Updated Fitted Face-covering
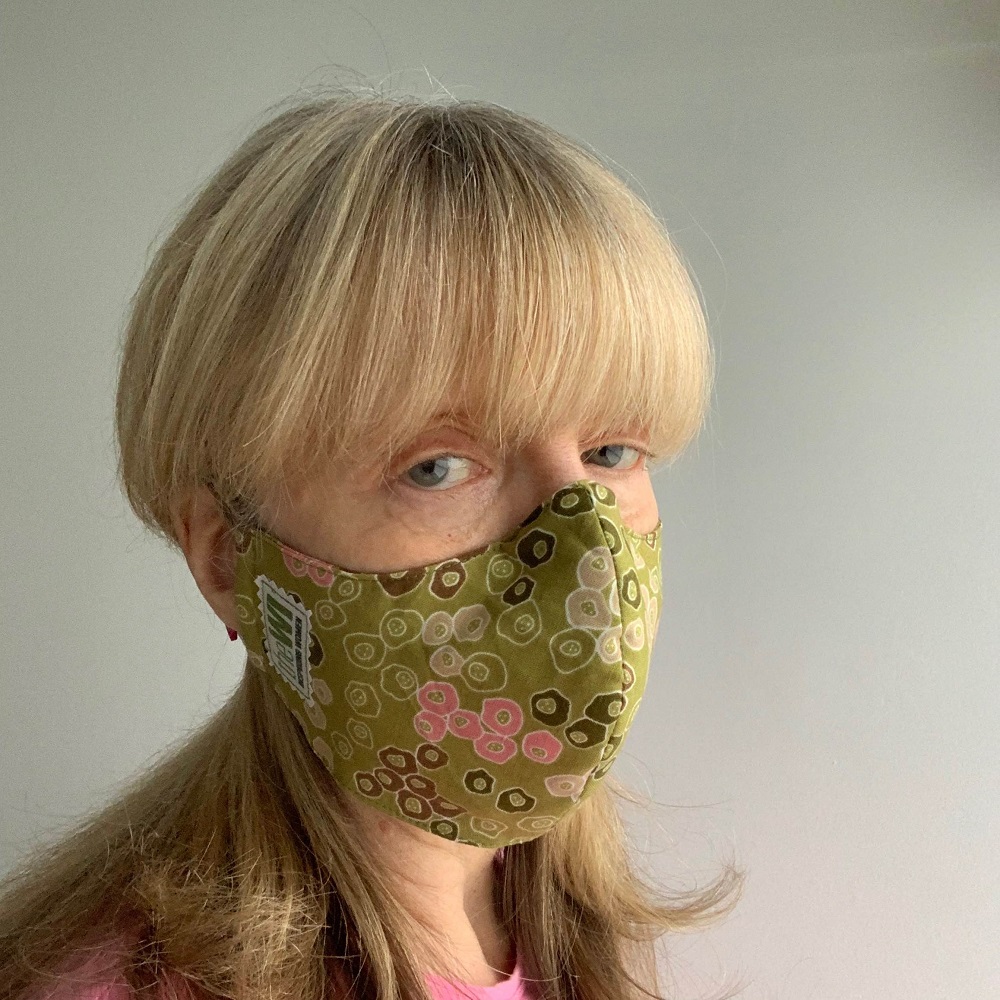
This mask is shaped to fit the contours of your face and is held in place by elastic around the ears and a piece of wire across the bridge of the nose to ensure a snug fit.
Before you begin
There are some places where it is a legal requirement to wear a face covering. Different rules exist in different parts of the UK. Further details can be found on the relevant regional websites:
You should also wear a face-covering indoors in places not listed on the Government’s website where social distancing may be difficult and where you will come into contact with people you do not normally meet.
Face covering update
Emerging evidence suggests that the risk of transmission may be reduced by using thicker fabrics or multiple layers. However, there has to be a trade-off between filtration, breathability and comfort.
The Welsh Government has also stated that face coverings should be made up of three layers as set out by the World Health Organisation (WHO), so in accordance with this latest data, we have adapted our original two-layer face-covering designs to accommodate a third layer or filter, as you desire.
Wearing of a Face Covering
- A cloth face covering is NOT PPE. They are not intended for the personal protection of the wearer – they are designed to prevent people who have COVID-19, but might not know it, from spreading it to others.
- Face coverings are not a substitute for social distancing or washing your hands regularly – they need to complement these behaviours.
- Wash your hands or use hand sanitizer before putting on and after taking off your face covering. Try not to touch your face, or the face-covering while you are wearing it.
- Once removed, ideally store worn face coverings in a plastic bag until you have an opportunity to wash them.
- You should wash a face-covering after wear. It can go in with other laundry, using your normal laundry detergent, but it does need to be a hot 60-degree wash, to destroy the virus.
Selecting the right fabric
The fabric that you choose needs to be dense enough to catch viral particles, but still be breathable, so that you can wear it!
The best fabric to make your face covering from is a tightly woven, cotton or poly/cotton fabric, such as craft cotton, used by patchwork and quilters, but also bed sheets, duvet covers, old shirts and good quality t-shirt fabric work too – these fabrics will be able to withstand the hot washing temperatures required.
One of the best ways to check whether your fabric is dense enough for the job is to hold a piece of doubled-fabric up to a bright light and if you can easily see the fibres in the fabric, then it’s not suitable. If it’s a denser weave and the light doesn’t pass through it as much, then that’s a good one to use. For this reason, coarse knitted fabrics are not the best, as they create holes between the threads when stretched, which can allow the virus to pass through.
It's also important to check whether you can breathe through your fabric too, so hold the layers over your nose and mouth and breathe!
Multiple layers
The World Health Organisation (WHO) says having more than two layers of fabric for a face covering can create additional filtration.
Disposable filters
You can insert a disposable filter, either one mass-produced for this purpose or make one yourself from a synthetic non-woven hydrophobic (water repellent) fabric, such as 100% Spunbond polypropylene fabric. Filters are not intended for wash and reuse and should be disposed of responsibly after wear.
Sustainability
Adding a disposable filter brings into question plastic waste, which is one of the WI’s main campaigns.
If using a disposable filter is not an option for you, then the Simple Face-covering would be your best option and simply add a third layer of fabric to your mask, or a sew-in polyester non-woven interlining, which can remain inside the mask and be washed at a hot temperature, time and time again.
You can even purchase sustainable polyester interlinings, created from recycled PET bottles, meaning that the synthetic material is recycled and does not end up in one of our dumps or – even worse – in our oceans. Plus, recycled polyester is just as good as newly produced polyester but needs considerably fewer resources for its production. For more information visit:
www.vlieseline.com/top/sustainability
Lifetime of a homemade face covering
Check the condition of your face covering regularly after washing and if the fabric looks noticeably worn out, then discard the whole mask and replace with a new one.
You will need
Skill level: Intermediate/Advanced
Sizing: Adult (One-size fits all)
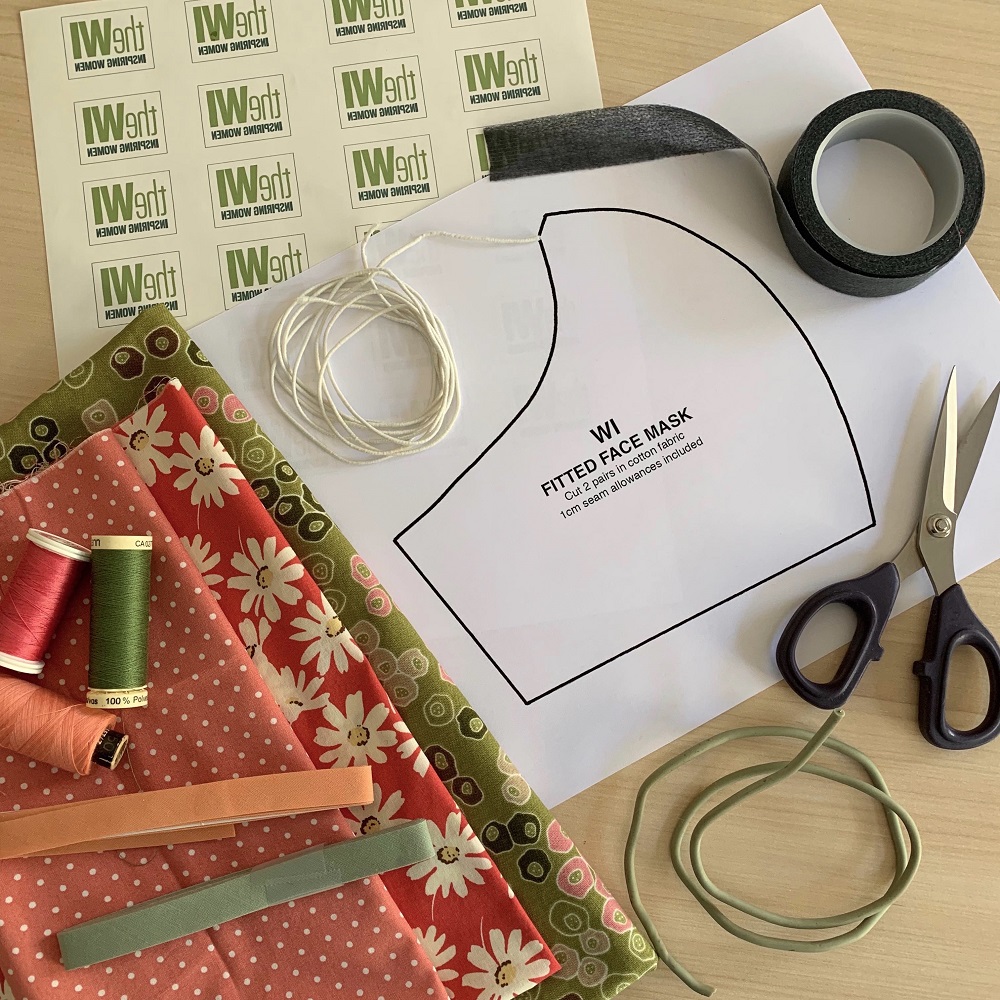
- Fitted Face Mask template [download here] Note: Make sure to print this template on A4.
- Mask Filter template [download here]
- Main fabric – see section on selecting the right fabric, above
- 100% Spunbond polypropylene mask filter fabric (if adding a filter to your mask) – we used 120cm-wide SARK Textile SB Filter (yield approximately 32 filters per metre of fabric)
- A narrow strip of iron-on interfacing or iron-on edge tape (Optional – to cover up the holes in the stitched centre seam)
- Soft shirring elastic or similar – Note: We experimented with hair elastics but found them to be too strong to wear around the ears, but if this is all you have available, then these will work
- Bias binding
- 6cm length of wire – use a piece of covered ‘Soft-tie’ garden wire (for delicate plants), or a chenille stick/pipe cleaner
- Matching sewing threads
- Sewing machine
- Scissors
- Iron
- Bodkin or safety pin
- Towel
- Pins
- Tape Measure
For optional WI logos, you will also need:
- Reversed small WI logos [download here]
- Light T-shirt Transfer paper
- Inkjet colour printer
- White cotton fabric
- Pinking shears
To make
Note: A 1cm seam allowance is used throughout these instructions and all seams are sewn with right sides together unless otherwise stated.
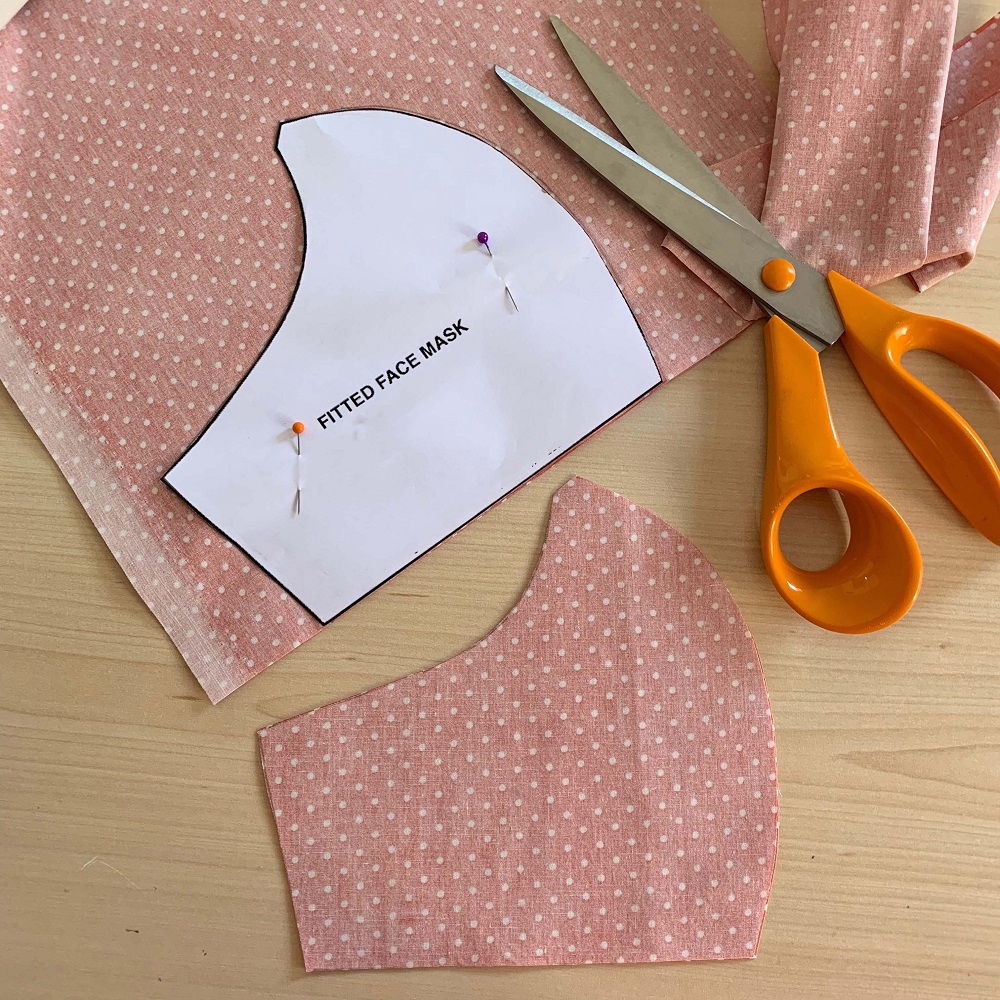
1. Download and print out the Fitted Face Mask template at 100%. Cut out and pin the template to a piece of doubled fabric and cut out two pairs. Remove pins and the template.
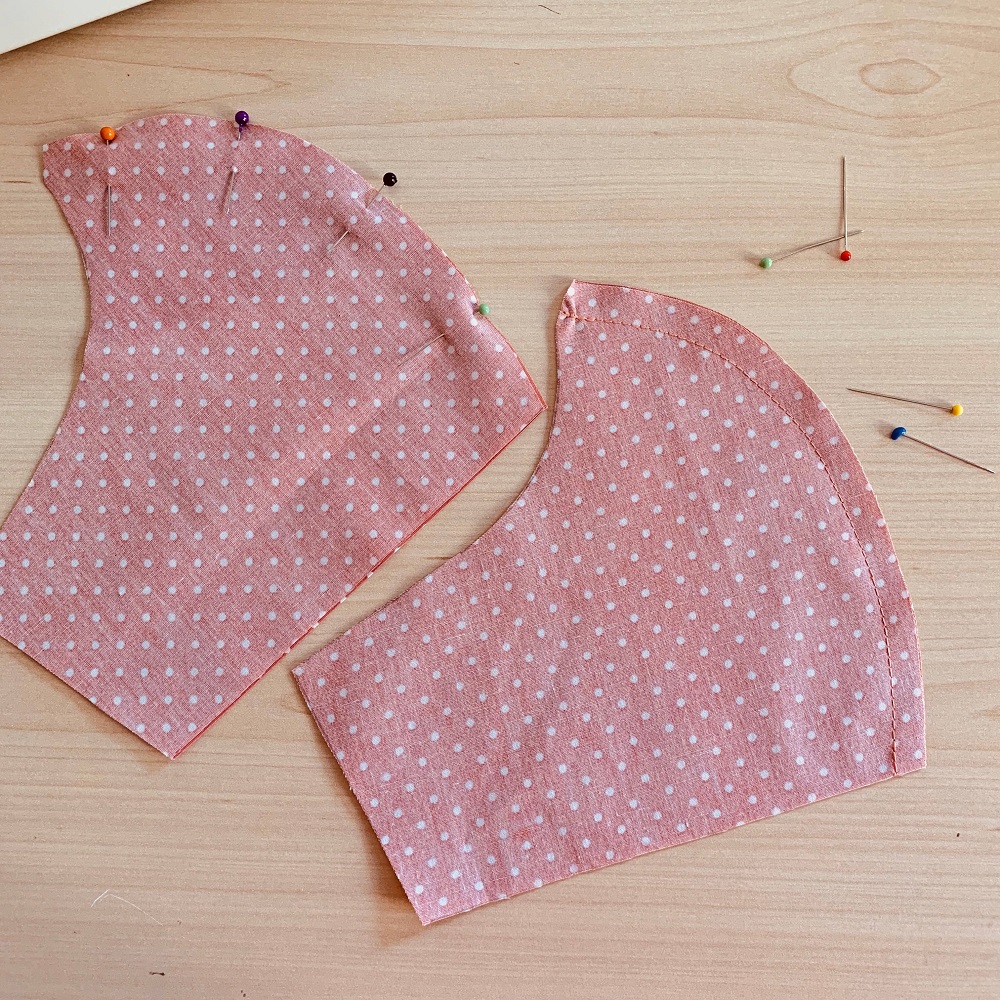
2. Pin and stitch each pair of fabric pieces together along their outer curved edge, as shown. Remove pins.
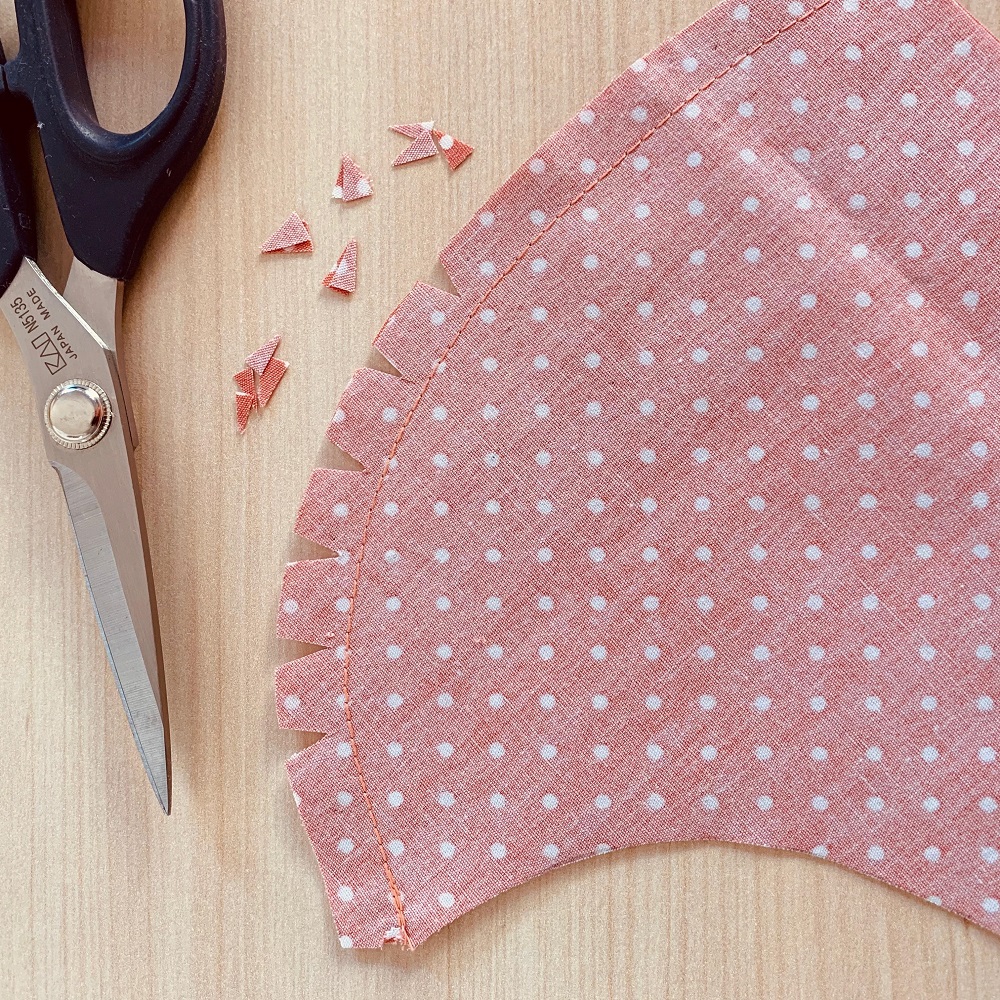
3. Clip small ‘V’ shapes out of the seam allowances along the curved edge, making sure that you do not snip into the line of stitches. This will help you to create a smooth curved seam.
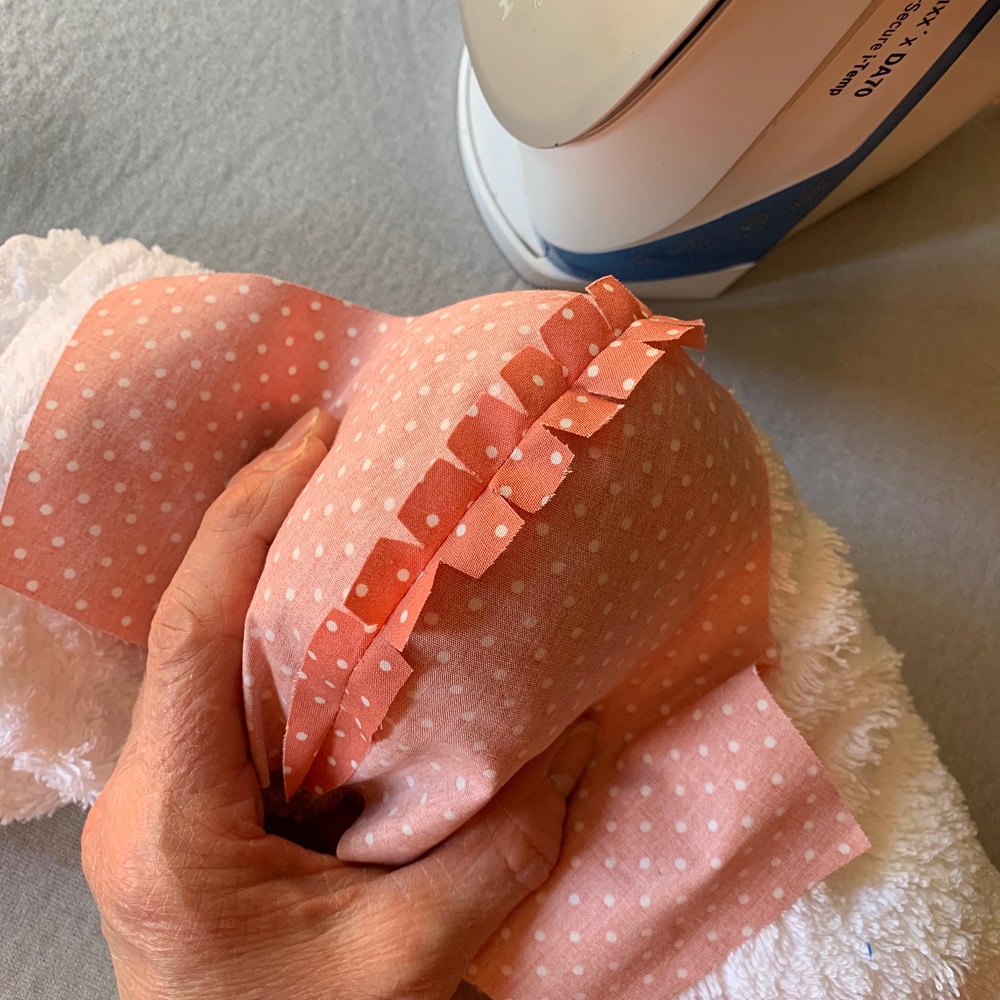
4. Using a small rolled-up towel or T-shirt to help you, carefully press open the seam allowances on each seamed piece.
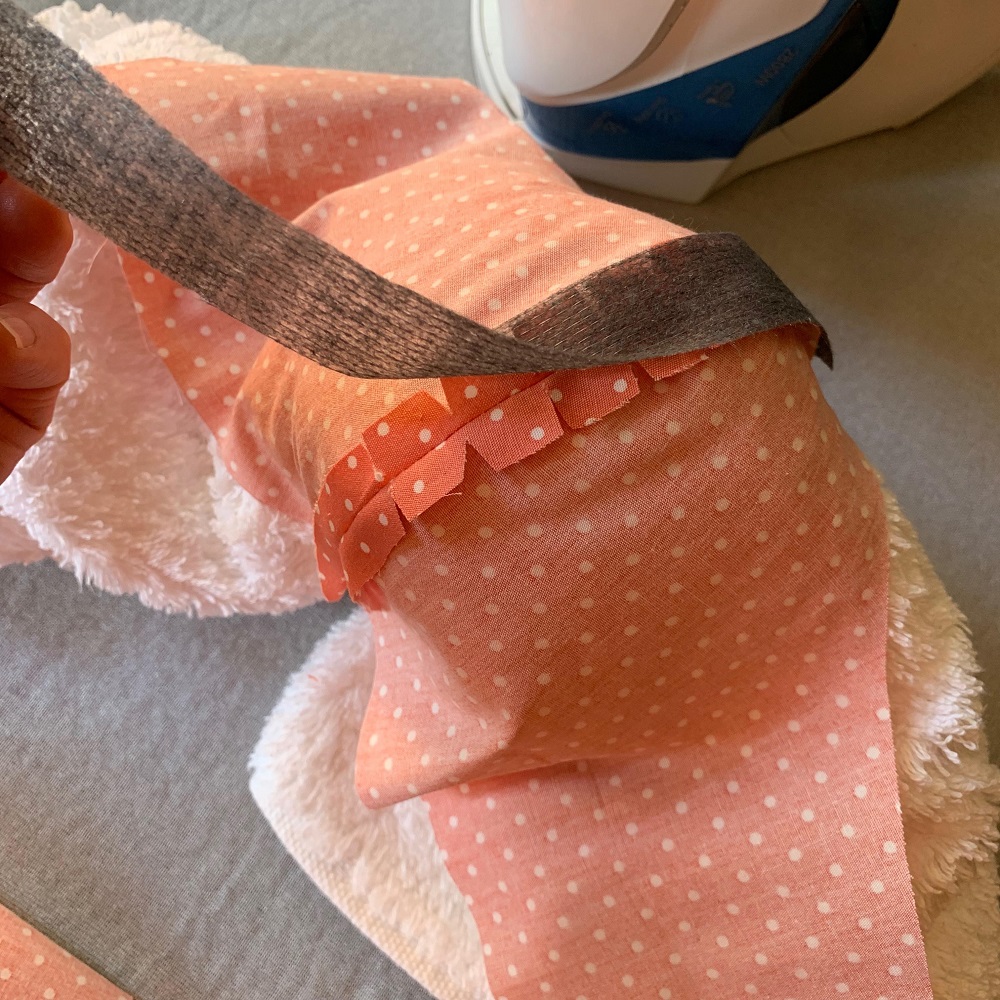
5. Optional - if you want to add extra protection to your mask by covering up the holes between the stitches in your central seam, then press a strip of iron-on interfacing over the seam allowances on one pair of joined pieces (this will form the outer layer of your mask). Use the rolled-up towel again to help you and make sure that you don’t get any tucks in the fabric.
6. If you wish to add a WI logo to your mask, you can do this now. Download and print out the mini reversed WI logos onto t-shirt transfer paper and following the manufacturer’s instructions, iron them onto a piece of plain white cotton fabric. Cut out a logo using pinking shears and place on to the right side of the outer mask, positioning it approximately 3.5cm in from one straight side edge and stitch in place, using the narrow green line as a stitching guide.
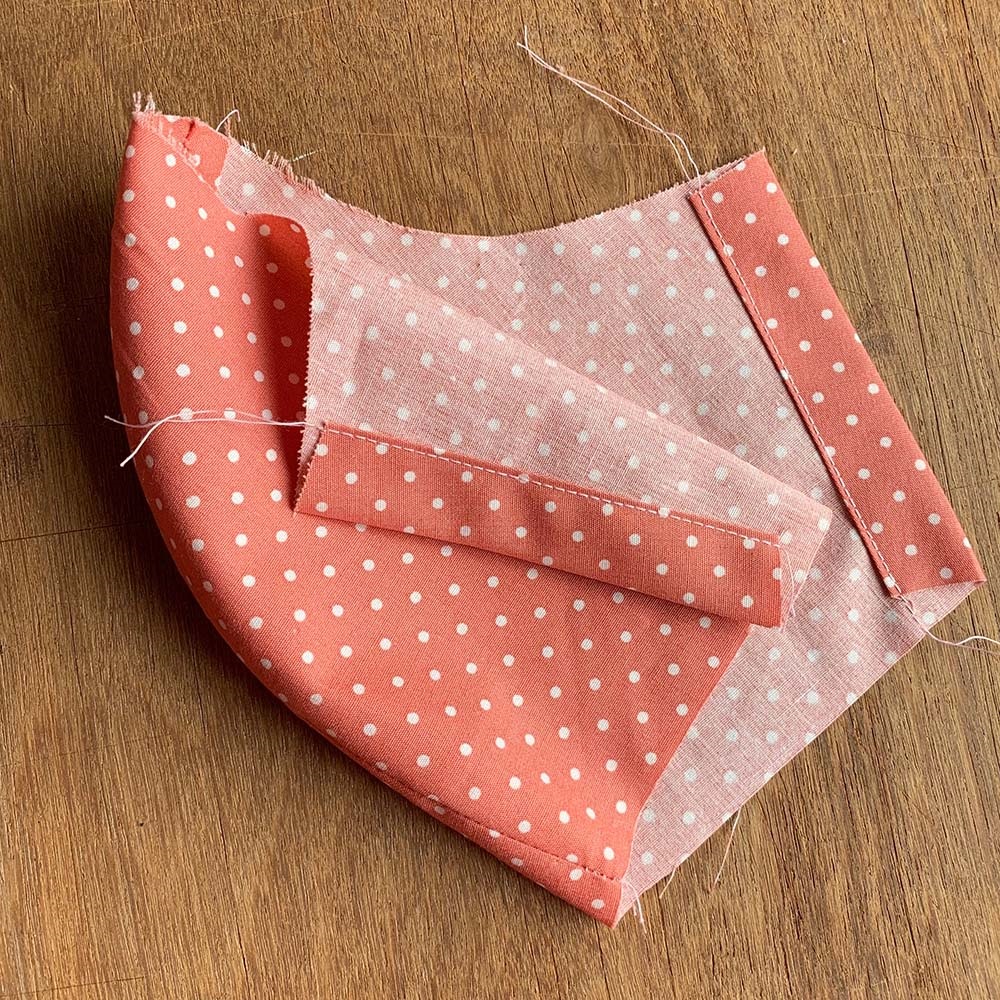
7. If you are making the original two-layer mask move straight on to step 8. If you want to make the filter mask, then take the inner part of the mask without the interfaced seam and press over a double-turned 1.5cm deep hem to the wrong side along both straight side edges; stitch in place.
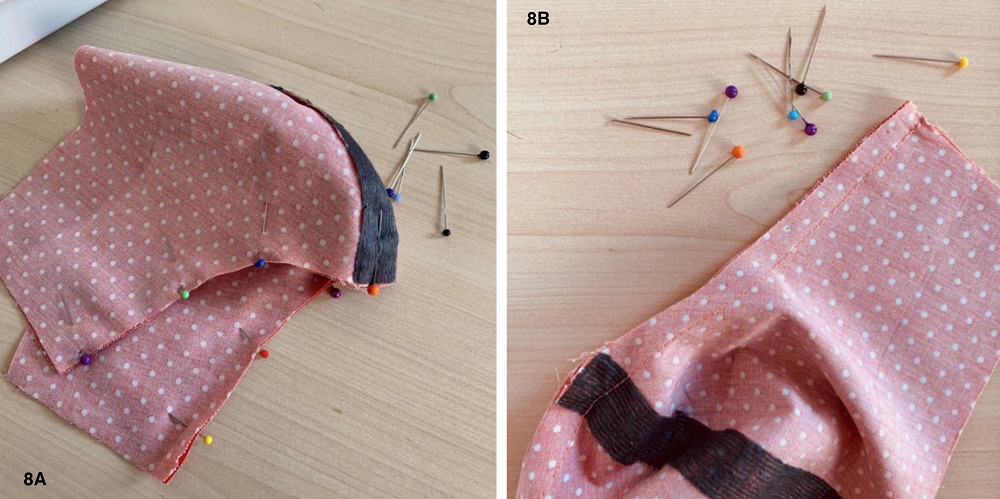
8. Matching the central seams, pin the two mask sections together along the top curved edge (a) and then sew pieces together, reverse stitching at each end to secure. Remove the pins. (b) – If you are making the filter mask, the hemmed side edges of the inner mask should finish 3cm short of the outer mask raw edges.
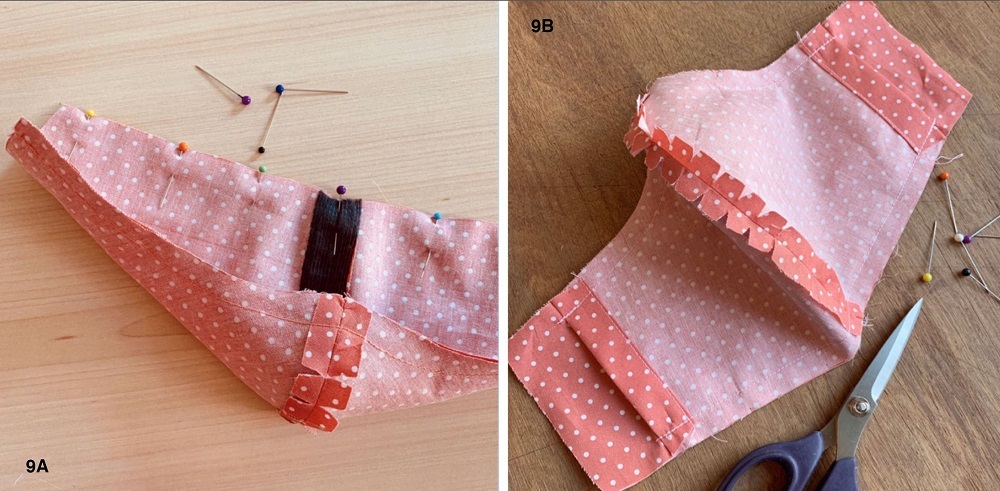
9. Matching the central seams again, pin the two sections together along the lower edge (a) and sew pieces together, reverse stitching at each end to secure. Remove the pins. Again, if you are making the filter mask the hemmed side edges should finish 3cm short of the outer mask raw edges, as shown (b).
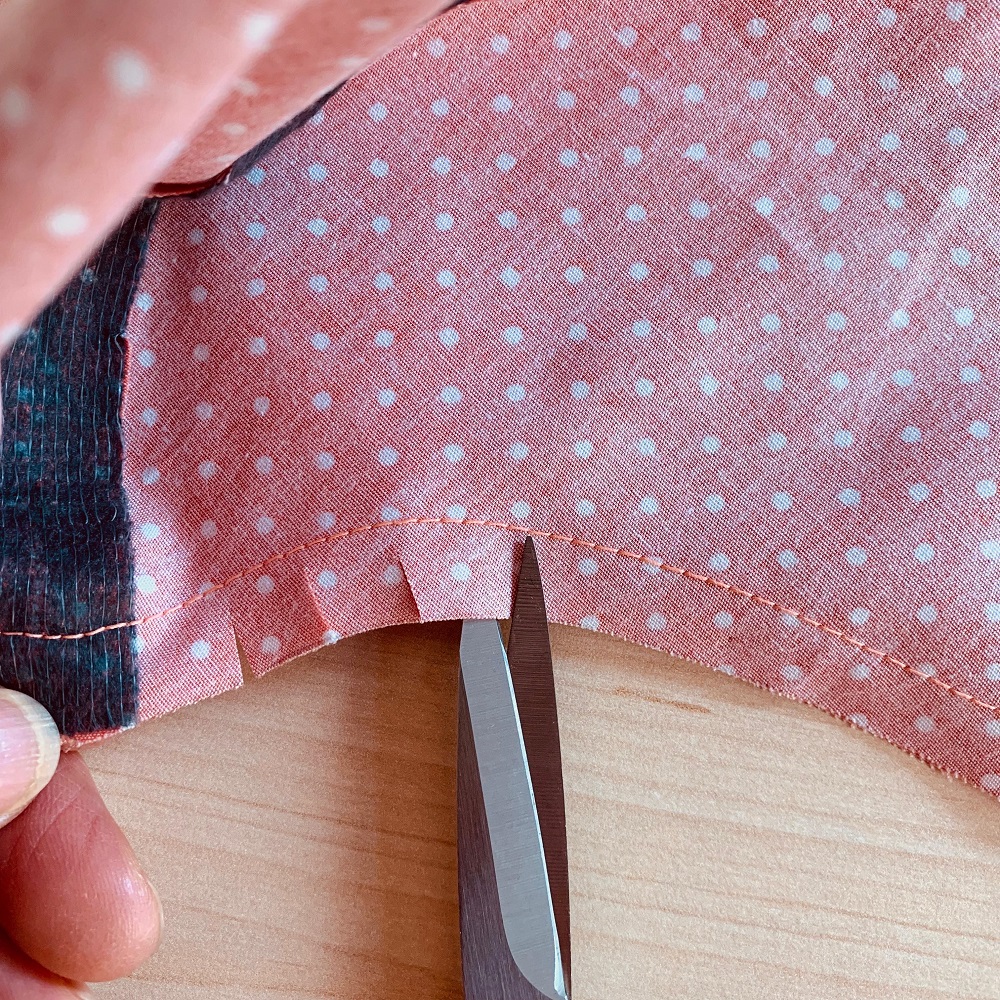
10. Snip into the top edge curved seam allowances, taking care not to snip the stitches.
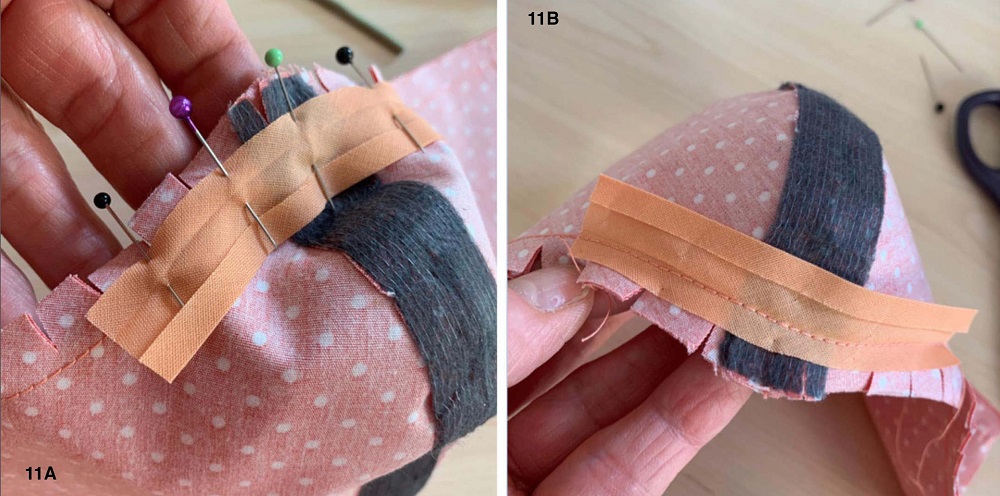
11. Cut a 10cm length of bias binding. Open out one folded edge and place it centrally across the central seam, pin the foldline along the top curved stitching line, as shown (a). Sew the binding in place along the foldline and remove the pins (b).
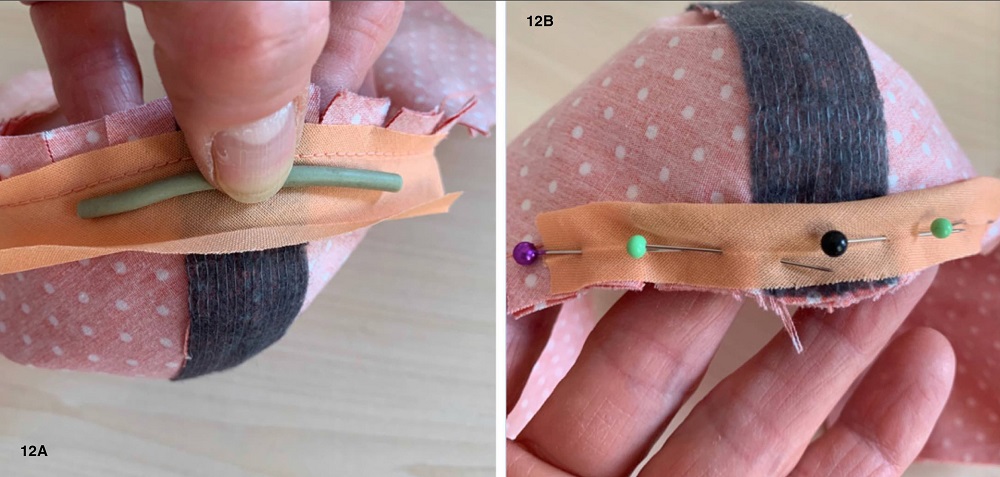
12. Cut a 6cm length of soft-covered wire or chenille stick. Open out the second fold on the bias binding and place the wire on top, as shown (a). Fold the binding strip over to enclose the wire and pin in place, keeping raw edges level (b).
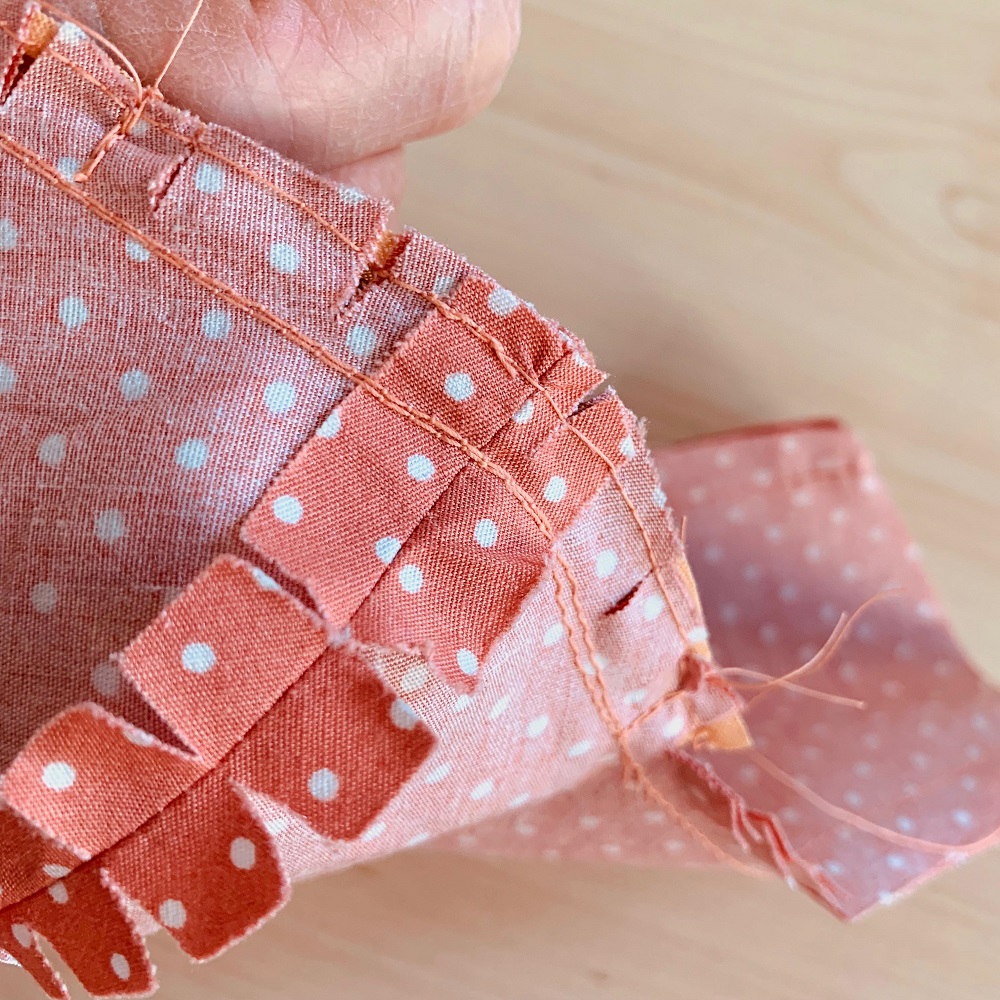
13. Stitch the binding in place close to the edge, enclosing the wire and removing the pins as you stitch. Finally, stitch across the open ends of the binding, just inside the seam allowances to keep the wire from slipping out at either end.
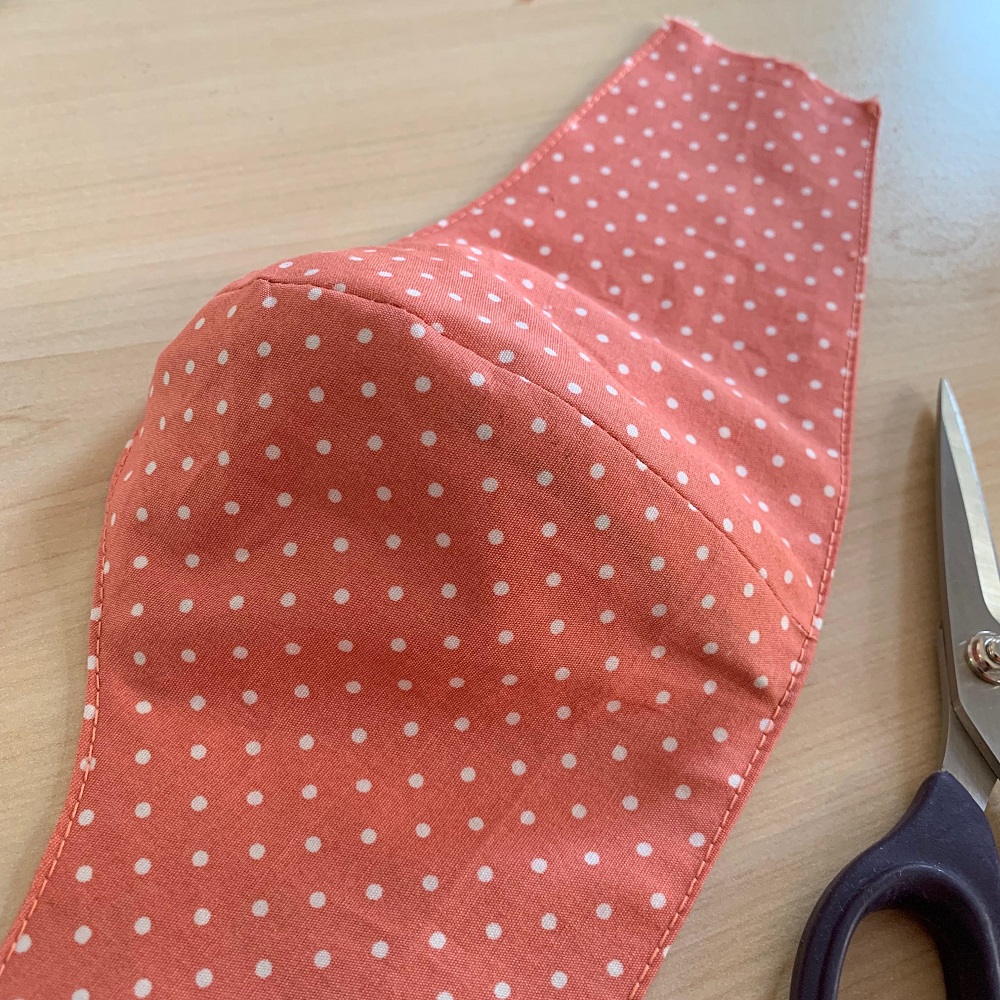
14. Turn the mask right side out through one of the open sides and press the seamed edges flat. If desired, edge-stitch the top and bottom of the mask for a neat finish.
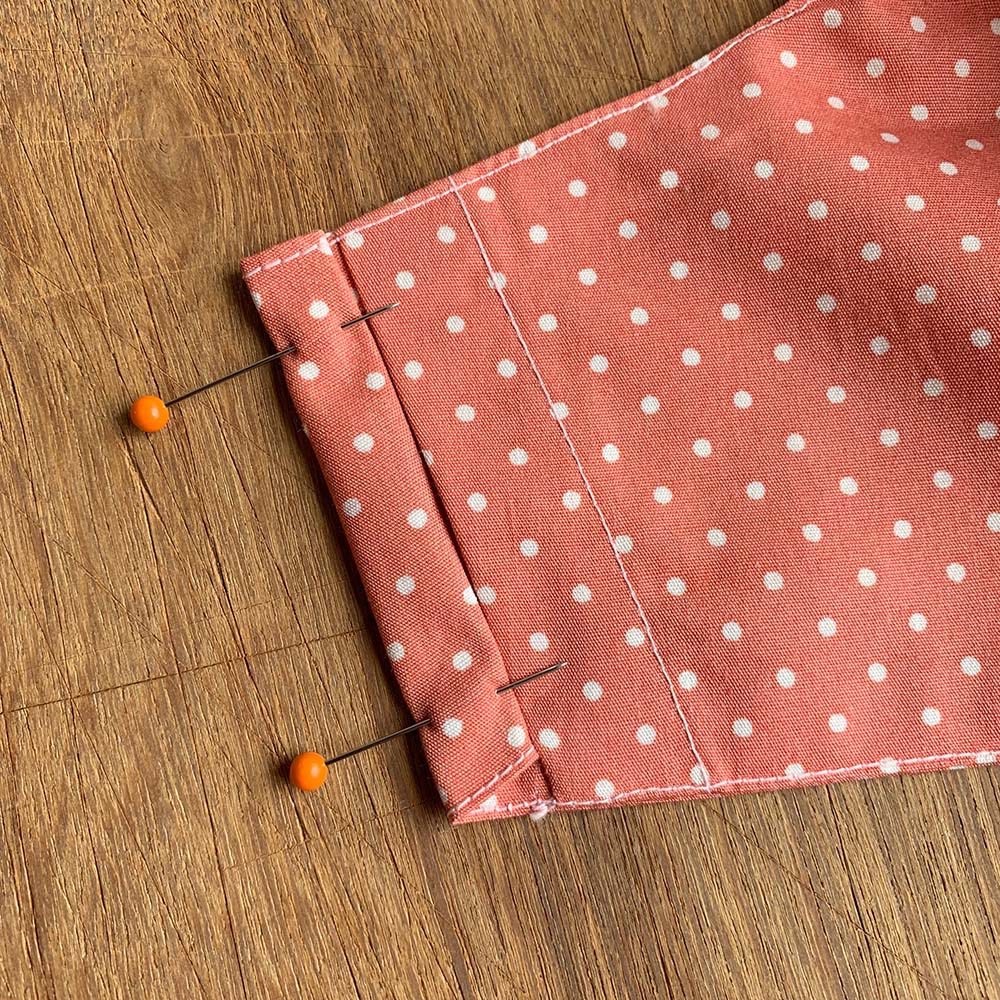
15. To finish the side edges on the two-layer mask, move on to step 17. For a mask with a filter, there will be just the side raw side edges on the outer mask to neaten. To do this, press a 1cm deep double-turned hem along each raw edge so that the pressed edges of the two hems butt together.
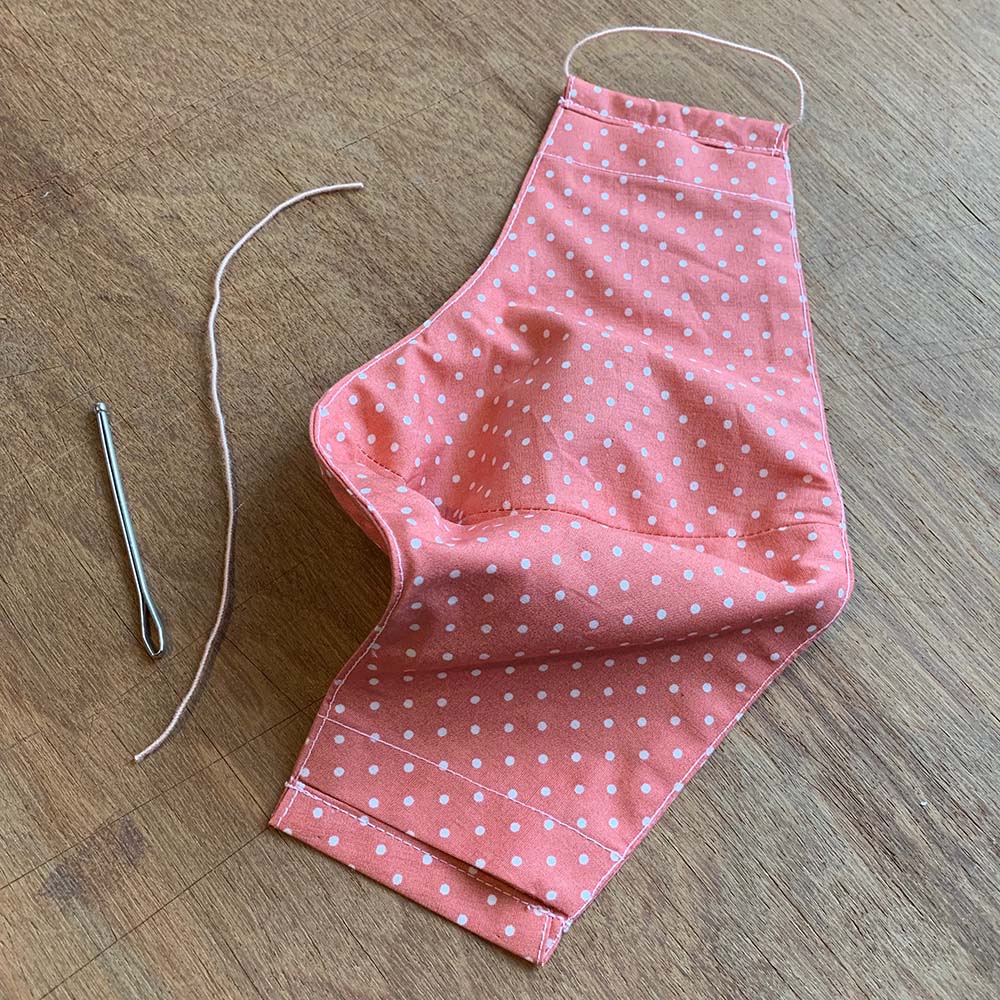
16. Machine sew the side hems in place reverse stitching at each end to secure. Cut two lengths of elastic 18cm long and thread through the outer channels, as shown in step 18.
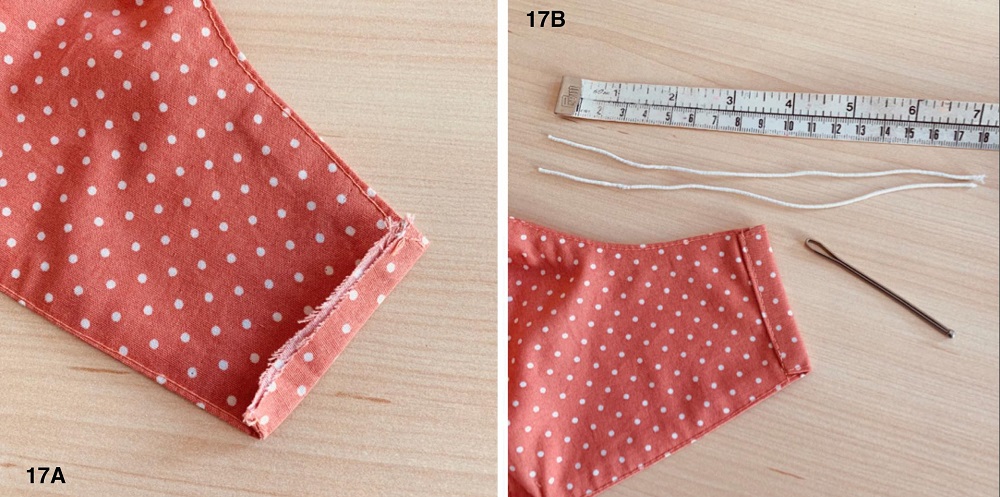
17. For the two-layer mask, press the raw side edges 1cm to the wrong side (a), then press over a further 1cm and stitch the hems in place, reverse stitching at each ends to secure. Cut two lengths of shirring elastic 18cm long (b).
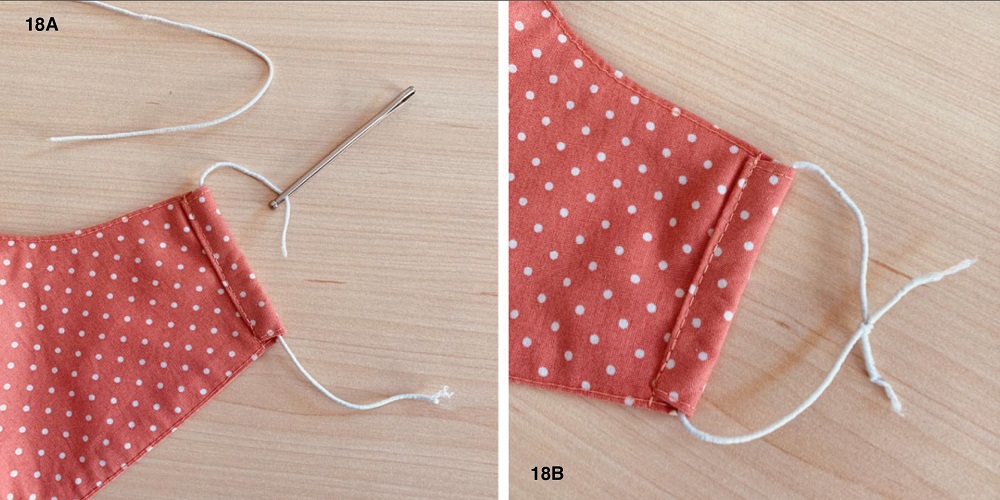
18. Thread a length of elastic through each side channel using a bodkin or safety pin (a). Knot the ends together, trying on the mask to adjust fit if necessary (b). When happy with the fit, pull the elastic knot around to hide the ends in the channel.
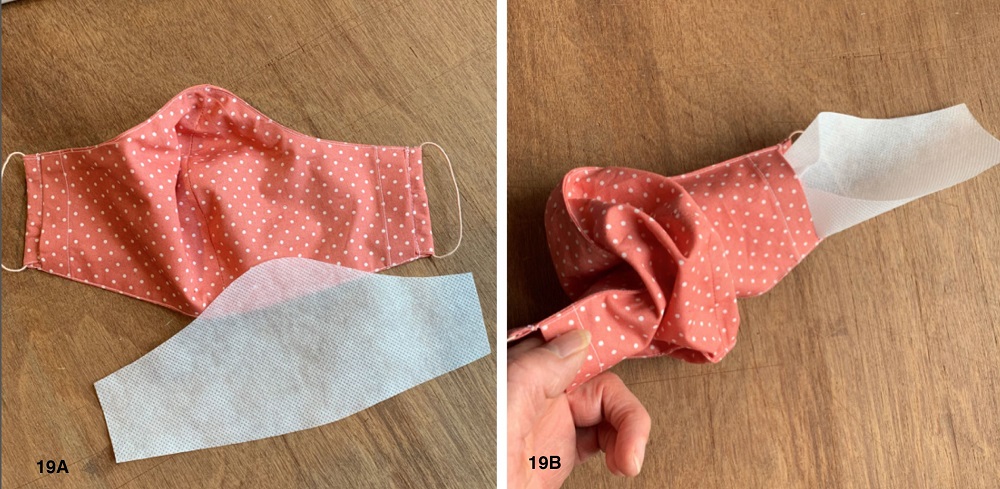
19. To make the filter for the mask, download the Mask Filter Template and print out at 100%. Using the template cut out one piece from Spunbond fabric. Insert the filter through one side opening and pull it through from the opposite side and smooth out flat with your fingers, ensuring it is sitting the correct way up.
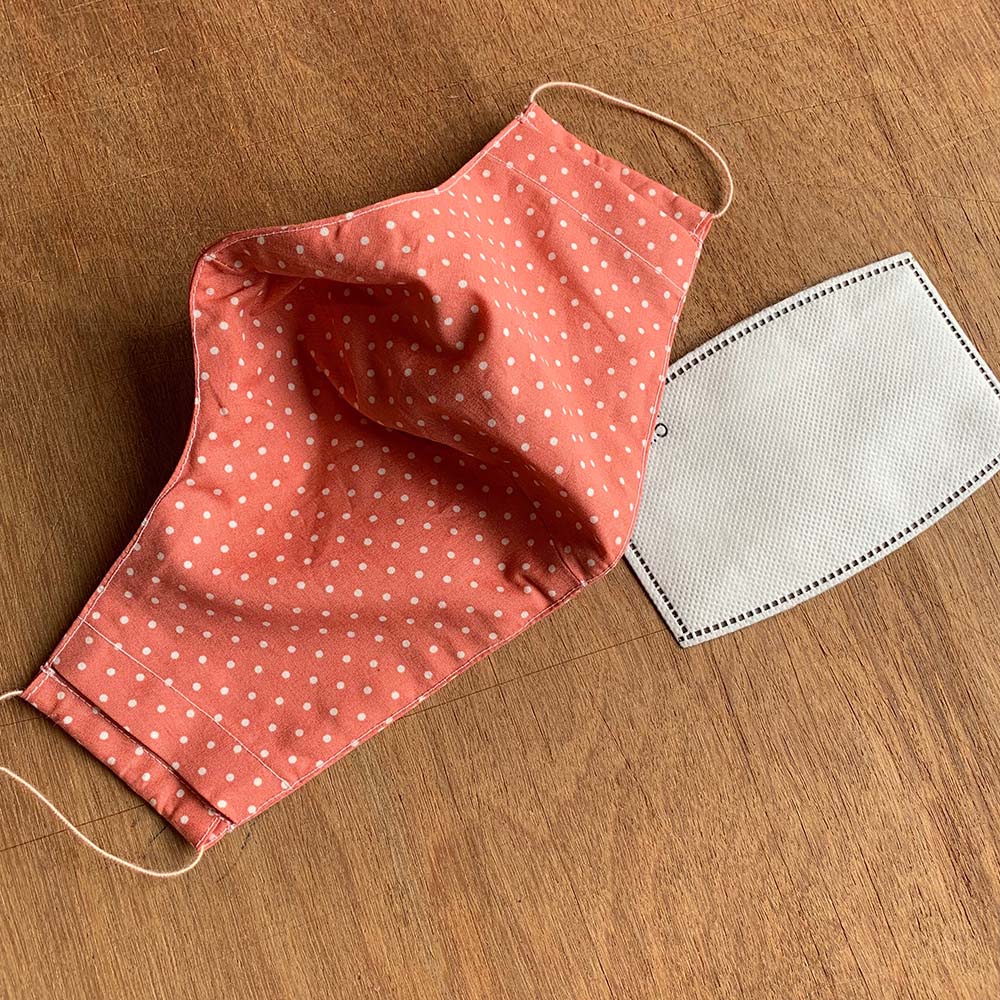
You can also add more than one filter layer if desired, to make a multi-layered mask, or alternatively, insert a ready-made filter that can be purchased in packs online, but please be aware these will not fit the mask as well.
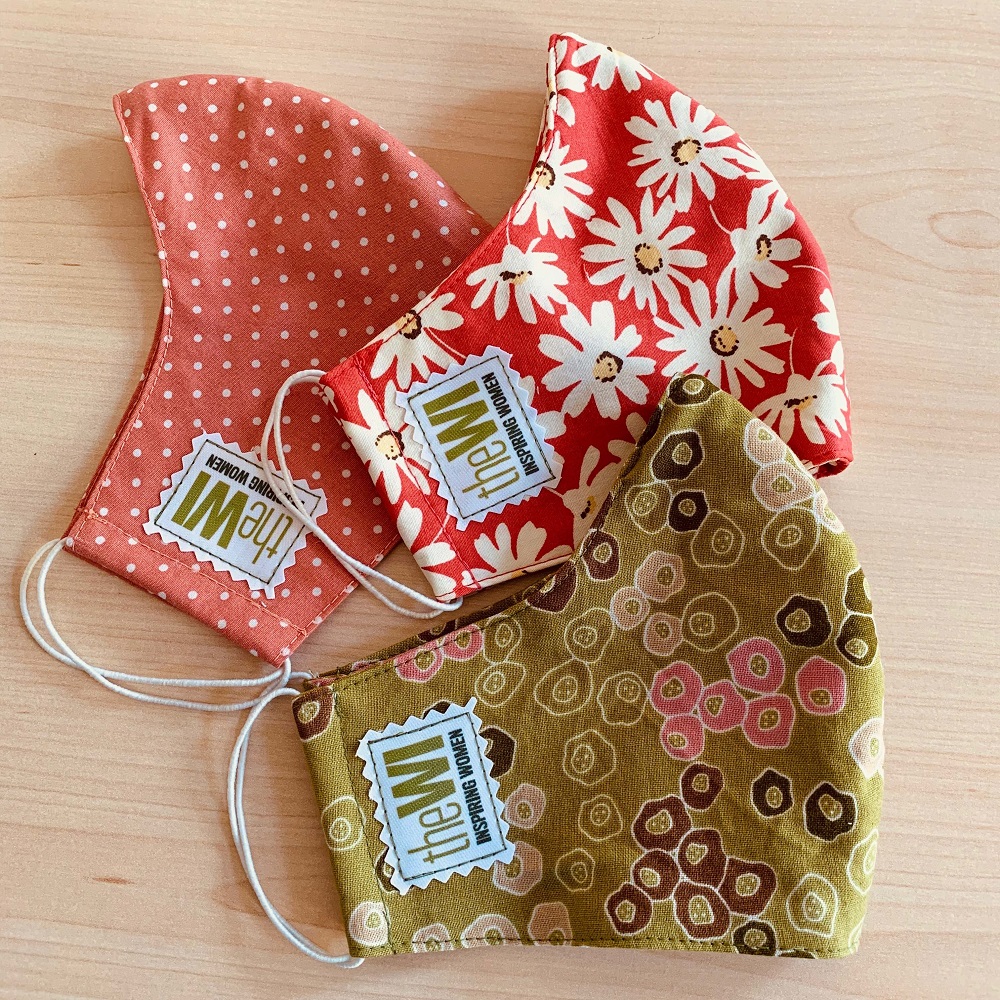
20. Whichever mask you have made, it is now ready to wear. We suggest that you make several of them, so that you will always have one to wear when the others are in the wash!
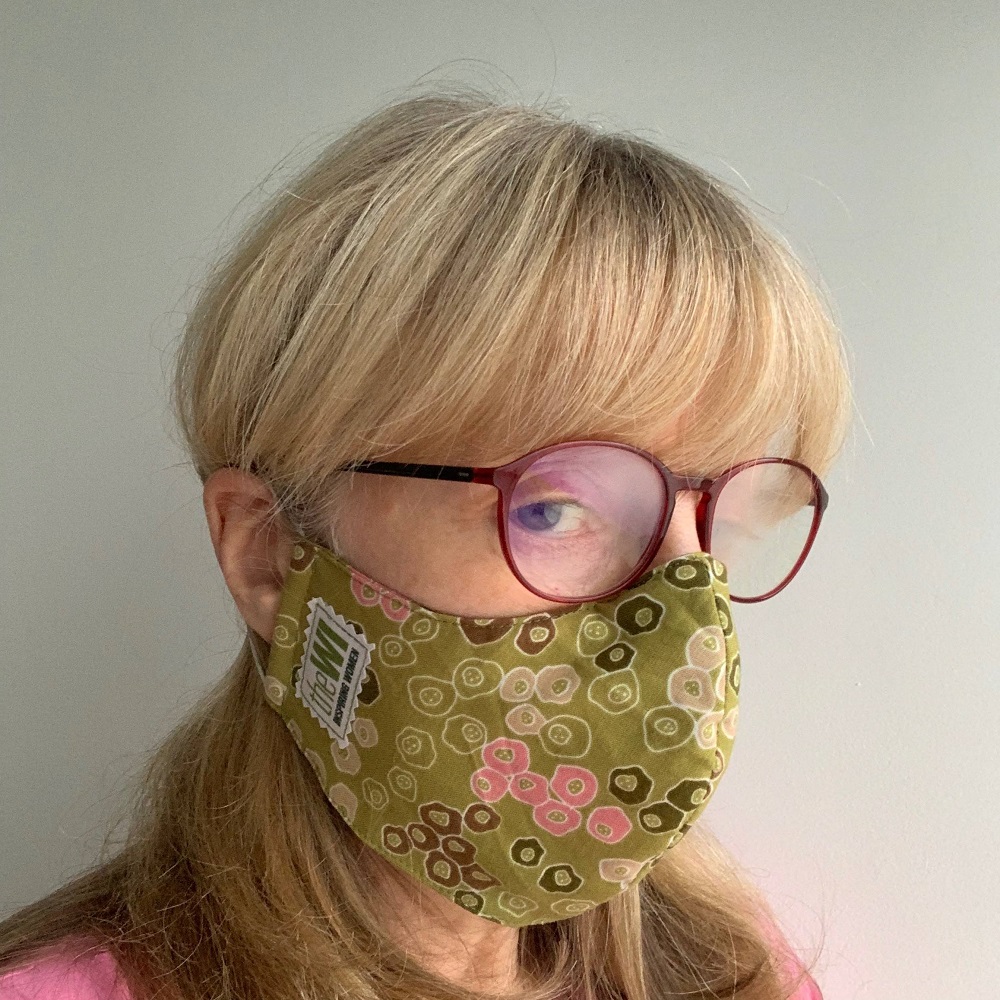
Note: this mask is suitable for those who wear spectacles and also works with over the ear hearing aids too.
Additional Button Band
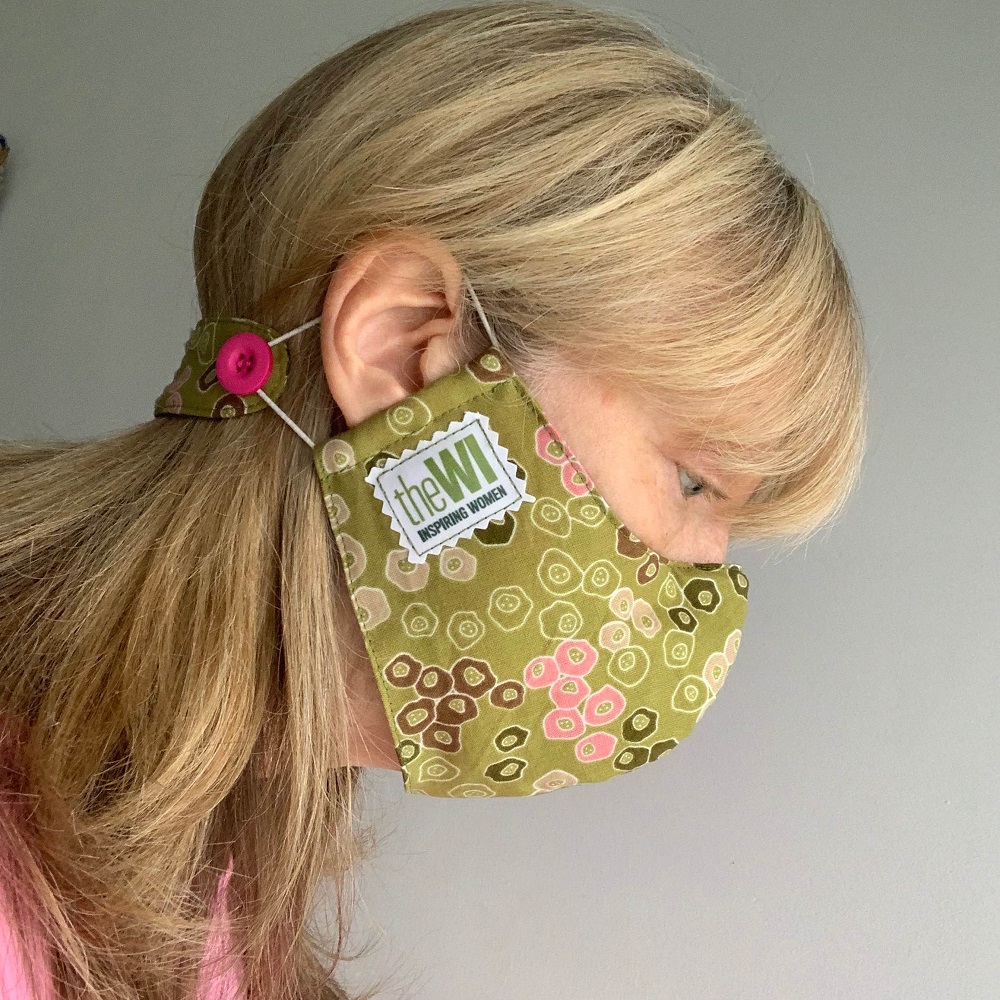
If you also wish to make a button band to go across the back of your head to take the pressure of the elastic off your ears, click here!
