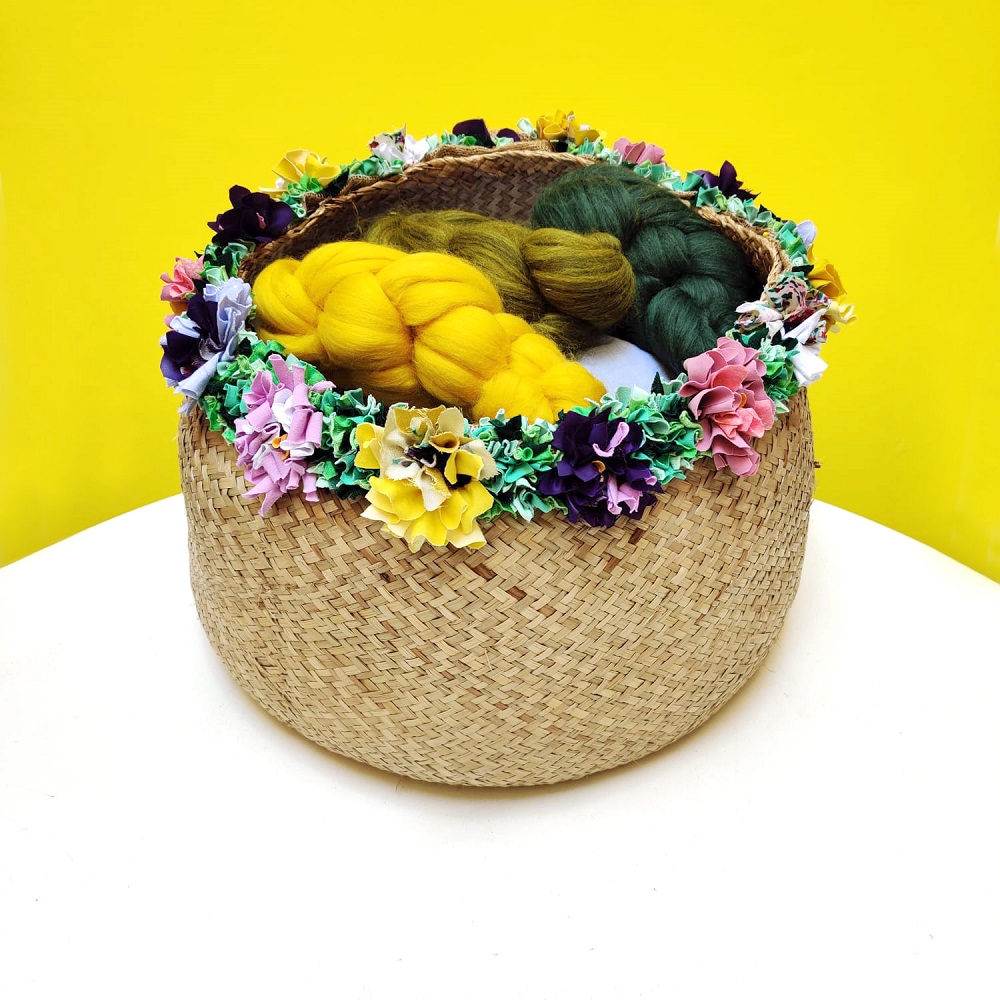
Pretty Pansy Basket Trim
Skill level: Intermediate
You will need
- Hessian (10 holes per inch weave is best)
- Marker pen
- Flexible tape measure/piece of string & ruler
- Sewing machine & thread
- Rag rug spring tool
- Rag rug scissors or fabric scissors
- Needle and thread (colour matched to basket ideally)
- Fabric offcuts or old clothing - The softer and thinner a fabric is, the easier it is to work with. However, you should try to include a couple of different textures in your piece if possible as this will make your design look more interesting. This project used:
- 3 purples: lining fabric, jersey offcuts and knitted jumper
- 2 pinks: jersey offcuts
- 2 yellows: Lycra sports top and t-shirt
- Floral fabric: chiffon
- White: cotton offcuts
- Black: jersey
To make

Measure the circumference of your basket using either a flexible tape measure or piece of string and a ruler.
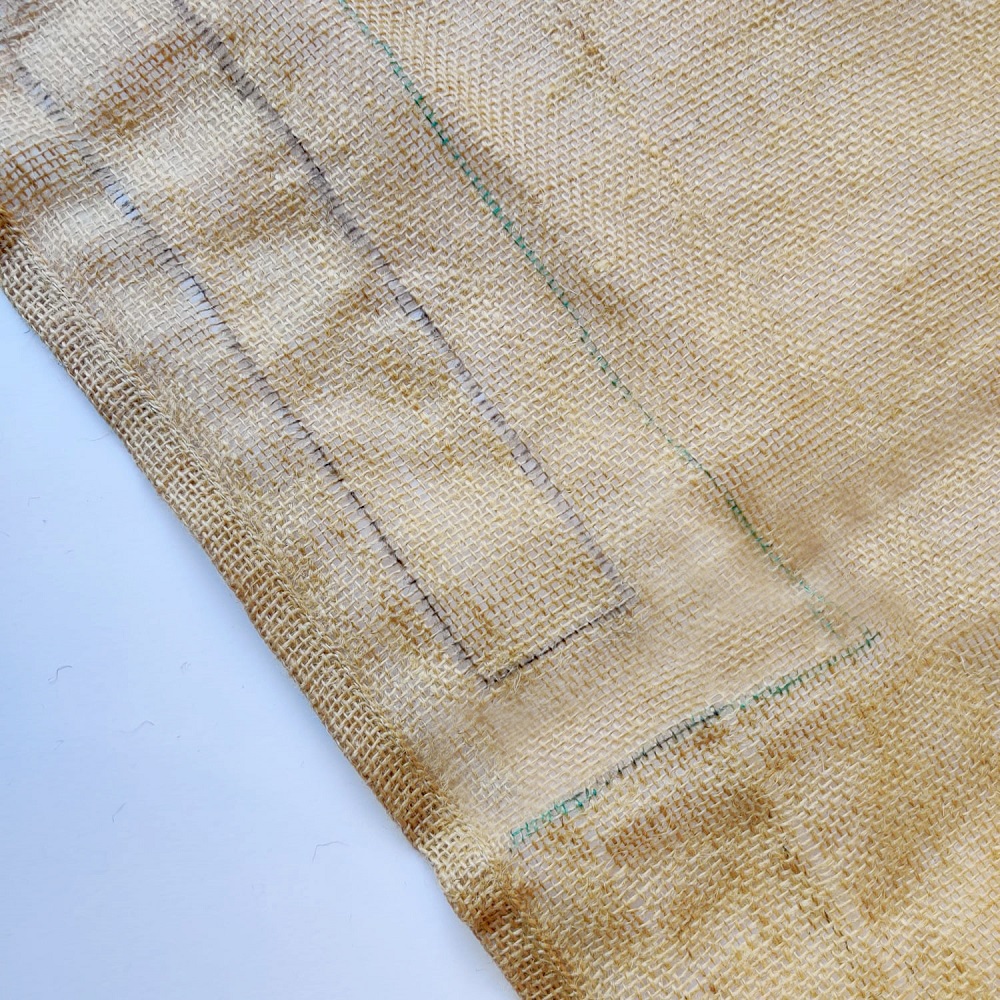
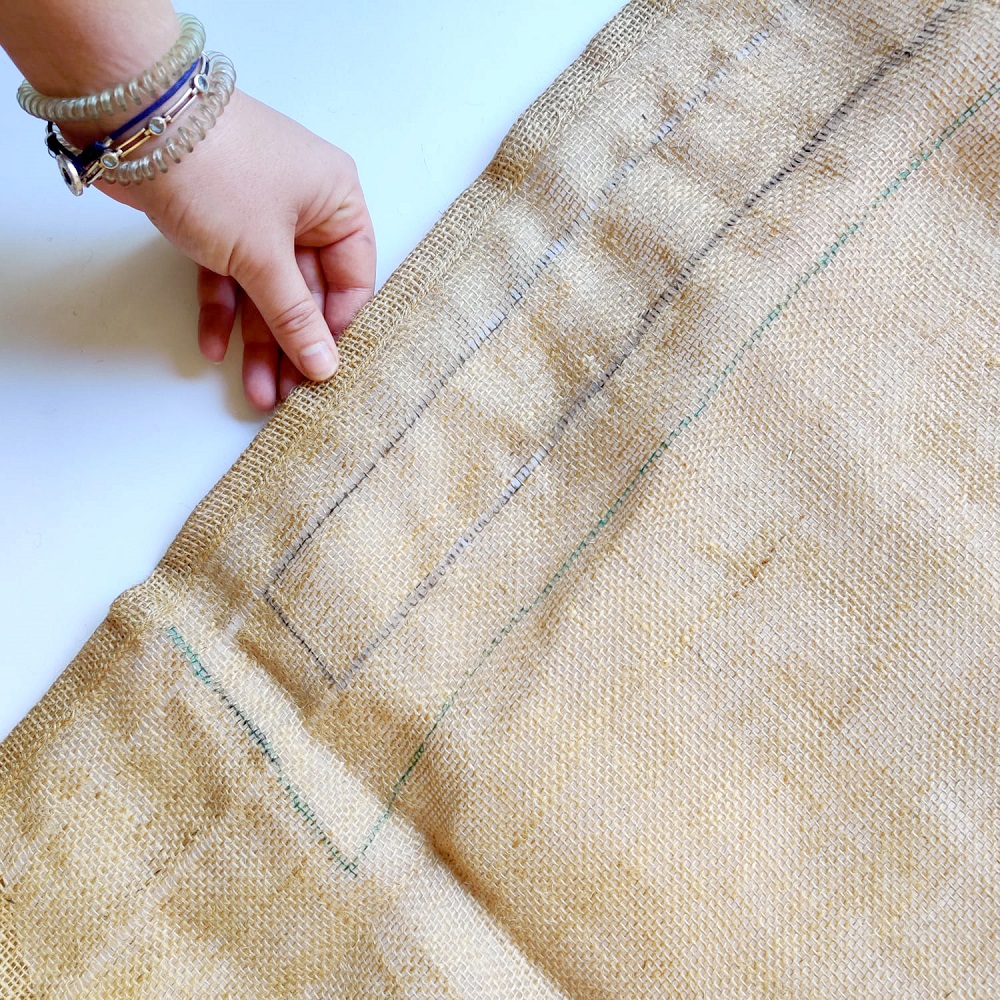
Leaving at least 5cm of excess hessian around each edge, draw a rectangle onto the hessian that is the circumference of your basket plus 3cm in length by 4cm in height. Draw a second rectangle approx. 4cm outside of the first rectangle.
Tip: If you are struggling to draw a straight line in the hessian, cut and pull out one of the strands to find a straight line. You can do this for each edge you need to hem if it helps.

Sew a wide, but short zig-zag stitch along each drawn line and cut around the outer stitched rectangle. You will only be filling the inner stitched rectangle with rag rugging.

Draw small circles across the length and breadth of the inner stitched rectangle. These circles are roughly the size of a 10p and spaced approx. 7cm apart. These circles are where your “pansies” will be.

Pansies have different coloured centres than their outer petals. Prepare the fabrics for the centre of your pansies. This project uses black, yellow and patterned purple fabric. Break down your items of clothing or material into flat blocks by cutting off and setting aside any seams, collars, zips or hems. Cut each piece of fabric into 5 x 3cm strips. You’ll need three strips for each circle you’ve drawn. This project needed 48 strips.

Lay 10 of these short strips on top of each other in a pile. Holding each pile of short strips in turn, carefully trim the fabric to shape each into a rounded “X” shape. The fabric pieces don’t have to be identical or perfect. Repeat the process until you have approximately 3 pieces for every circle you have drawn onto your hessian.
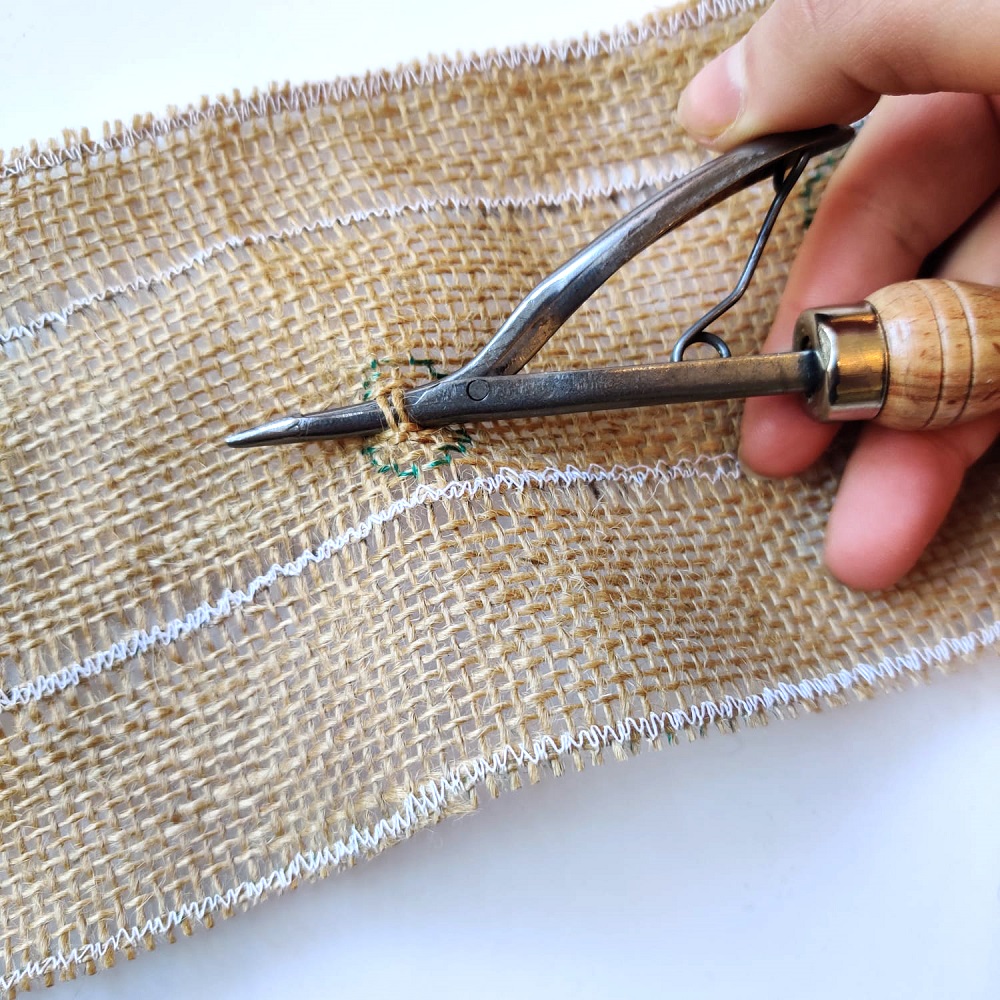
Rag rug three pieces of fabric into the centre of each of the drawn circles, preferably using a mixture of all three colours in different combinations across the centres.
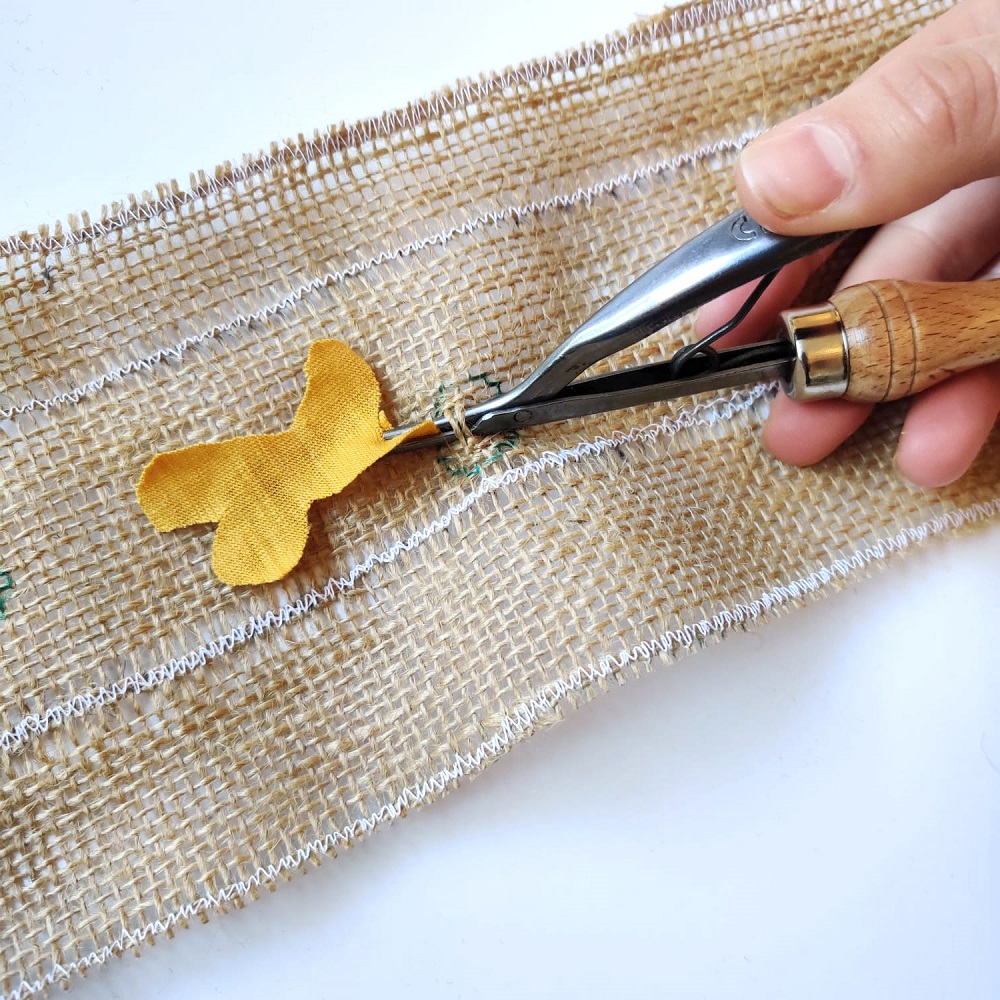
Keep the spring tool closed and weave it across the top of the hessian to capture two strands onto the barrel. Open the end of the spring tool and clasp onto the side of one end of the strip.

Pull the fabric through, so that half of the strip is on one side of the hessian strands and half is on the other. This is your first piece of rag rugging!

Missing out approximately one strand of hessian between one fabric piece and the next, put in two more pieces of fabric near the centre of each drawn circle. You can weave across the hessian in any direction, including diagonally. You want you pieces of fabric to be packed in tightly and standing up slightly.

Next, prepare your outer petals using a mixture of colours. Repeat steps 5 and 6 but cut each fabric strip approx. 7 x 4cm before shaping into “X”s. You will need about 10 strips for each circle you have drawn onto the hessian.

Rag rug these “petals” around the pansy centres, making sure to miss out approx 1-2 strands of hessian between each piece of fabric. It helps to rag rug in concentric rings around the centre until you reach the drawn circle edge, but you can experiment with making some of the flowers asymmetrical (which will make them look more like pansies). Repeat the process on each drawn circle until all your pansies are fully rag rugged.

Prepare your “foliage”. Cut your green fabrics into 2 x 1cm strips. Leaving a 1.5cm gap of empty hessian around each pansy, rag rug in between your pansies and up to the inner stitched rectangle. Pull each piece of fabric through the hessian with the spring tool, as in previous steps. This green fabric will be a much shorter pile that will make the pansies pop.

Once the strip is fully rag rugged, fold the excess hessian behind the rag rugging.

Pin the top edge of the basket trim to the basket and hand sew the top and bottom edges in place using a thread that matches the basket. Voila! One pretty pansy basket trim!
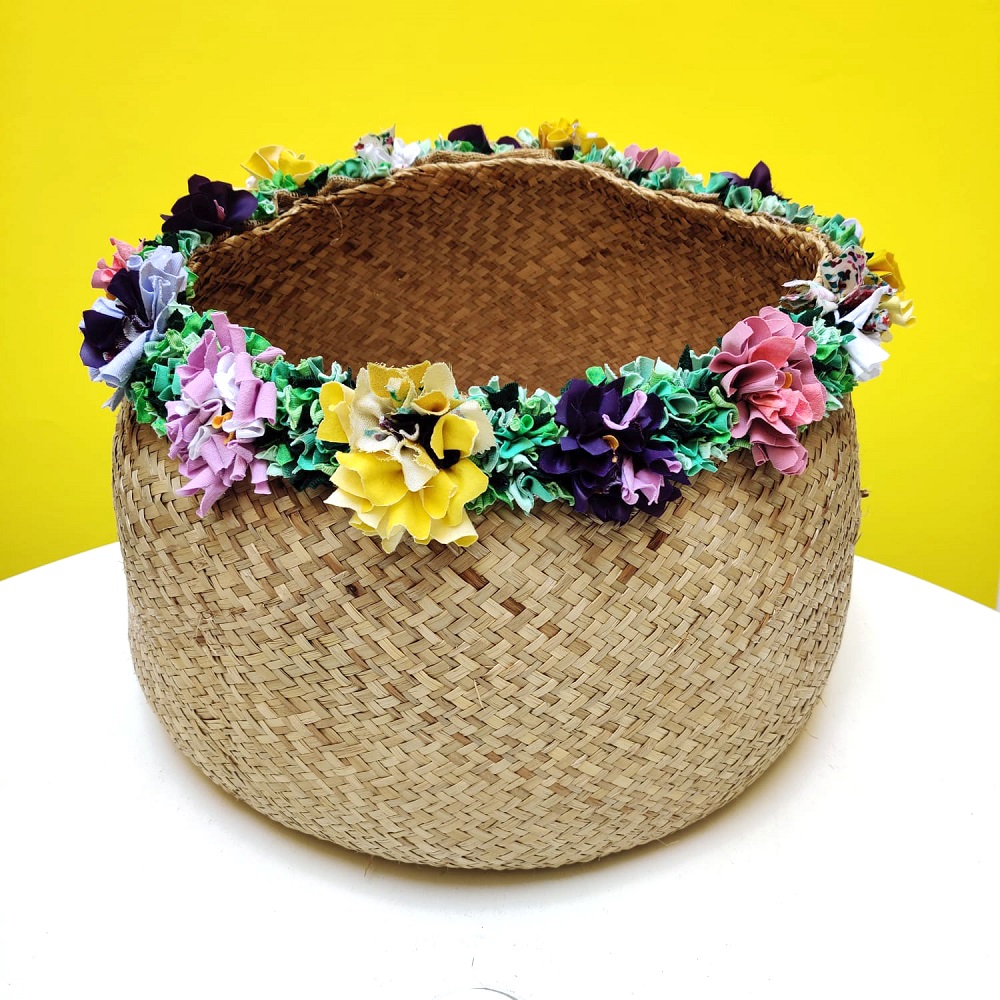
Credit: Project designed, created and photographed by Elspeth Jackson from "Ragged Life"
Elspeth Jackson is a craft author and blogger who is passionate about bringing the traditional and sustainable craft of rag rugging into the 21st Century. She fell in love with rag rugging after making an outfit for a recycled fashion show and soon found she was hooked. Now she rag rugs anything that will stay still long enough! Browse her colourful creations at www.raggedlifeblog.com and www.raggedlife.com

