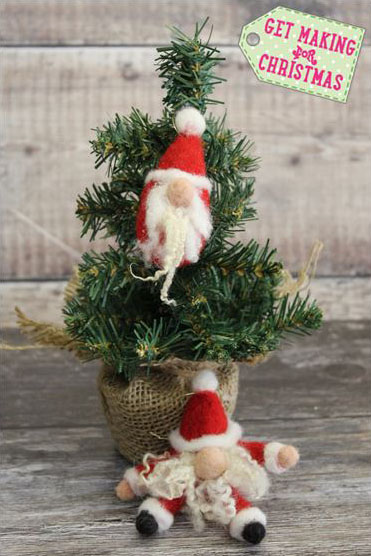
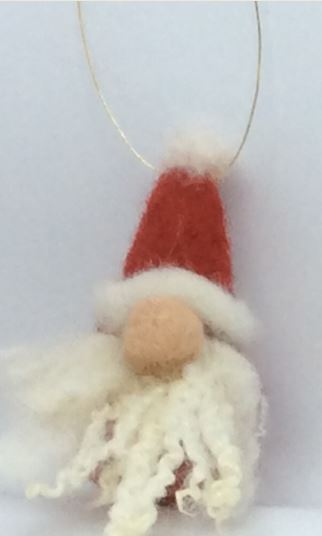
Needle felted Santas
You will need:
- 3g red New Zealand Merino wool batts per Santa (when making the simple Santa*)
- Other wool: Flesh Pink New Zealand Merino 1g, Cape Merino wool batts white 1g, Blue Face Leicester curls white 1g (when making both styles of Santa)
- Thread or thin gold wire for hanging
- Felting needles, #38 medium
- Felting mat
- A sewing needle
To make a Santa with arms and legs, you will also need:
- *An additional 2g of Red New Zealand Merino wool batts
- 1g black New Zealand Merino
Size
Simple Santa: 8-10cm
Santa with arms and legs: 12-13cm
Tip: Both styles start out the same way so you can make the simple Santa and then decide if you want to make the arms and legs for him.
Simple Santa
Important note for beginners: the felting needle you are using in this project is a specialist needle and has a sharp end with notches along it. By stabbing the needle in a straight line in and out of the wool you are tangling up the fibres. They get tighter and felt together and the air gets squeezed out, which allows you to shape the wool into a felted object.
The shape will shrink as it gets firmer. The deeper you sink the needle into the wool the more the core gets felted. Please take care of the needles around others and mind your fingers.
To make

1. Make sure to have all your different colour and types of wool ready. If you are using exact quantities make sure you keep a wisp of each colour aside in case you need it at the end for cosmetic adjustments.

2. Take 3g of the red wool batt and roll it up on itself into a short sausage shape. You should have a smooth outer and wispy ends where the sausage shape closes. Hold the shape with 1 hand and with your medium needle stab these wispy ends into the main shape. Use the felting mat as a base to rest on.
The wispy ends will get tangled up inside the red shape and you can now let go of it. Give the shape a few stabs all over. Decide which end looks naturally rounder and which more pointy.

3. When working on the rounder end: stab your needle in a semicircle around the round end (see white dotted line) to make this end firmer and even more round (this will be Santa’s bottom).

4. When working on the opposite, pointier end: stab your needle in a straight line from the middle towards the end. This will make the end pointy (this will be Santa’s hat). Felt the whole shape a little firmer but keep 1 end pointy and the other round.

5. Take a small pinch of flesh pink wool (about ¼ or less of 1g) and roll into a small ball shape, similar to what you did with the red wool earlier. Give this shape a few stabs on the felting mat, minding your fingers (this will be Santa’s nose).
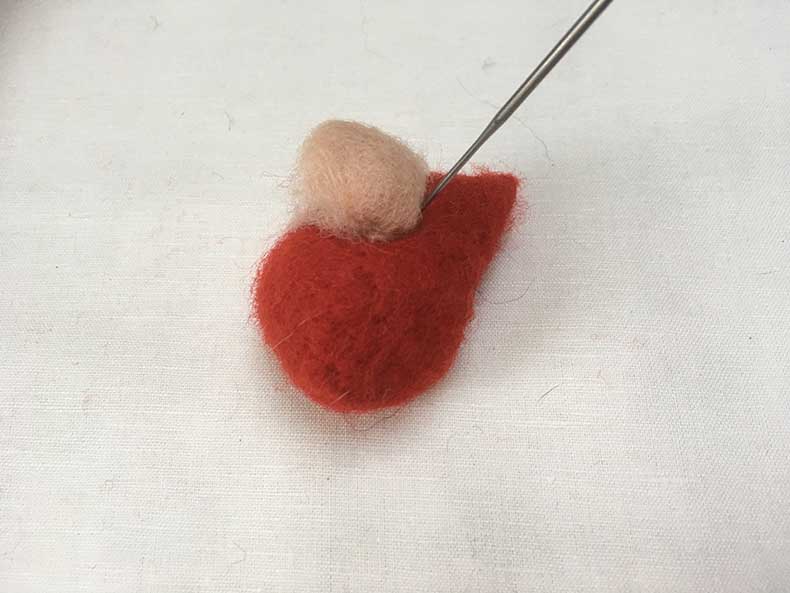
6. Position the pink nose on the top half of the red pointy shape and stab with your needle around the base of the pink nose. This will fasten the nose on without flattening it. Once it is fastened, stab into the pink shape so that the needle only goes in superficially to firm up the nose and reduce its size if need be.
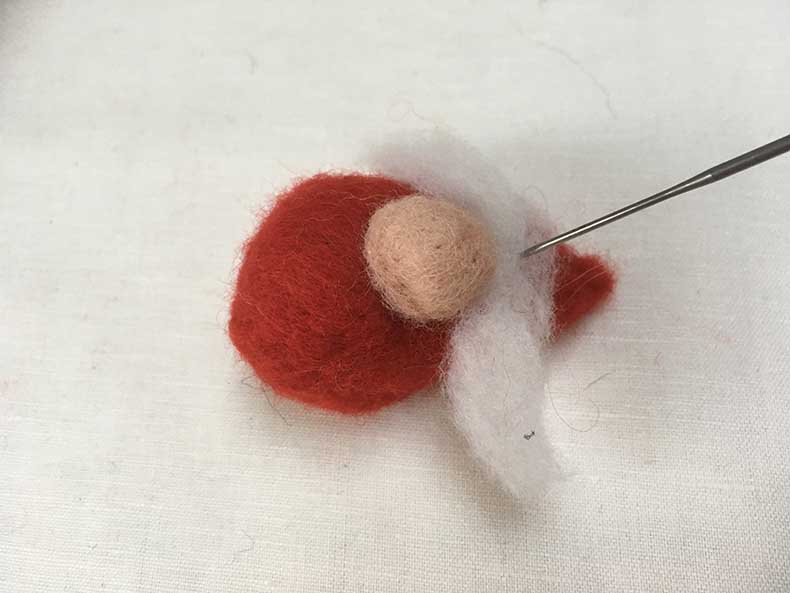
7. Take a small amount of the soft white Cape Merino wool and tease into a short strand. Lay this onto the red shape just above the nose and all around the top of the red shape to make the fur trim. Stab into place by stabbing your needle either just above the white or just below so that the white stays fluffy and slightly raised.
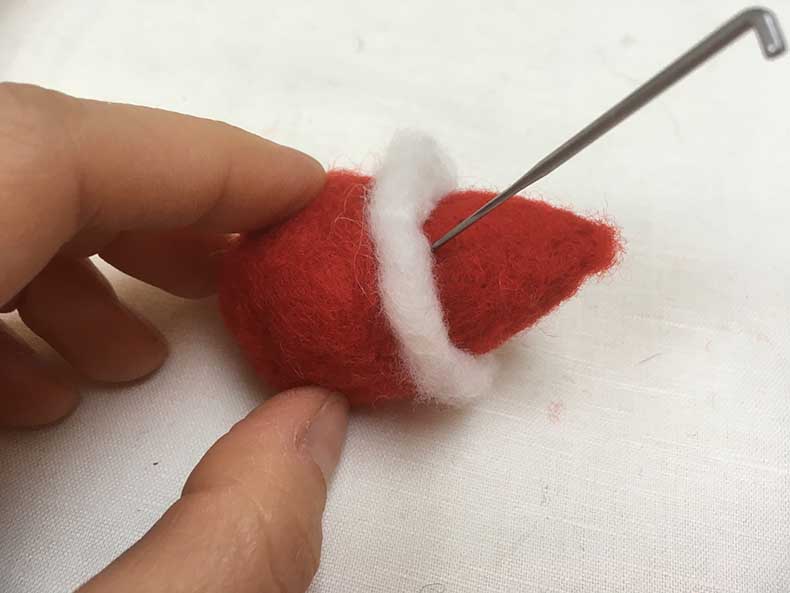
8. Fasten the fur trim all around the top half. Add more wool if necessary but make sure the white wool is not flattened down.
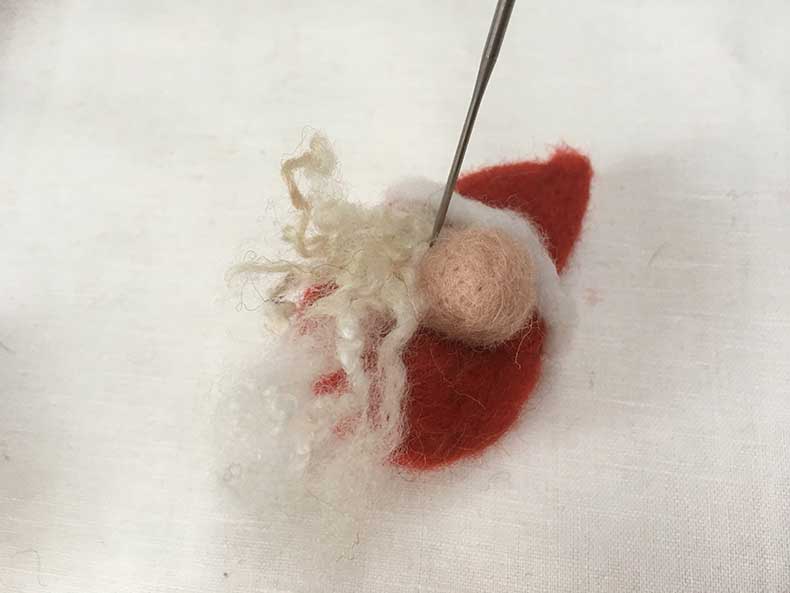
9. Take a small strand of the white curls and only fasten 1 end onto Santa’s face next to the nose and right under the fur trim. Make sure there is no red wool visible between the beard top and the fur trim. Add another strand underneath Santa’s nose and a third to the other side of the nose. As with the first, cover all the red.
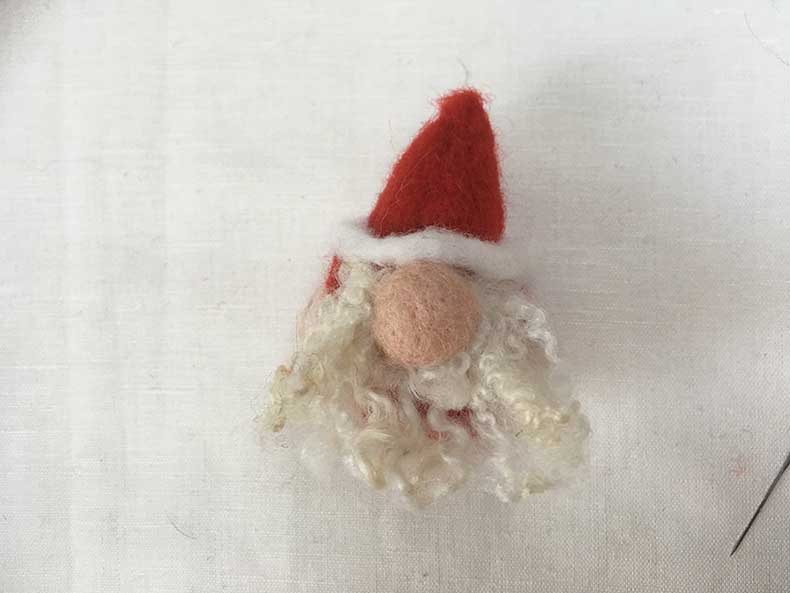
10. The beard should surround the nose where it was red before. Curls can be hard to tear so use scissors if you need to cut the curls shorter. Make sure the nicer ends hang freely.
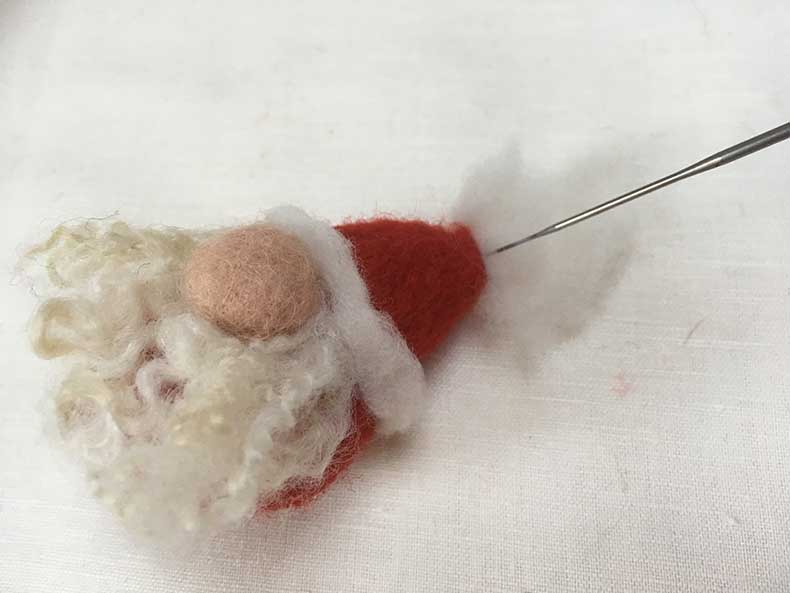
11. Finally take a wisp of white wool (the same as you used for the fur trim) and felt onto the top of the hat for a bobble. Make sure you stab your needle very superficially so that the red fibres do not come out at the other side. Stab all around.
12. Add a thread below the bobble to hang your decoration. This completes your simple version of a needle felted Santa.
Adding the arms and legs (optional)
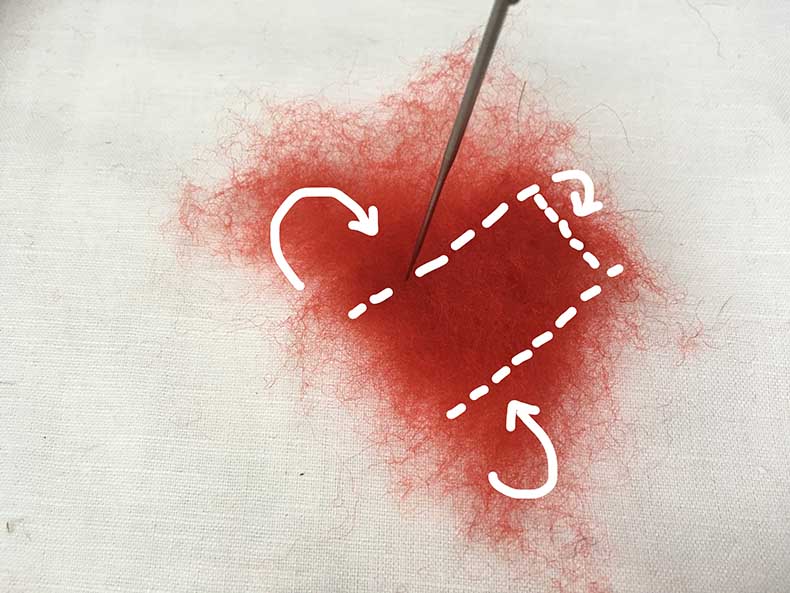
13. Take a wisp of the red wool (you should have 2g for arms and legs), flatten with your fingers and lay onto your felting mat. With your medium felting needle stab 3 straight lines (dotted white lines) to make rectangle open at 1 short side. Fold the wispy ends outside the lines in (white arrows) and felt down inside the rectangle.
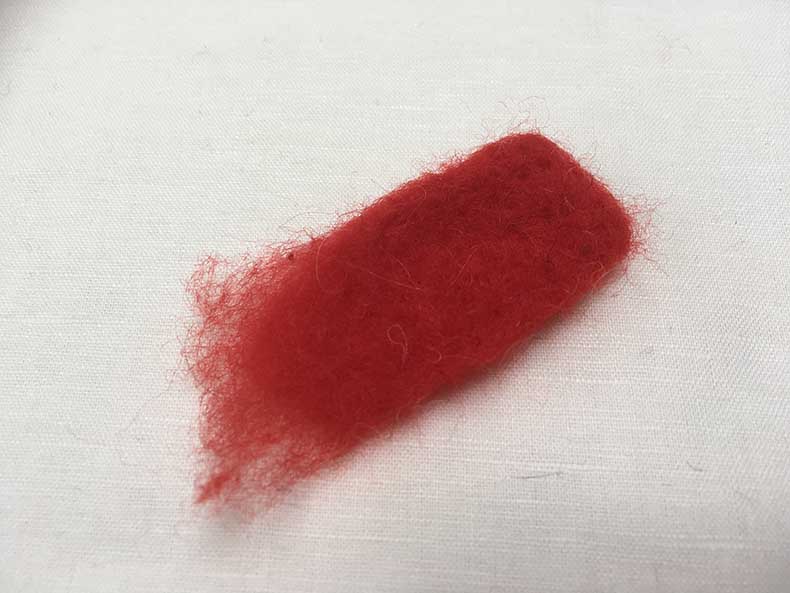
14. Make sure you leave 1 side (short side) fluffy. Felt the rectangle from both sides so you create a small, firm piece of felt. It is important that you lift the shape off of the mat regularly so it does not get felted onto it.
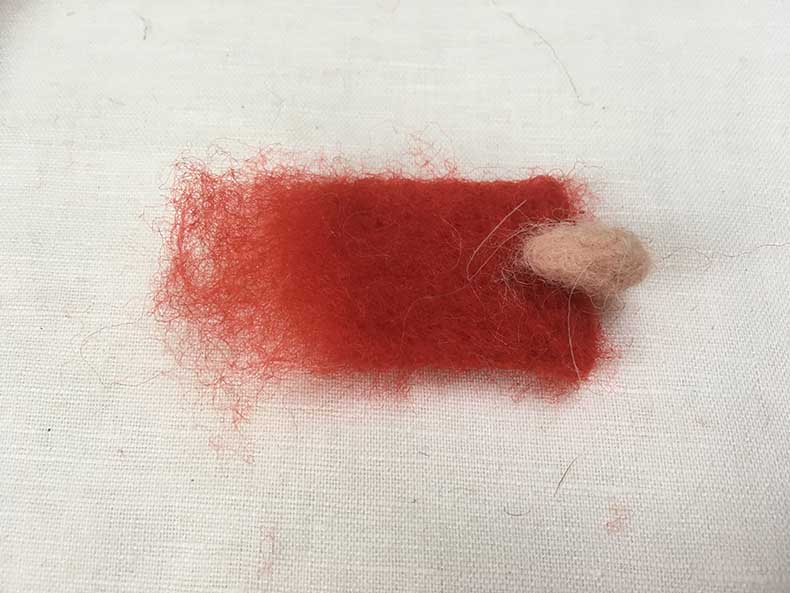
15. Make a small, slightly oblong shape from the pink wool you used for the nose. Position it at the end of the rectangle opposite the fluffy short side (this will be Santa’s hand).

16. Now fold the rectangle so that the hand is trapped and the 2 longer sides are aligned. Use your needle and stab along the edges into both sides, creating a seam. At the same time stab your needle into the red wool and the hand inside the sleeve so the hand is firmly fastened on.
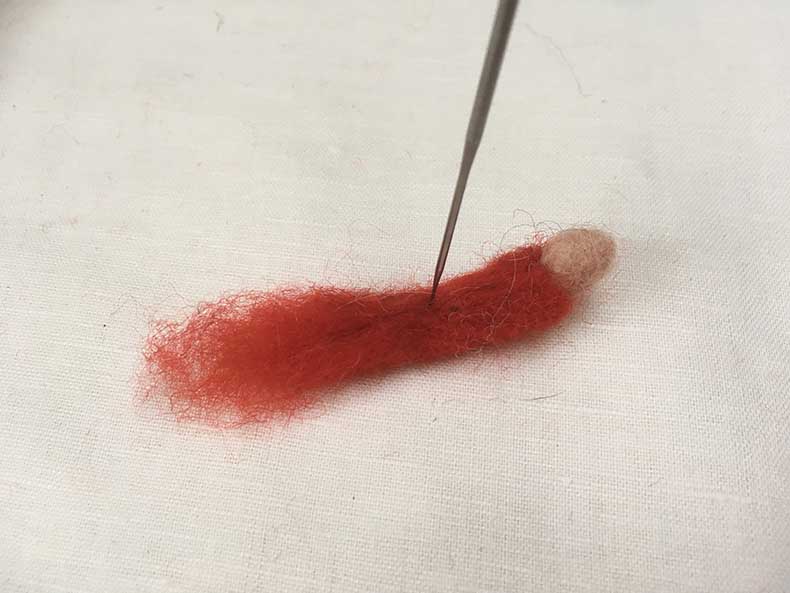
17. Once the seam is closed stab the arm all over to firm up and even out, leaving the wispy ends unfelted.
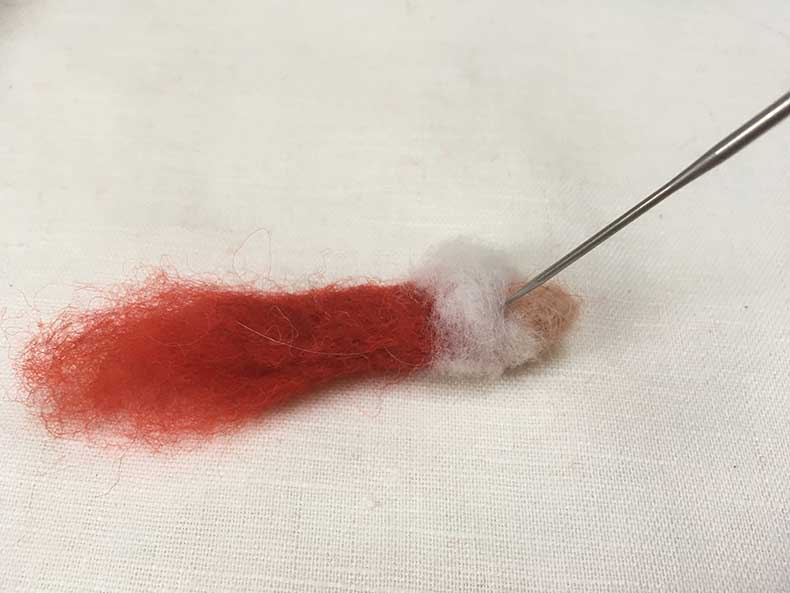
18. Use the soft, white wool to create a fur trim as you did with the hat by stabbing a short strand onto the end of the red sleeve. Make sure you cover all the red next to the hand.
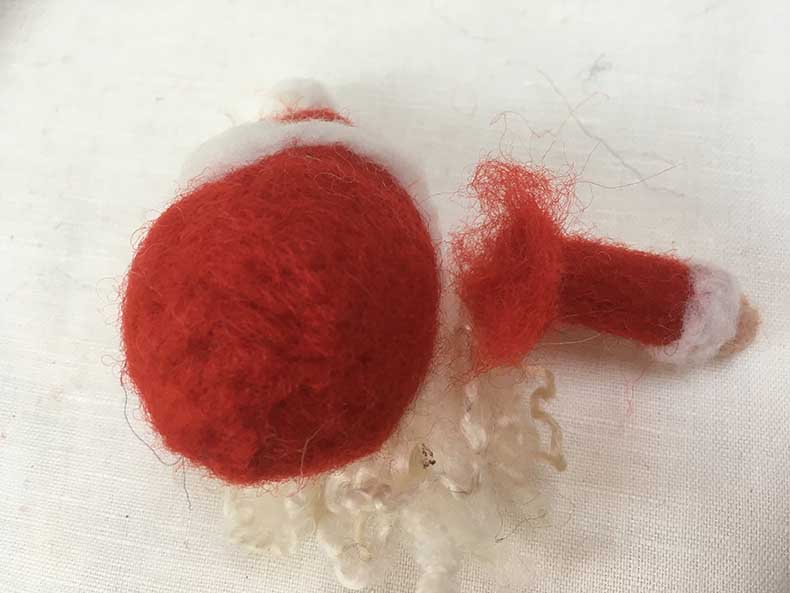
19. Make another arm as much the same as the first as you can. Take 1 arm and flatten the wispy ends out so they create a flat surface.
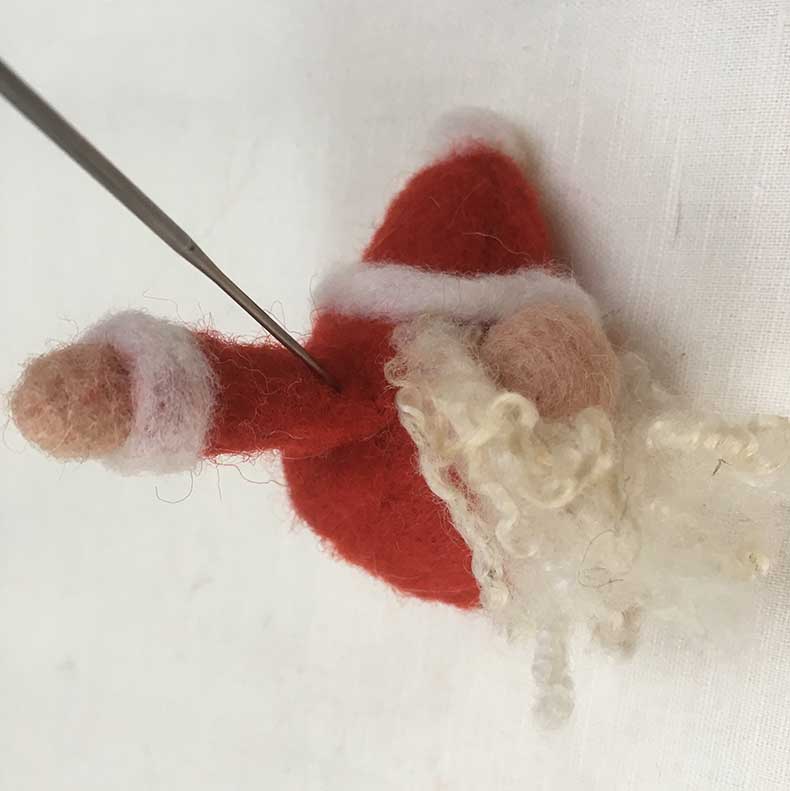
20. Lay the flat base onto the side of the Santa’s body (you may have to move the beard out of the way) and felt the wispy ends into the side of the Santa. This will fasten the arm onto him.
Repeat with the second arm. You can shorten the arms by stabbing at a shallow angle into the length of the arm (mind your fingers!).
Repeat the process for the legs but make the rectangle slightly longer and instead of making a pink hand, make a slightly larger black foot. Felt the rectangle together by laying the 2 longer sides on top of each other and felt down. Add the white fur trim to the trouser hems.
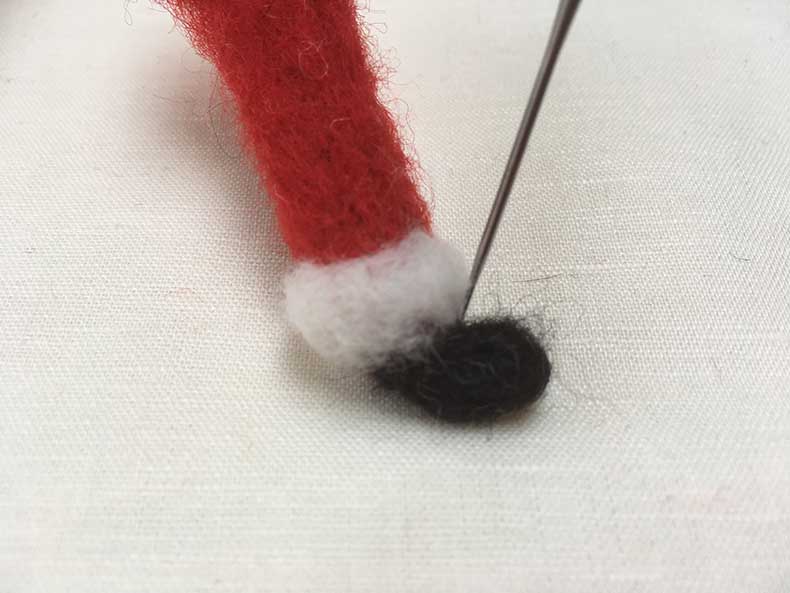
21. Bend the boot up by stabbing the needle into the top of the foot near the hem of the trousers. This will bring the foot up at a right angle. Make 2 legs the same and attach them to Santa in the same way as the arms were attached, by flattening the wispy ends into a base.
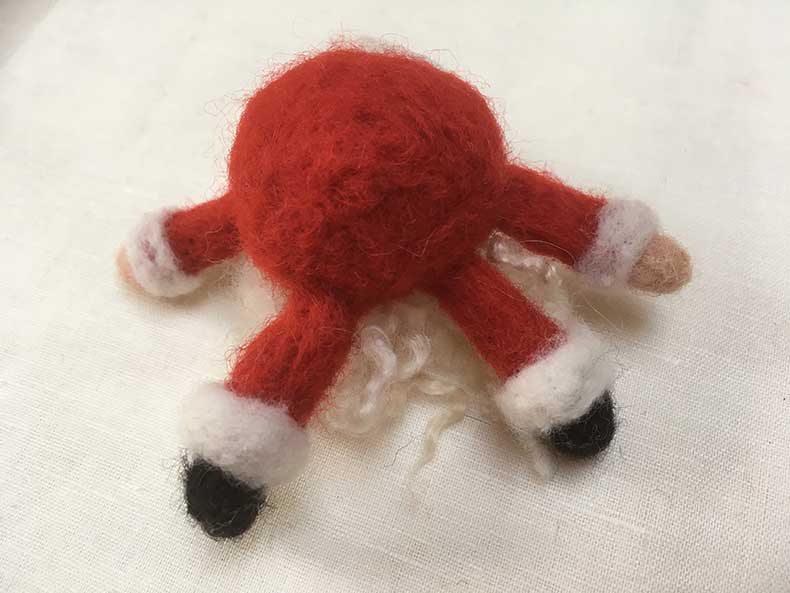
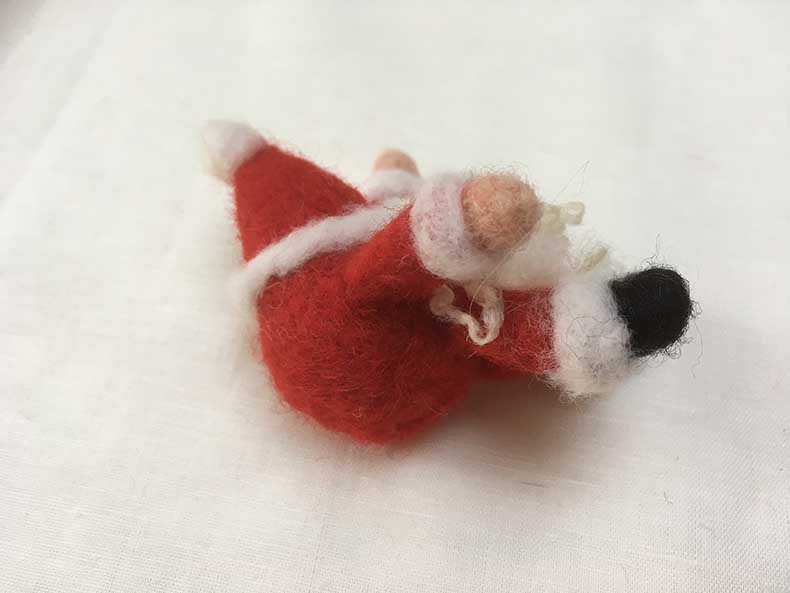
22. The legs should be positioned below the beard (move this out of the way while attaching the legs) and show Santa’s bottom at a profile.
Project by Steffi Stern, Associate Member of the WI and Co-founder of The Makerss: www.themakerss.co.uk

