Machine embroidered landscape
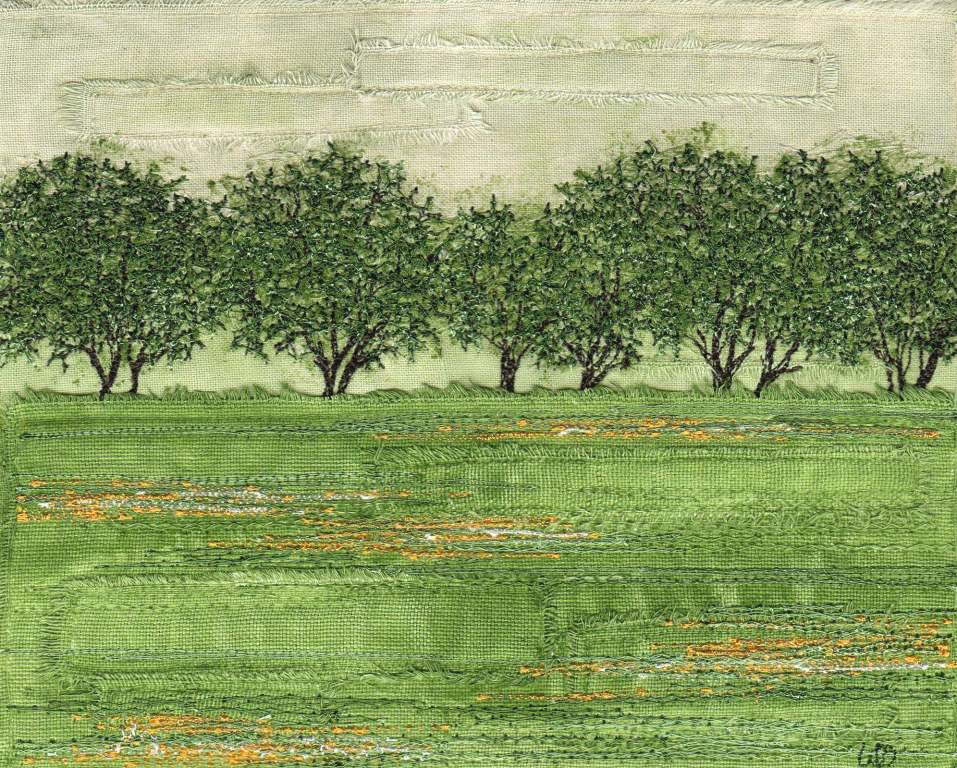
Piecing and patching natural fabrics and then working into them with both hand and machine stitching, creates an exciting textural surface, which can then be painted with fabric paints. The coloured background then worked into again with coloured threads. This final process defines the form and detail of the design.
You will need:
- Sewing machine with a freehand embroidery/darning foot
- 28 x 25.5cm piece of calico backing fabric (this allows a 5cm border)
- A variety of pre-washed natural fabrics with interesting textures, such as cotton, calico, scrim, silk noil and linen
- 28 x 25.5cm piece of Stitch ‘n Tear or Vlieseline (Vilene)™ stabiliser
- White or cream cotton machine thread
- Hand embroidery threads, (optional) e.g. perlé, coton à broder, crochet cotton, stranded cotton
- Machine embroidery or general sewing threads – select colours for your chosen colour scheme
- Water based and iron-fixed fabric paints
- Paint brushes, palette knife (optional) and textured sponge
- Water spray
- Pins
- Scissors
- Pencil or fabric marker
- Tracing paper
To paint
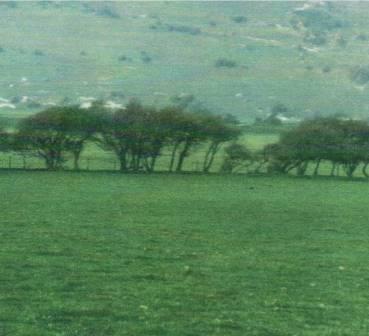
1. Select an image that you wish to recreate – the source for this design was a row of hawthorn trees on the South Downs, Sussex. Lightly trace the design onto the centre of the calico, using a fabric marker or pencil. This will indicate where to layer your textured fabrics.
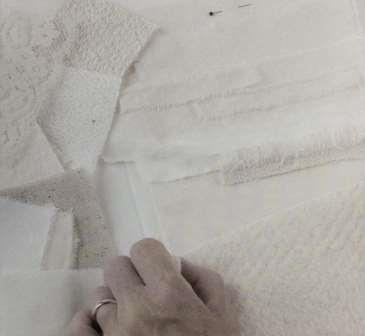
2. Select which fabric textures you would like to represent the different areas of your design. Calico and silk noil works well for the Downs and field in the background, with white cotton for the meadow in the foreground. Start tearing your chosen fabrics into strips. These can vary in width and length. The torn edges will become part of the texture of the design.
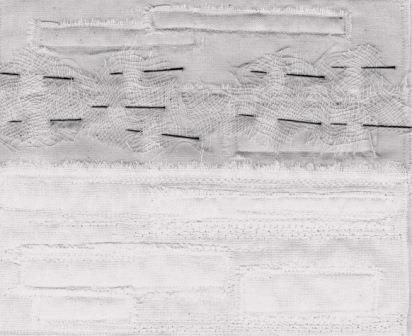
3. Pin and tack fabrics in place through all layers. Place the Stitch ‘n Tear or Vlieseline stabiliser behind the calico and pin in place. This will stop your fabrics from puckering when you stitch. Set up your machine for freehand machine embroidery, if you are unsure how to do this, see the ‘Setting up your machine’ section at the end of this project.
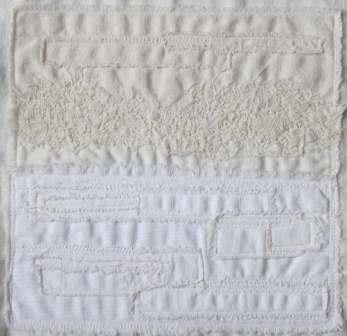
4. Moving steadily across your design, stitch around all the edges of the tacked fabric strips. This stitching has 2 purposes: it is functional as it will hold the pieces in place, but it is also decorative and will add more surface texture. Try and run the machine at a medium to fast speed but move the fabric quite slowly to produce short stitches. You are in control of the length and the direction of the stitch. Try not to stitch too close to the fabric edges so that the torn edges are still visible. Remove any tacking stitches and press the design on the reverse.
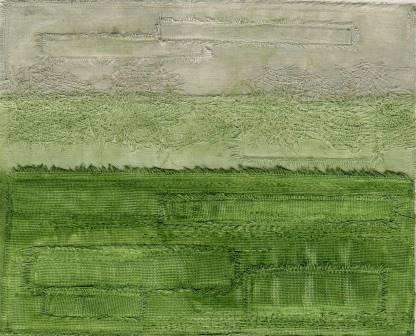
5. Small pieces of scrim can now be cut up and applied where the trees will be. Stitch down with the white cotton thread, using a narrow zigzag setting (1 to 1.5mm) and moving the fabric backwards, forwards and sideways in a ‘sifting’ action, creating a foliage effect (see stitch diagram below).

You may wish to add some hand stitching at this stage using white or cream cotton perlé, crochet cotton, stranded cotton etc. Simple straight stitches can be very effective, giving more texture to the surface.
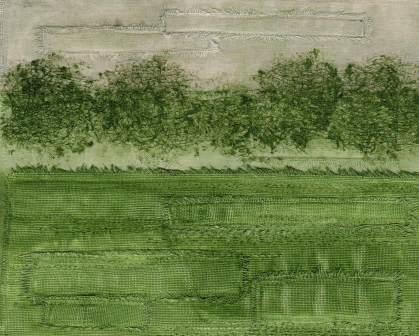
6. It is now time to paint the background fabric. Decide on your colour scheme – you can use green shades as shown here or you may choose to use autumnal colours instead. Mix up your chosen colours and always test your paints on a sample piece of fabric first so they are not too dark or strong. You may choose to work with thick pigments and apply the colour with a palette knife or dilute them and work with a brush, in which case you can spray your fabric lightly with water to allow the paint colours to merge together more. Make sure you give tonal variation to your background by using light and dark shades of paint. Allow everything to dry then iron on the reverse to fix the paint.
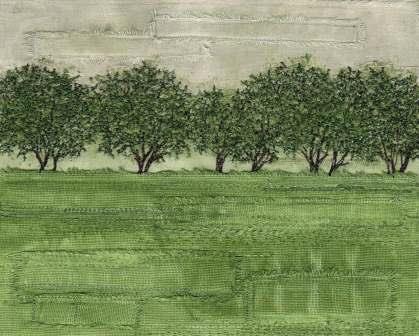
7. Now use a sponge and a darker shade of green to print across the scrim textured tree area, again fix with an iron when dry.
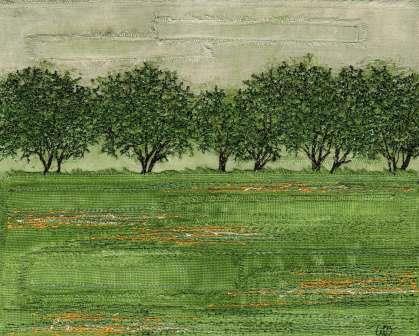
8. You are now ready to start stitching into your textured and painted background with freehand machine stitching, using coloured threads. These can be machine embroidery rayon threads or any threads you may have. Use the design below as a guide to stitching the tree trunks.
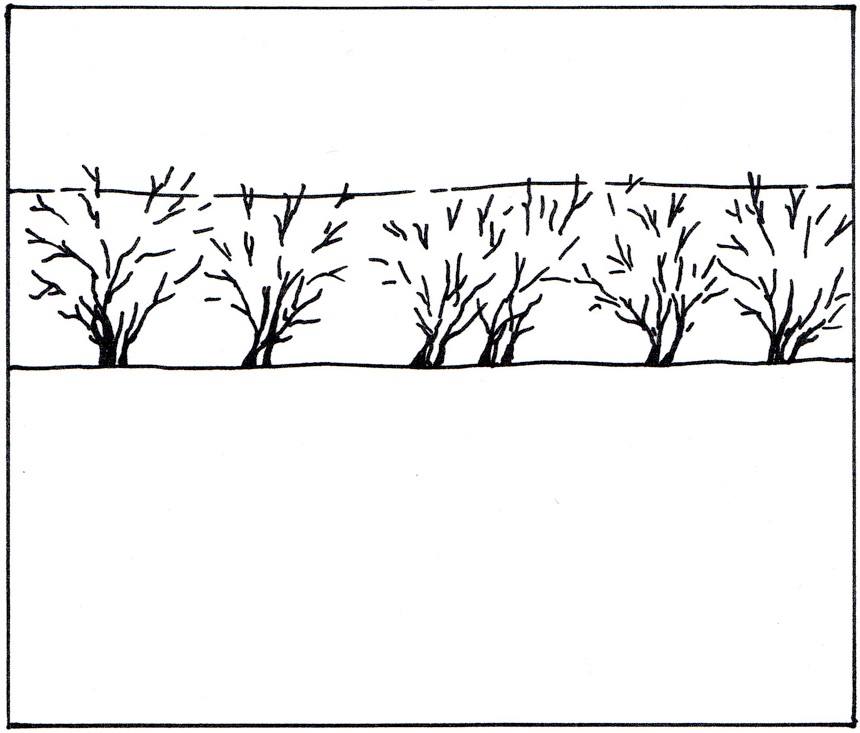
9. Stitch more foliage and add some meadow flowers into the foreground, perhaps buttercups and daisies or poppies. Hand stitching could now be added too, using coloured embroidery threads. Simple straight stitches, couching and seeding can add another dimension to your work.
10. Your final embroidery can be simply framed, or used as a central panel for a cushion or a bag.
Setting up your machine
1. Remove the general sewing foot and replace with free embroidery (darning) foot.
2. Lower the feed dog (teeth) or cover with a darning plate and set the stitch length at 0.
3. Release the foot pressure control to the darning setting (not applicable to all machines).
4. Using a 90 (14) size needle, thread your machine with white cotton thread on the top and in the bobbin.
5. Place your fabric under the needle and lower the presser foot lever. Holding onto your top thread, turn the flywheel towards you and bring the bobbin thread to the surface. Holding onto both thread ends, run the machine and make a few stitches on the spot. Cut off the ends. You are now ready to start freehand machine stitching.
Embroidered Treescape by Wendy Dolan
Wendy is a textile artist, tutor and author. Specialising in freehand machine embroidery and related textile techniques, she offers a wide range of courses in the UK and abroad. For further details visit her website.
