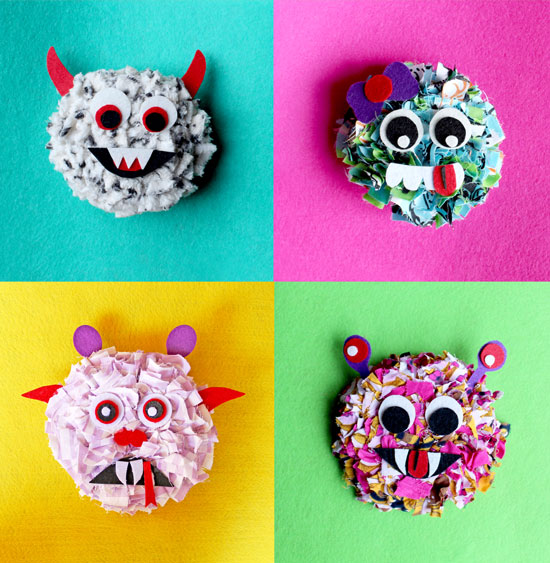
Rag-a-monster
Skill level:
Age: 12 upwards. Younger ages with adult help.
You will need:
- Monster template [download here]
- Monster Accessories templates [download here]
- Thick marker pen
- Hessian– a piece approx. 22 x 14cm makes one monster. The weave should be approx. 10 holes per 2.5cm.
- Sewing machine and thread
- Mixed fabrics – see Note below
- Fabric scissors or rag rug scissors
- Rag rug gauge (optional)
- Latch hook – we used a children’s latch hook when working with kids
- Glue gun or PVA glue
- Felt or thick fabric – we used white, black, red and purple.
Note: You can use any old clothing or fabric offcuts, but thinner and softer fabrics like jersey and cotton are easiest to work with. You can use both patterned and plain fabrics and even mix them up. The front of a medium sized t-shirt is enough.
To make:
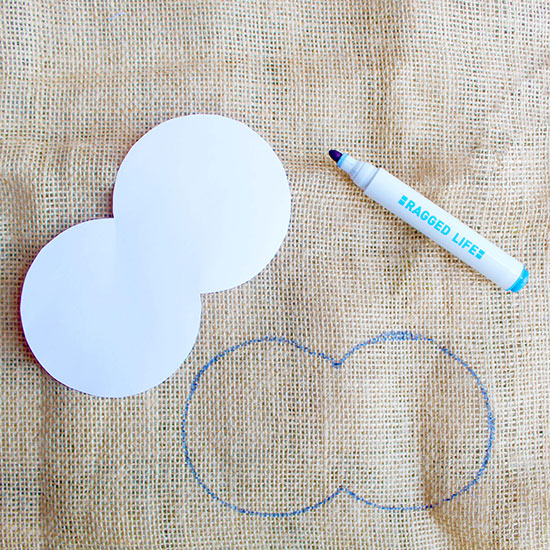
1. Print out the monster template then cut it out. Place the template onto the hessian, so it is at least 3cm away from the edge of the fabric. Draw around the template with a thick marker pen.
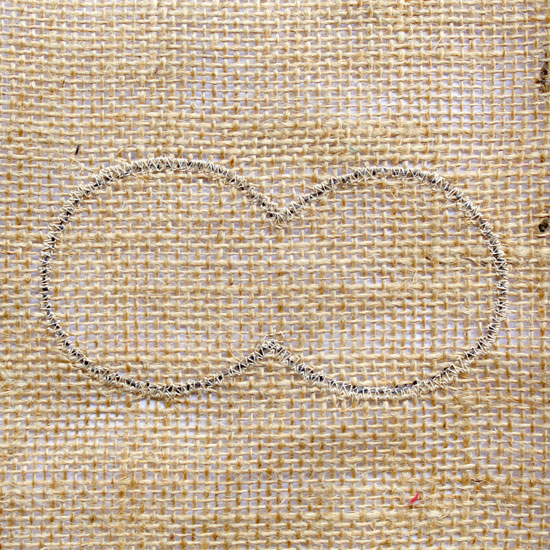
2. Sew around the drawn template using a wide zig zag stitch on your machine. This is to keep the hessian intact and aid assembly later on.
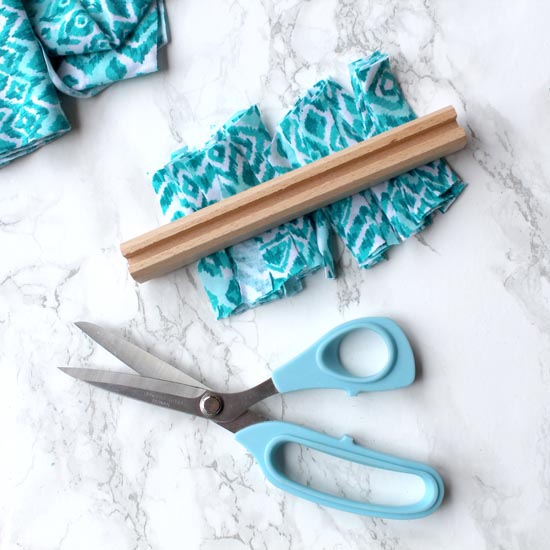
3. Cut your fabric into long strips that are approximately 1.5cm wide. The longer the strips, the better, but don’t worry if they’re a bit wonky. Wrap the long strips around a rag rug gauge and cut down the central groove to cut them to the same length pieces, approx. 7cm in length. If you do not have a rag rug gauge then this can be done manually. Discard any pieces that come out too short.
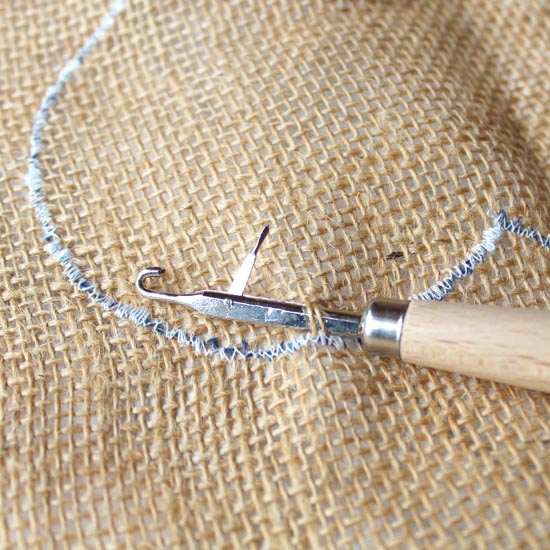
4. Within the zig zag stitched areas, weave the hooked end of the latch hook into a hole in the hessian fabric and up through a hole two strands away. Push enough through so that the dangly latch is on the far side of the strands of hessian and is open. You should have two strands of hessian on the bar of the latch hook.
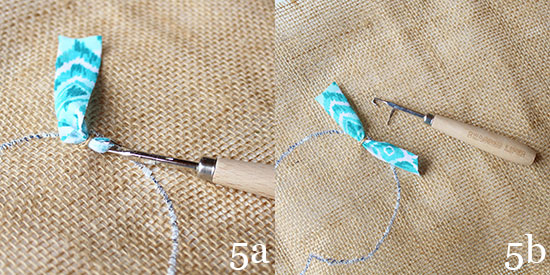
5a. Place a short strip of fabric into the hook and pull the handle of the latch hook. As you pull, the latch should close to trap the fabric strip into the hook.
5b. Keep pulling until half of the strip is on one side of the hessian strands and half is on the other side. This is your first piece of rag rugging.
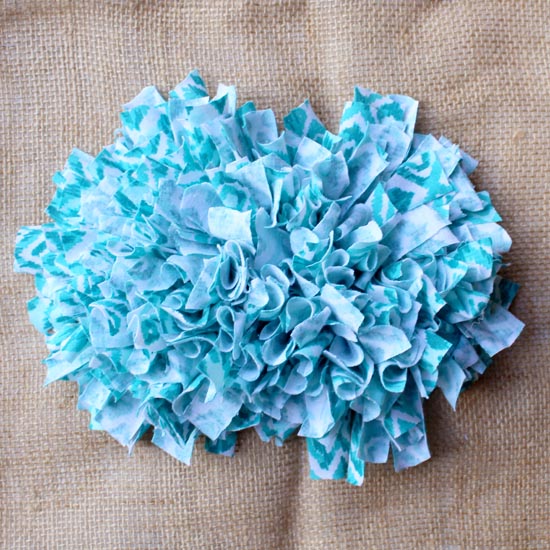
6. Repeat steps 4 and 5 (a and b) to continue this method, missing out approximately two strands of hessian between one strip of fabric and the next. Continue until you have completely filled the entire figure-of-eight with shaggy rag rugging and it looks nice and full. We like to rag rug the hessian in rows from one end to the other.
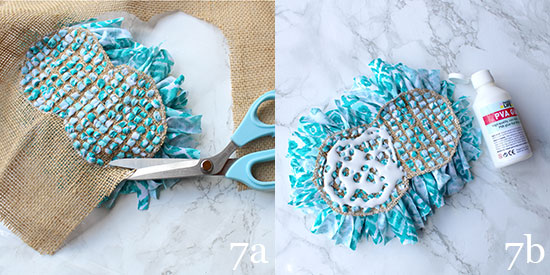
7a. Carefully cut around the zig zag stitching, being careful not to cut any of the fabric pieces. Try to keep nice and close to the stitching without nicking it. Then, with the hessian side face up, apply glue to one half of the figure-of-eight.
7b. Sandwich the two sides of the figure-of-eight together and press together until the glue is dry. You can weigh the two sides together by putting a book on top.
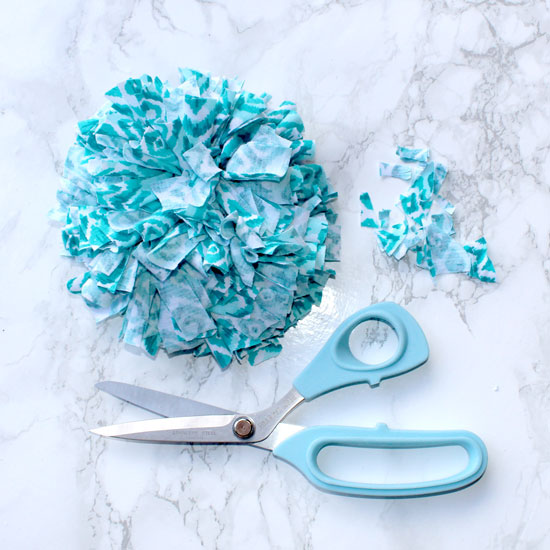
8. Once dry, your monster may need a little tidy up and haircut. Use the glue gun or PVA to cover any bits of hessian that might be visible by carefully gluing pieces together around the “seam”. Trim any pieces of fabric that are sticking out a bit too much.
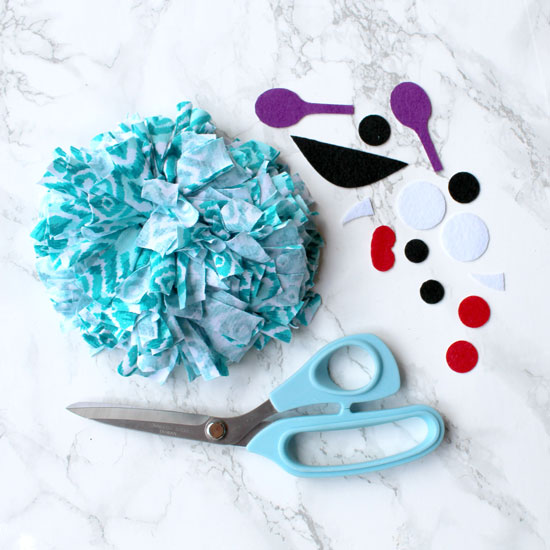
9. Print out the Monster Accessories template. Choose which features you would like to put on your monster and cut them out. Draw around the accessories onto the correct colour felt then cut them out.
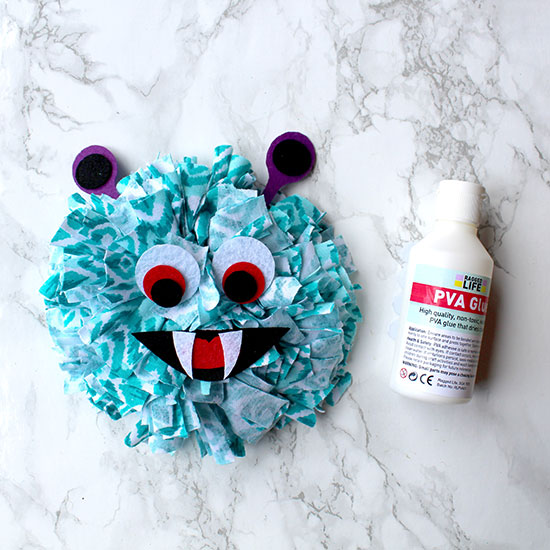
10. Stick your fangs, eyes, horns and other creepy or cute accessories onto your monster using a glue gun or PVA. Set aside until the glue is dry. Voila! One upcycled Rag-a-Monster.
This project was created by: Elspeth Jackson, www.raggedlife.com

