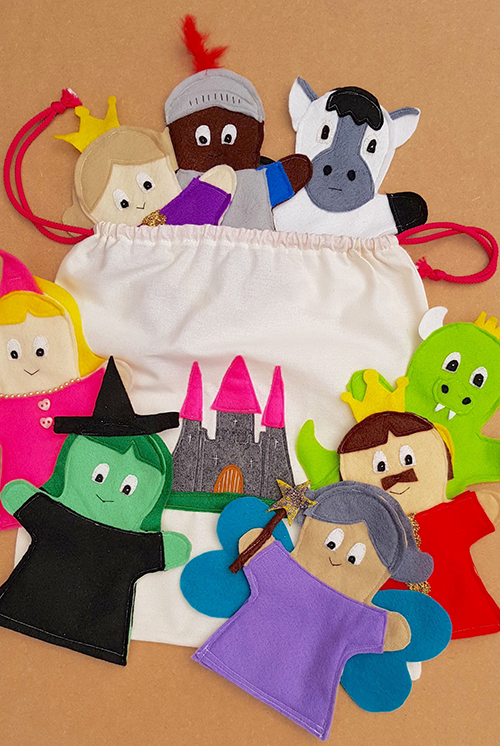
Fairy Tale Storytelling Sack: Glove Puppets and Drawstring Bag
What is a Fairy Tale?
This is usually a made up story…
- It can begin with “Once upon a time”, “Long ago”, or “Once there was a…”
- Contains royal characters such as kings, queens and princesses
- It features imaginary characters such as dragons, fairies, witches, elves and giants
- Wishes are often granted
- A difficult problem is solved at the end of the story
- Good triumphs over evil
- The story has a happy ending
In addition, a fairy tale will often include:
- Talking animals
- Magical elements such as magic beans, fairy dust, an enchanted castle
Glove Puppets
Skill level: Beginner
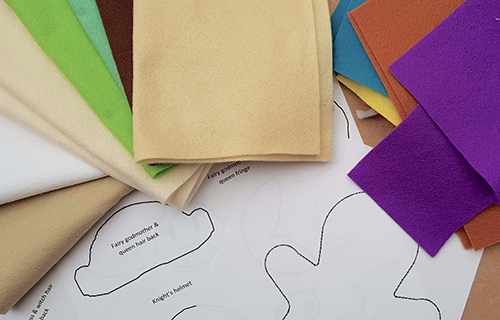
You will need:
- Scissors
- Sewing thread
- Sewing machine
- Hand-sewing needles
- Pins
- Access to a printer
For the bodies:
- Basic glove puppet template [download here]
- Matching sewing threads
- 2 x A4 felt sheets in flesh and beige
- 1 x A4 felt sheet in brown, light green, lime and white
For clothes and accessories:
- Clothes and Accessories templates:
- Template 1 [download here]
- Template 2 [download here]
- Template 3 [download here]
- 1 x A4 felt sheet in bright pink, light grey and black
- Small pieces of felt in lilac, red, purple, blue, yellow, dark grey
- Assorted trimmings, such as: gold braids, buttons, feathers, beads and glitter
- Fabric glue if using glitter
Note: Puppet templates fit ages 2-5 years
To make the Pink Princess
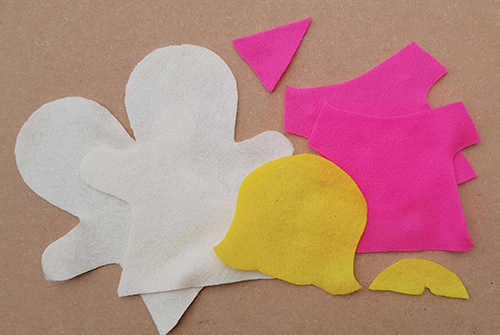
1. Download, print and cut out the templates, then using the images as a colour guide cut out all the felt pieces needed to make the princess: two puppet shapes from flesh felt, two dress pieces and a pointed hat from pink felt and, her fringe and hair from yellow felt.
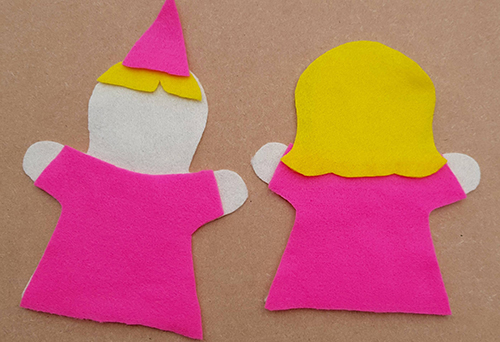
2. Lay the two puppet pieces out flat and place the dress and hair pieces on top to form the front and the back of the puppets; pin pieces in place.
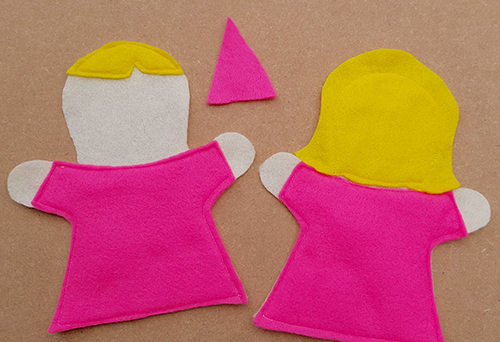
3. Stitch the dress and hair pieces in place; you can do this by machine, or alternatively hand sew them together. Remove all pins.
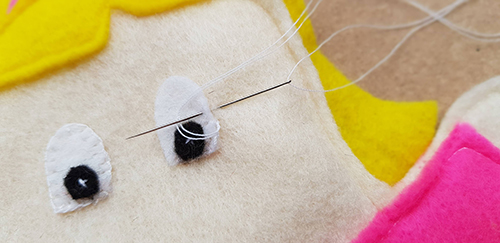
4. Using the glove puppet template as a guide for the facial features, cut out two eyes from white felt and two pupils from black. Attach the pupil to each eye with a couple of hand stitches, then position them on the face and stitch in place using small blanket stitches. Finally, work two straight stitches to form the mouth.
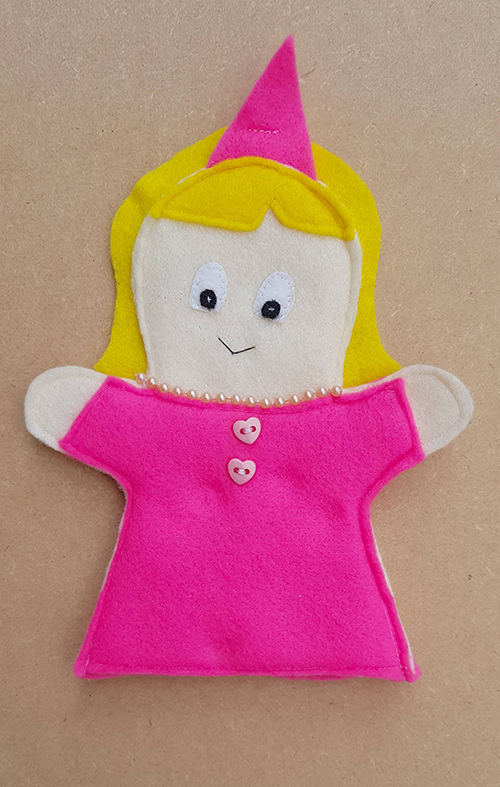
5. To complete the Princess, pin the two puppet pieces together, slip the hat between the layers at the top. Stitch around the outer edges, sandwiching the hat in between the layers and leaving the lower edge open to insert a hand. Work a few extra stitches across the hat to fasten it to the top of the hair. Finally, attach beads and buttons as desired.
To make the remaining characters
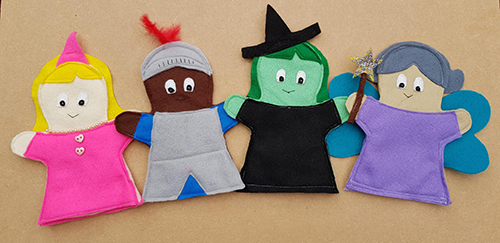
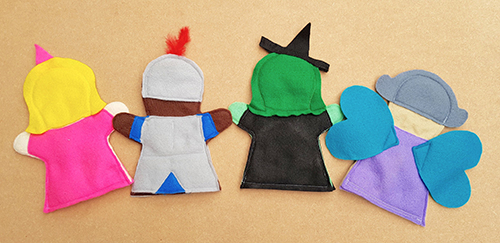
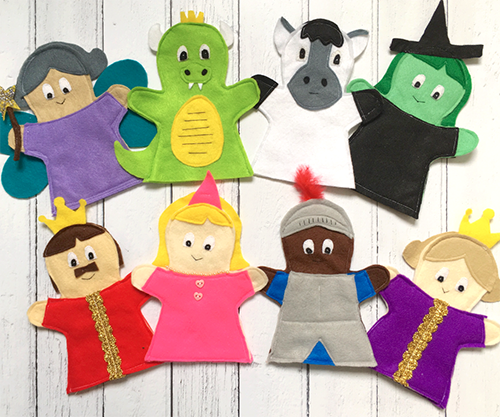
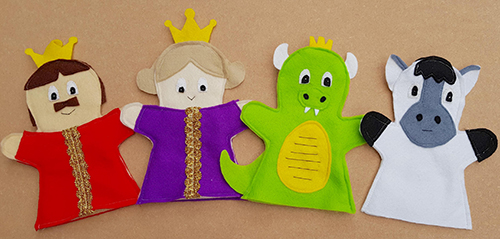
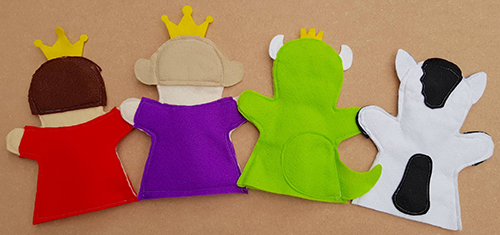
Following the same method shown for the princess, and using the photos above and below as a guide, complete the remaining puppets.
See above for the Knight, Witch and Fairy Godmother and below for the King, Queen, Dragon and Horse.
Drawstring Bag
Skill level:
Beginner
You will need:
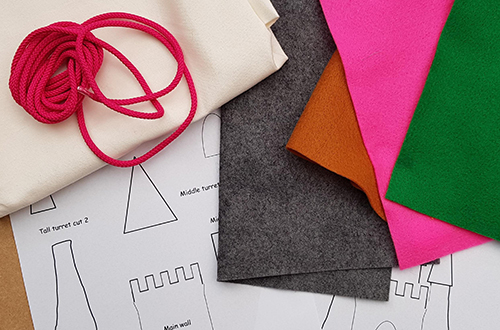
- 40cm of 112cm-wide cotton fabric
- Sewing thread
- 2m of ribbon or cord
- Castle templates [download here]
- Small pieces of felt in grey, green, pink and brown
- Scissors
- Bodkin or safety pin
- Sticky tape
- Sewing machine
- Iron
- Access to a printer
To make:
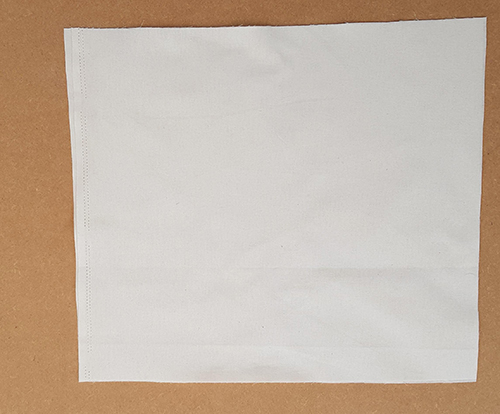
1. Cut out two bag pieces, each 50cm x 32cm, placing one short side of each piece up to the selvedge of the fabric (the thicker finished edge that runs down both sides of a length of fabric, often featuring pin-prick holes).
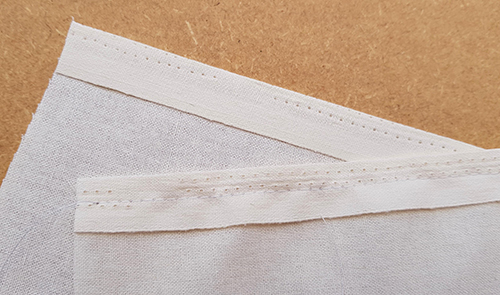
2. Press a 1.5cm hem to the wrong side along each selvedge edge, and stitch in place.
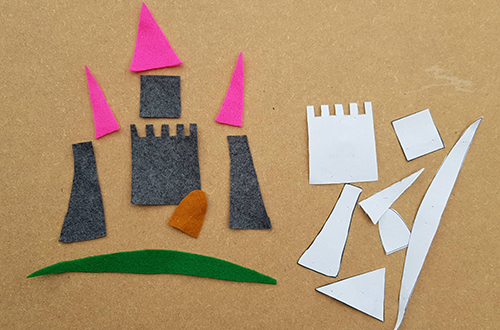
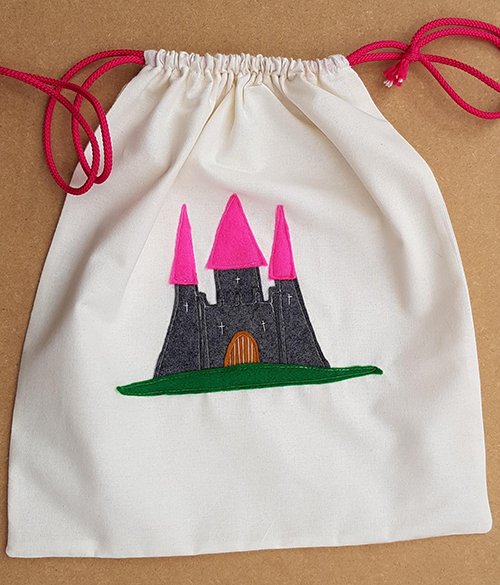
3. Download, print and cut out the castle templates. Use the templates to cut out the various pieces, using the image above as a colour guide.
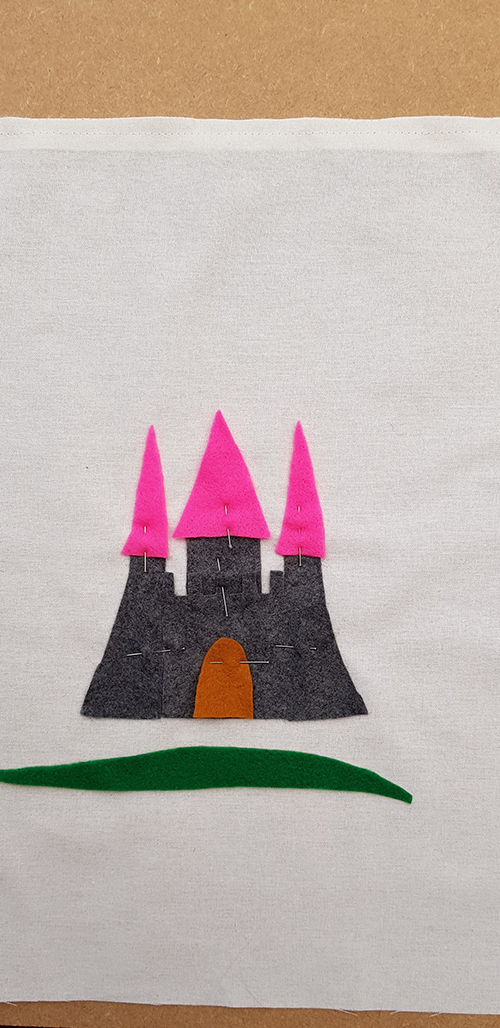
4. Place one of the hemmed fabric pieces face down, with the hemmed edge furthest away from you. Arrange the castle pieces on top, as shown in the picture. Pin in place.
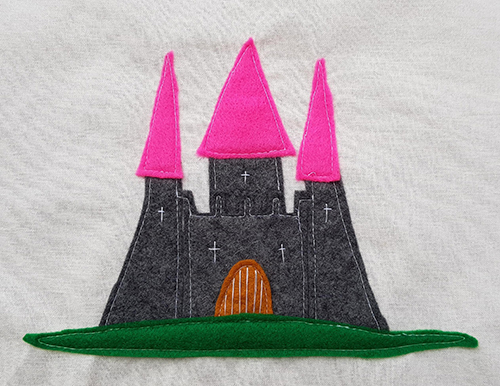
5. Machine stitch the castle pieces in place, sewing close to the edges and removing all pins as you go. Hand-stitch the cross-windows and lines for the door, as shown.
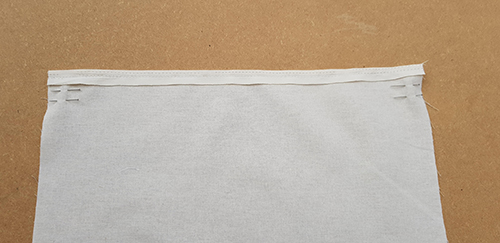
6. On one fabric piece, measure down each side from the top hemmed edge: 2.5cm and then another 1.5cm and mark with pins, as shown.
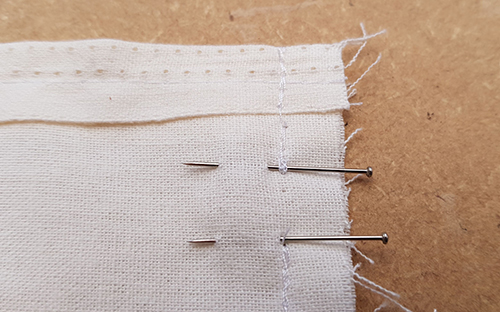
7. With right sides facing stitch all the way around, leaving a gap between the pins at each side, and reverse stitching to secure, each time you start and finishing sewing. Snip the bottom seam turnings diagonally for a neat finish and press seams open.
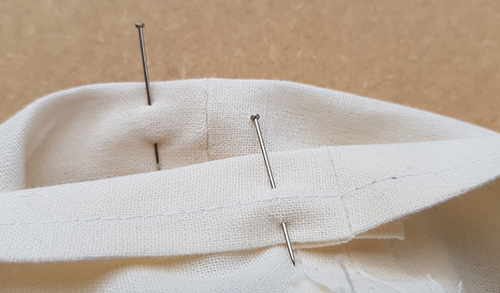
8. Fold over the top hem 2.5cm to the wrong side, making sure that the side gaps sit close to the top edge. Pin and stitch in place all the way around to form a channel for your cord.
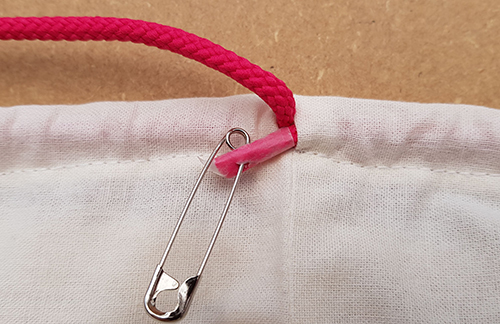
9. Turn the bag right side out. Cut the ribbon or cord into two equal lengths, then using a safety pin or bodkin, thread one length through one hole all the way around the bag and back out the same hole. Knot ends together. Repeat from the other side.
Tip: Wrap a piece of sticky tape to stop the ends of the cord splaying out whilst you are threading it through.
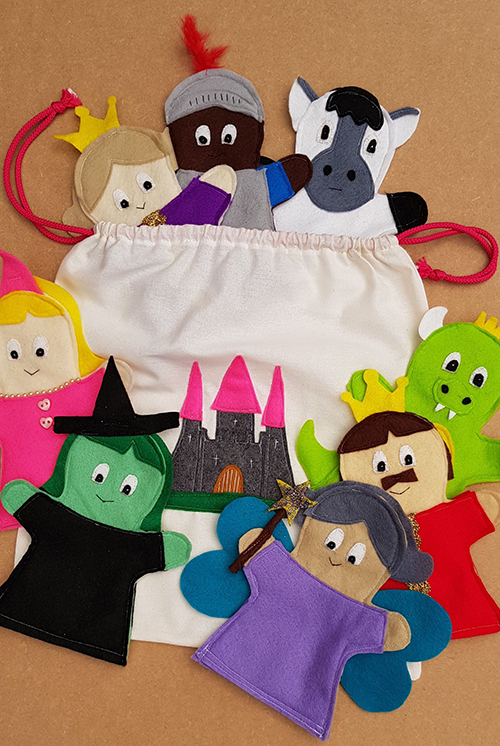
10. Your drawstring bag is now complete. Add your puppets and start creating your own Fairy stories, taking the characters and your children, or grandchildren, on many imaginary adventures!
Project design: Ruth Ryan

