Children’s ‘At Home’ Sport’s Day
Not all school’s reopened after lockdown, so many children have missed out on their annual summer Sport’s Day. So here are some fun ideas to recreate at home and keep them fit!
Sports Day… Back in time
Sports days are events staged by many schools and also offices, in which people participate in competitive sporting activities, often with the aim of winning trophies or prizes.
- Many sports day activities have been around for generations and the classic egg and spoon race dates way back to 1894 and was used as part of a celebration of the Diamond Jubilee of Queen Victoria.
- Discus throwing can be traced back even further to ancient Greece, where in the Olympiad games, this particular sport was used to judge the physical strength of athletes. The game was also popular because it requires high precision and coordination.
- The beanbag toss, also known as ‘Cornhole’ involves throwing a bag filled with dried beans or corn, into a hole or bucket. Some believe this was first introduced in Germany in the 14th Century. Some say that the idea was generated when a farmer witnessed young boys throwing rocks into a hole. It then sparked an idea that this would make a fun game but using bags filled with corn as a safer option.
- The classic three-legged race is said, to have originated in Japan in 1900 and it was used to teach children how to cooperate with one another.
Sports Day ideas
Sports Day should be about fun, teams and joining in - here are a few simple, traditional ideas that you can try at home for ages 2 years upwards.
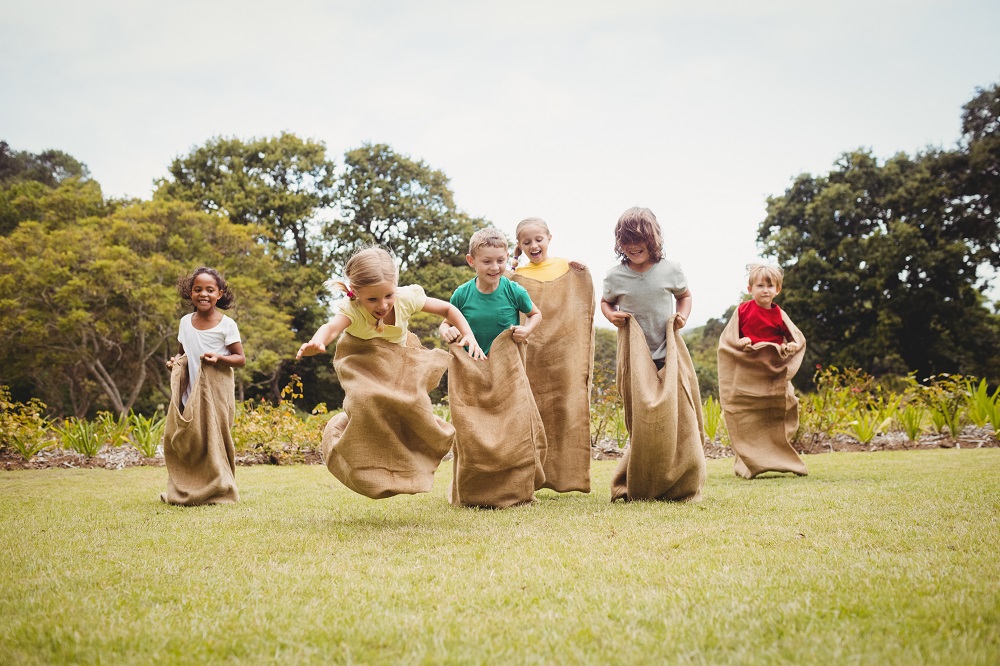
Sack race – using a couple of pillowcases (one inside another for strength) children must jump their way to the finish line.
Three-legged race – use a scarf, tie or other piece of fabric; standing next to your partner link arms and tie your middle legs together, but not too tightly, around the ankles. This is all about co-ordination. Which two can walk the quickest to the finish line without falling over?
Tug-of-war – this is a test of strength and you will need a large open space. Decide on two teams and then, grab hold of each side of a thick rope or skipping rope and PULL.
Obstacle course – Cones, jump ropes, balls, hoops, tumbling mats and under table legs can all create exciting obstacle courses outdoors, and also inside, to a lesser extent, if weather becomes an issue. Children must navigate the obstacle course by running, climbing, jumping, crawling and balancing, with the aim of testing speed and endurance. Whoever does it in the shortest time is the winner.
Sports activities can practically be anything that includes the opportunity to win and could be simply how many jumps you can do or catching a ball or cycling from one side of the garden to another. The ideas are limitless, but overall just have fun!
Sports activities to make
Why not try out some of our ‘Crafty Sports’ activities below too – not only will the children enjoy making them, but also have fun competing with their siblings and friends. Choose from: Egg and Spoon, Catch Cup, Flying Saucer ‘Discus’, Javelin Rockets and of course, Medals for the winners.
Egg and Spoon
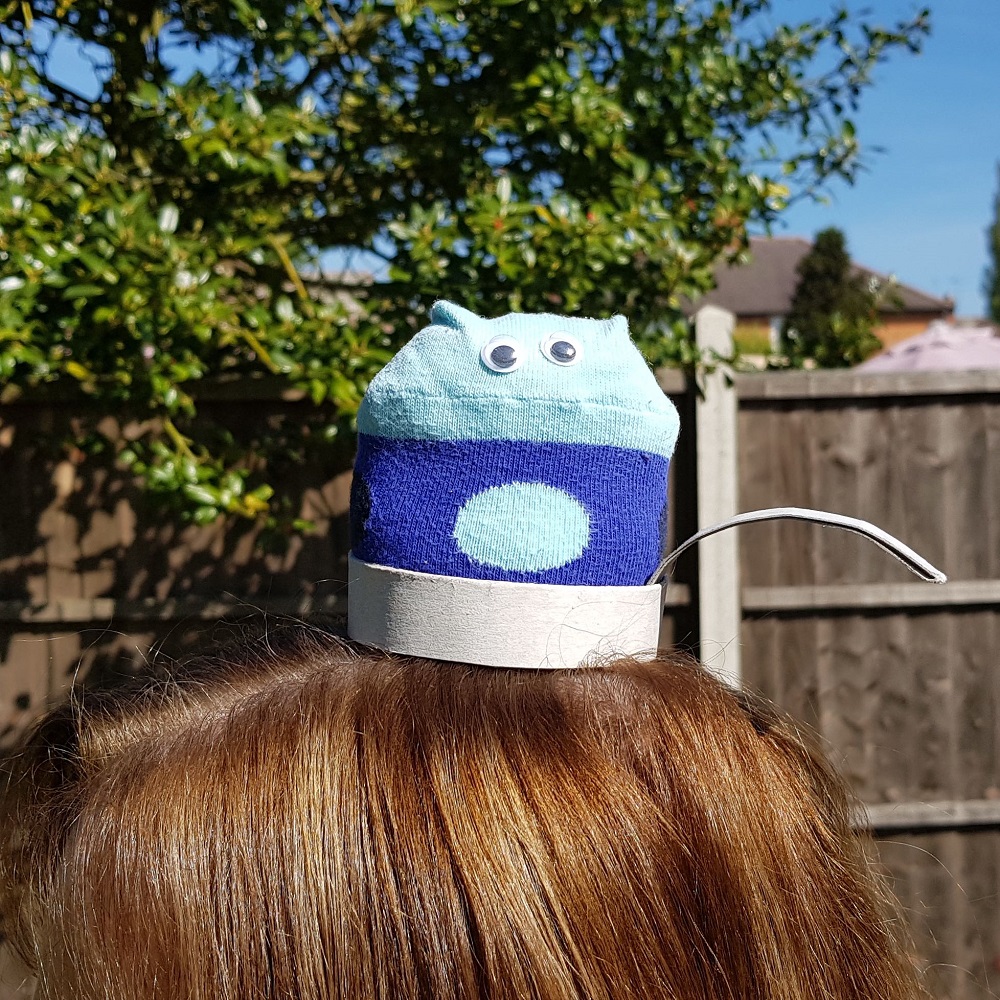
This is a different take on the original egg and spoon race, and requires participants to balance the ‘egg’ on their head instead of on a spoon.
Skill level: Beginner
You will need:
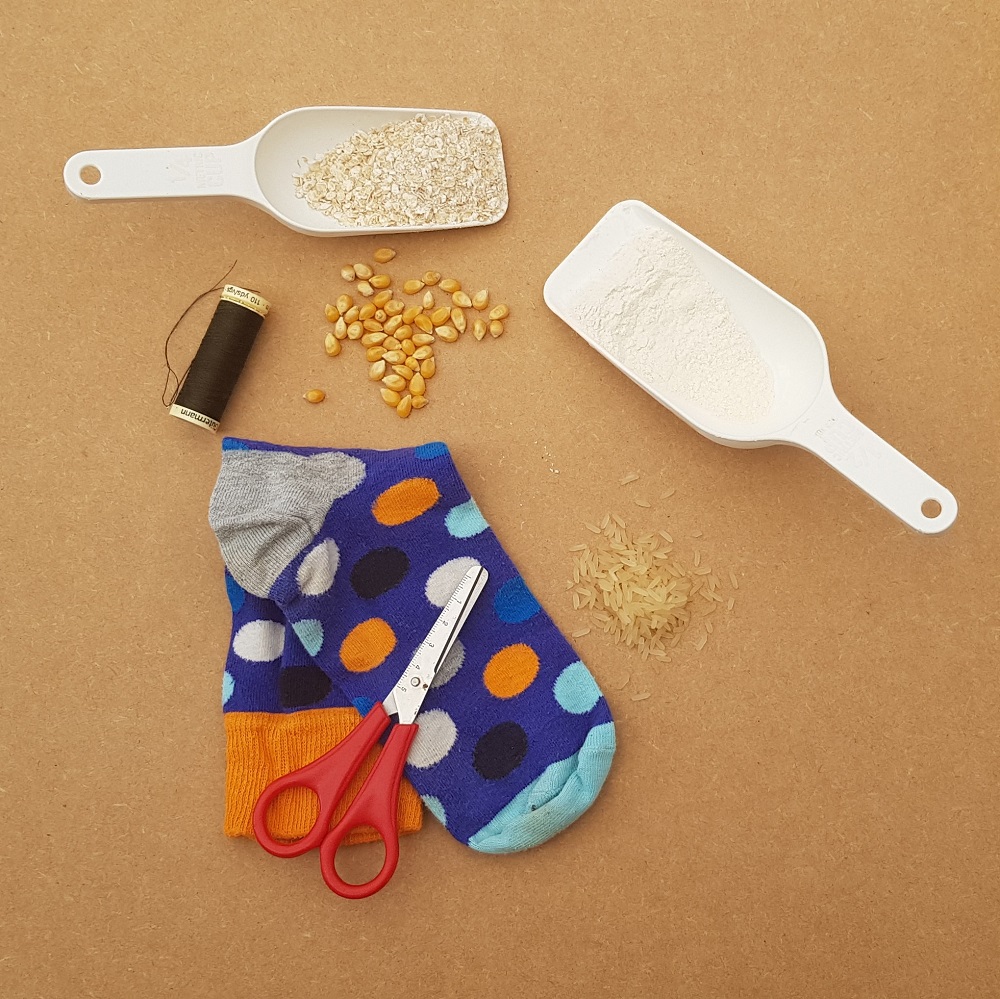
- Brightly-coloured old socks – you will need one sock per ‘egg’
- A pair of scissors
- A needle and thread
- Dried beans/rice/corn/oats or flour
- Plastic or cardboard centre from a large reel of sticky tape and/or an empty cereal box
- Stapler
- Sticky tape
- Small polythene food bag (optional)
- Googly eyes (optional)
To make the ‘egg’
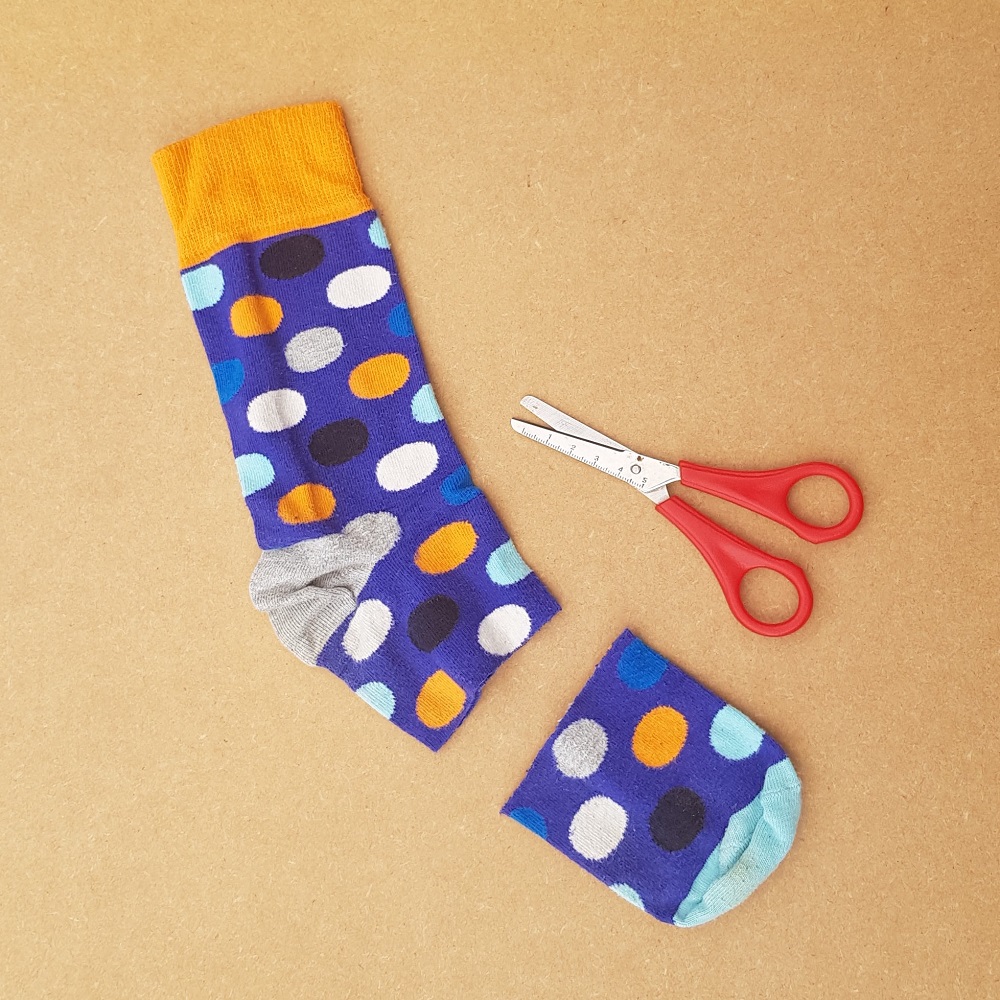
1. Measure about halfway between the heel and toe of your sock and cut off this section – you will need only the toe piece of the sock, so discard the other section.
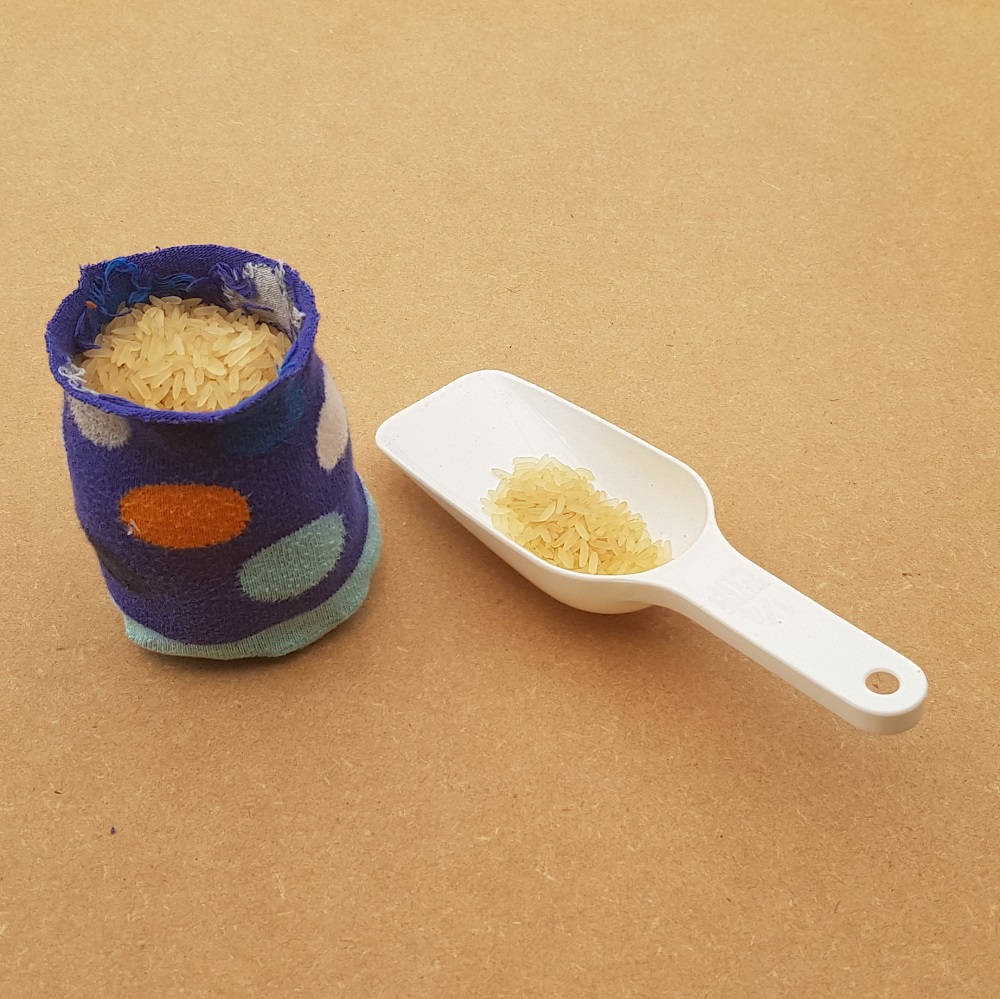
2. Fill the toe part of the sock with rice/beans etc. or if you use flour, make sure to place a small polythene food bag into the sock first, to stop the flour coming through the sock fabric; knot the bag tightly. If using other dried ingredients fill the sock, pushing it well in to the toe, to make sure it is packed full, finishing the level 1cm before the top.
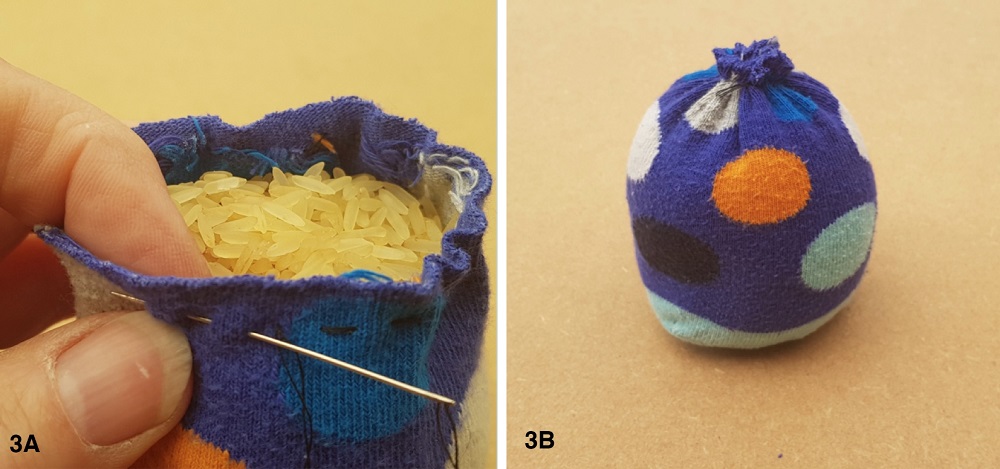
3. Using a doubled thread in a needle, sew a simple running stitch all around the top, leaving a small length of thread at the beginning (3a). Pull together both thread ends as tight as possible and knot together firmly (3b).
To make the ‘spoon’

4. Using the centre from a large reel of sticky tape makes this job very easy, all you need to do is add a handle made from card 2cm x 18cm folded in half and attach with sticky tape.
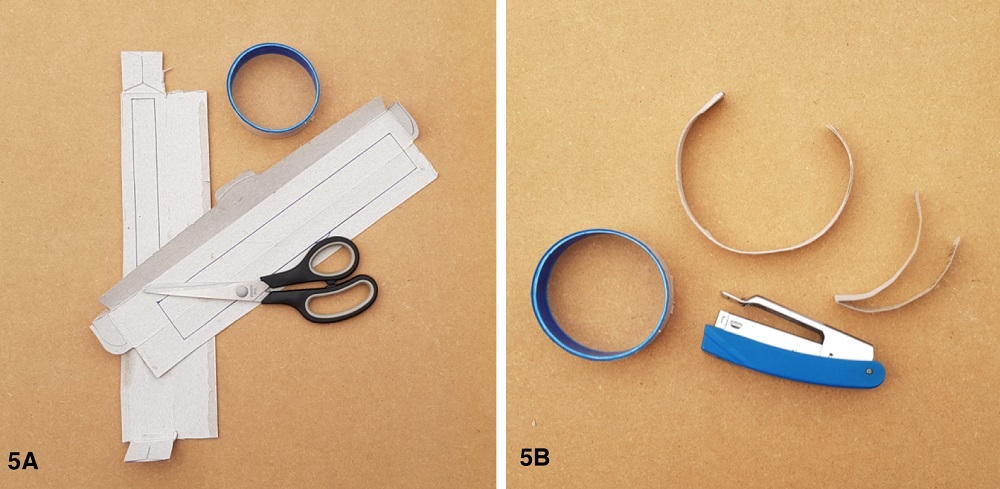
5. Alternatively, if you don’t have a sticky tape centre, cut a long strip of card measuring 4cms x 26cms and fold the strip in half length-ways (5a). Staple together in a ring and add a handle, as in step 4 (5b). Carefully shape your ‘spoon’ and handle by running your finger along the length to form soft curves.
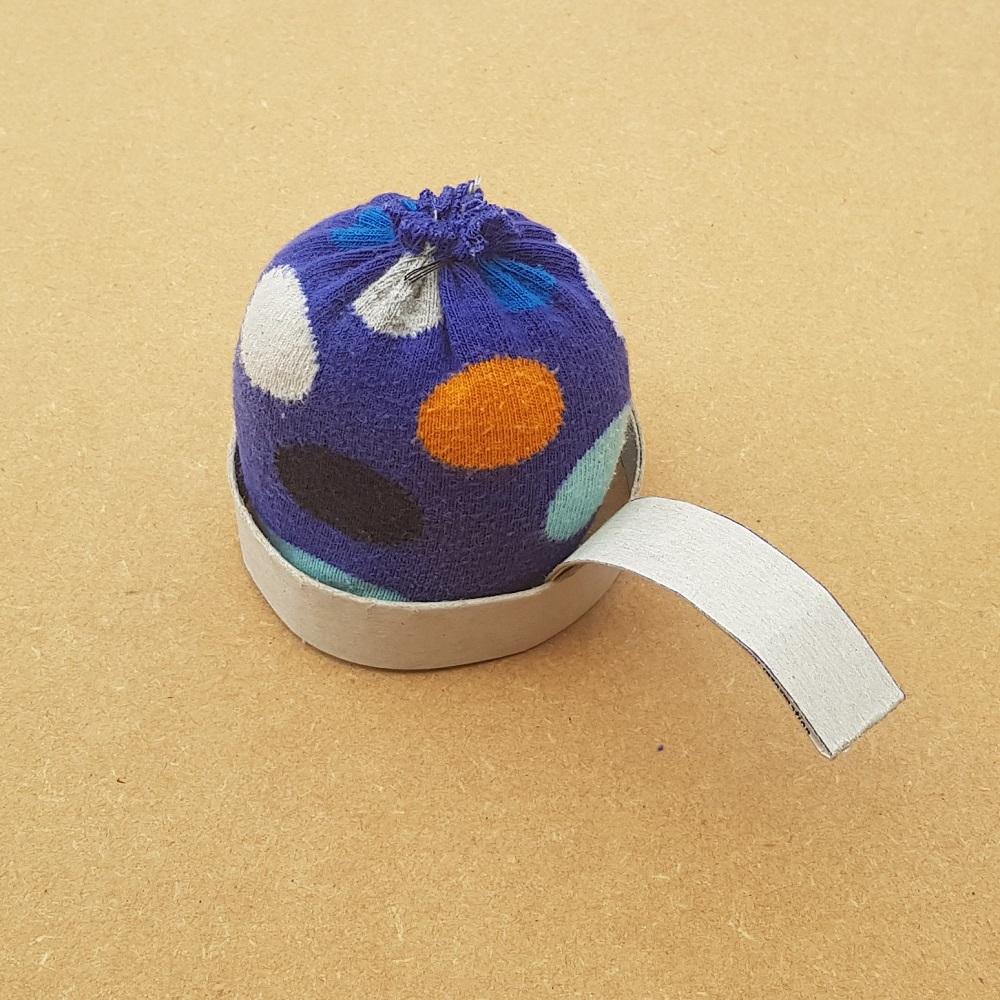
6. You are now ready to race; place the ‘spoon’ on your head and pop the ‘egg’ in the middle.
With your arms out for balance, walk as quickly as you can without dropping the ‘egg’. Good luck!
Personalising your egg
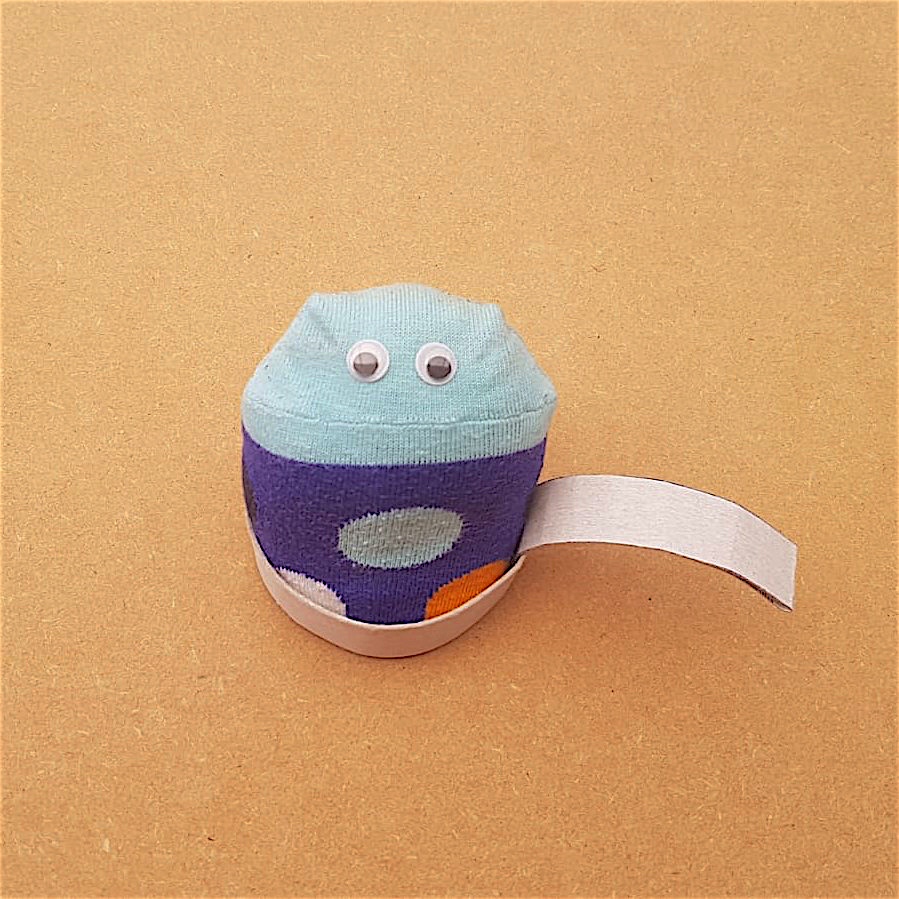
7. Why not personalise your ‘egg’ by turning it toe-end up and adding googly eyes – think up a suitable name like Rebegga, Eggbert or Reggie to make it more fun!
Catch Cup
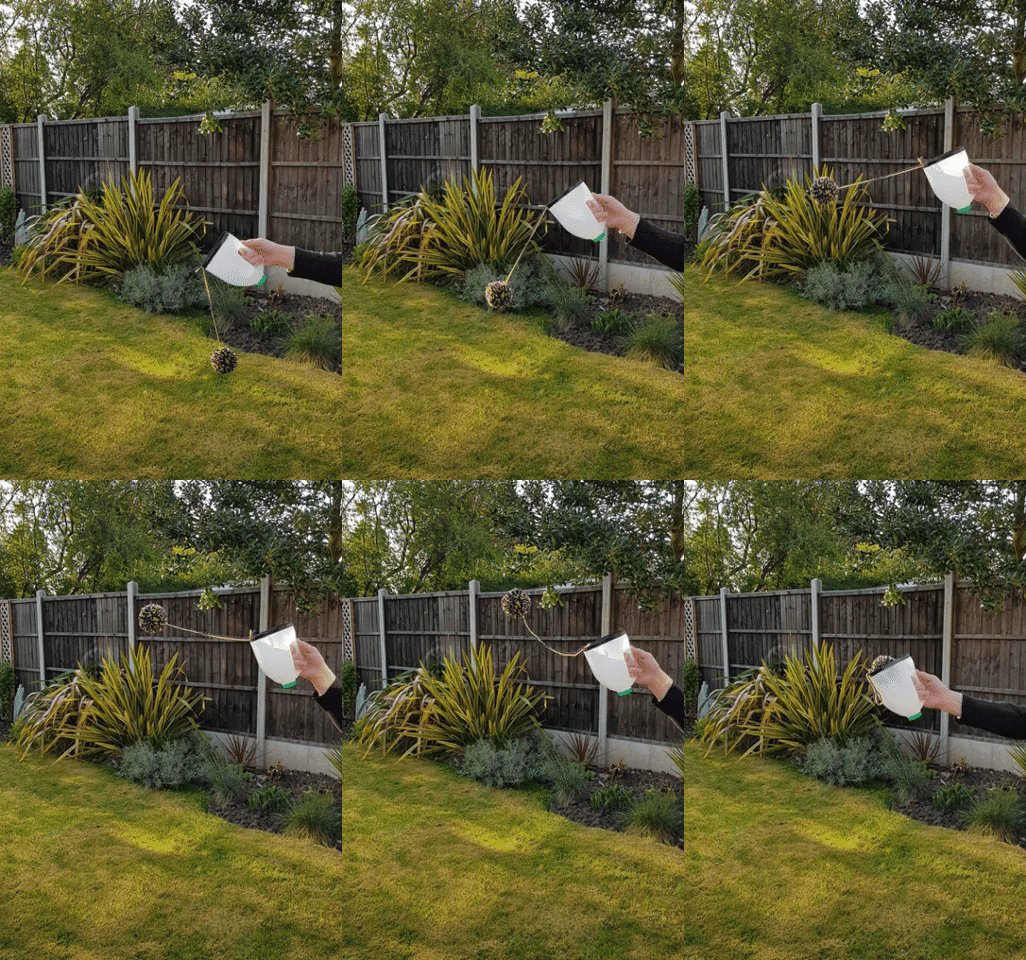
Catch cup develops skills such as hand-eye co-ordination. Swing the tethered pompom in the air and catch it in the cup – you can count the number of times the pompom is caught in a set time for each contestant
Skill level: Beginner
You will need:
- A 4-pint plastic milk carton
- Scissors
- Electrical tape or other sticky tape
- Hole punch
- Two contrast shades of yarn
- Scrap of card
- Medium size glass or tumbler
- Two pence coin
- Pencil
- Alternatively, use a pompom maker – available from most craft shops and websites
To make the catch cup

1. With the bottle in an upright position cut along the top ridge (if your bottle has one) approximately where the top of the milk bottle label was (1a). Dispose of the bottom half of the bottle (1b).
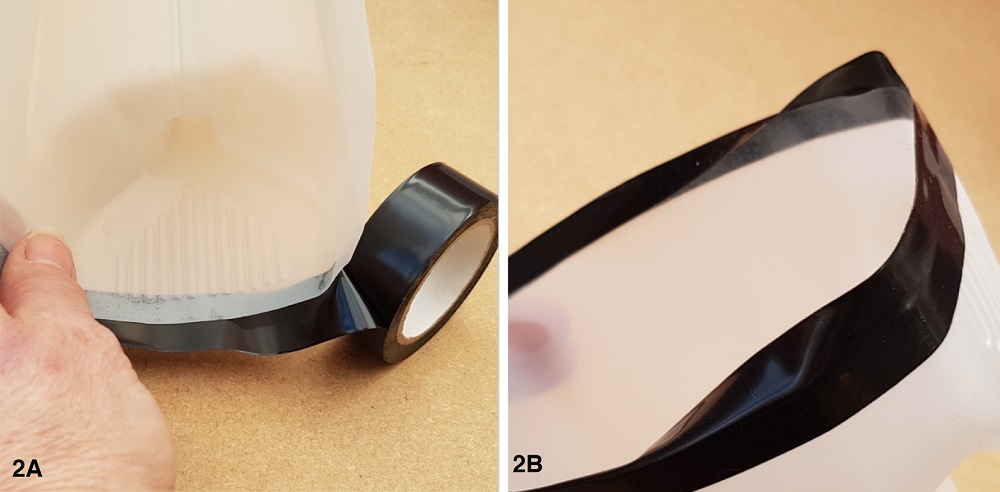
2. Using electrical tape or sticky tape, run a strip all around the cut edge (2a), make sure you leave half the tape proud to fold over the edge and cover any sharp edges (2b).
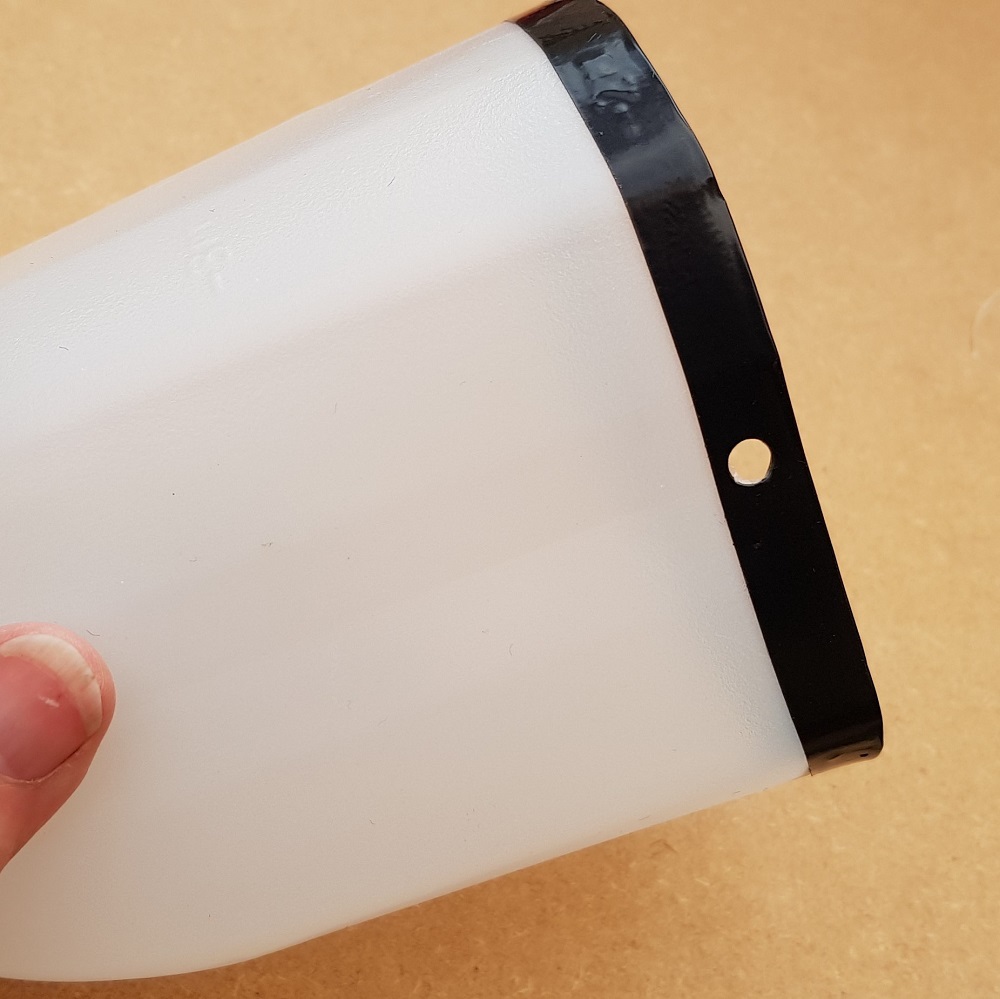
3. With the hole punch make a hole in the centre of the tape on the opposite side to the handle.
To make the pompom ball
Note: If using a commercial pompom maker, follow the manufacturer’s instructions to form your pompom and then move on to step 9. Otherwise continue as shown below from step 4.
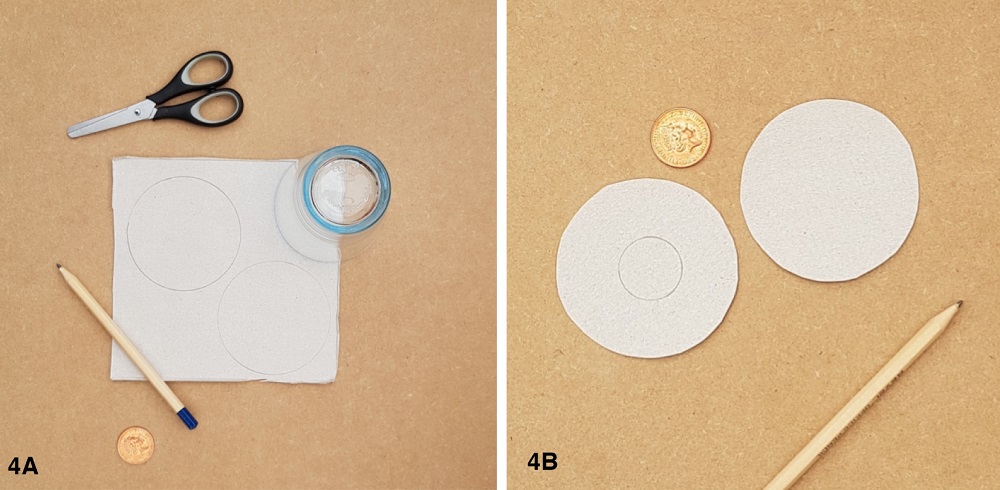
4. Using an upturned glass and a pencil, draw two circles on to the piece of card (4a). Cut out the circles and draw a smaller circle in the centre, using the two pence coin (4b).
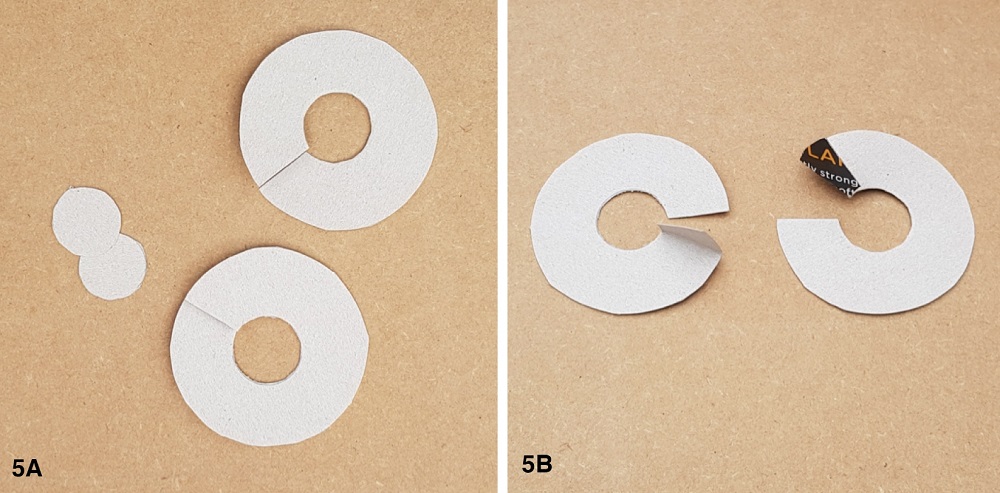
5. On both pieces of card, carefully cut through the to the centre circle, then cut out the central disk and discard (5a). Gently bend up one of the cut sides by approximately 1cm. this will stop the wool coming off the hoop (5b).
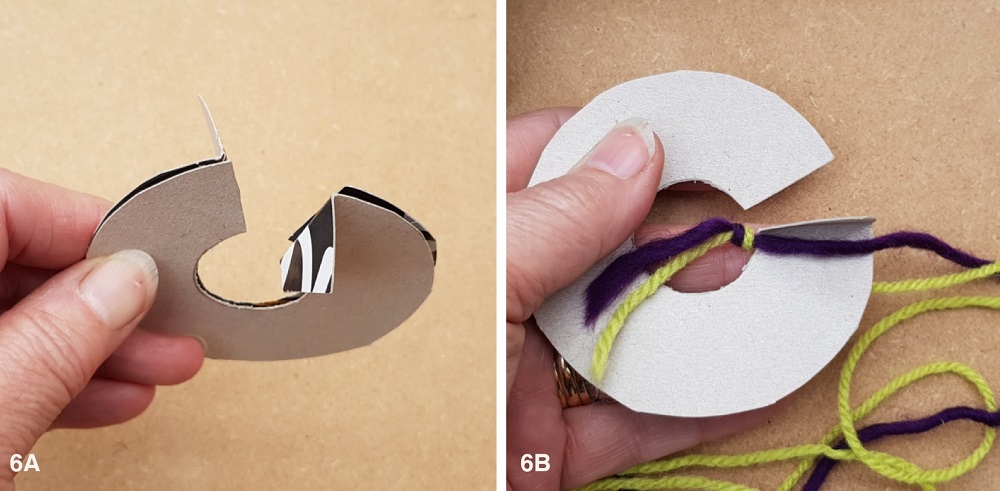
6. Place the two cardboard hoops back to back, as shown (6a). Tie the ends of the two contrasting yarns together and slip them over one side of the doubled cardboard hoop (6b).
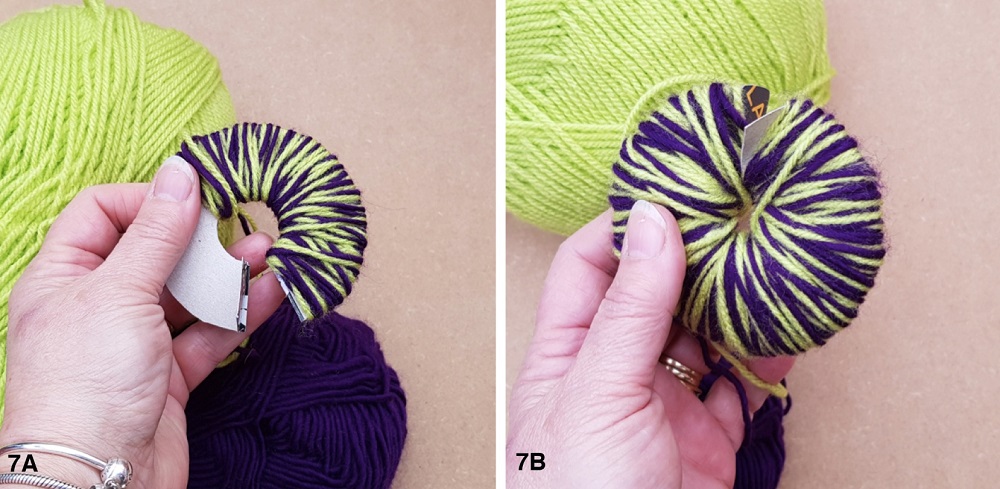
7. Wrap the yarns around and around the card hoops until they are all covered (7a) and you have only a small gap left in the middle (7b).
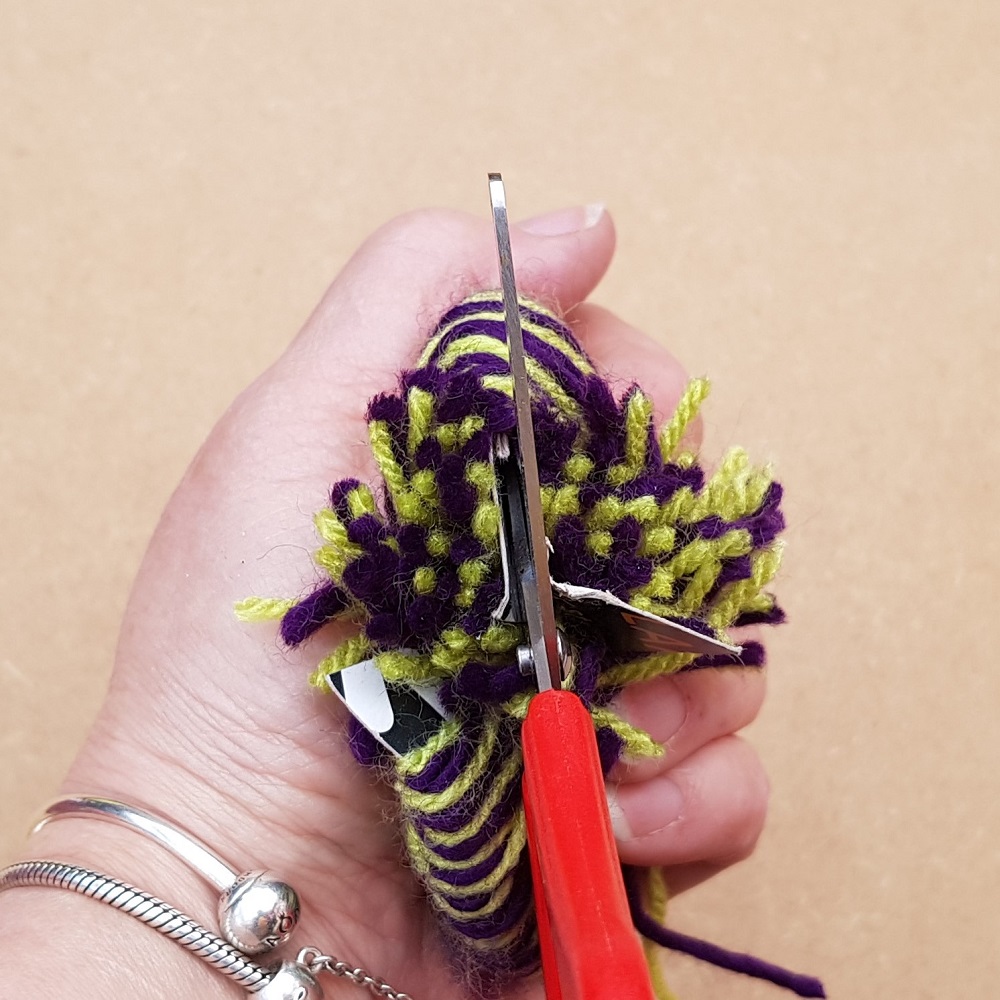
8. Hold the covered hoops firmly in one hand and with a pair of scissors carefully insert them between the two layers of card and snip the wool threads all around.
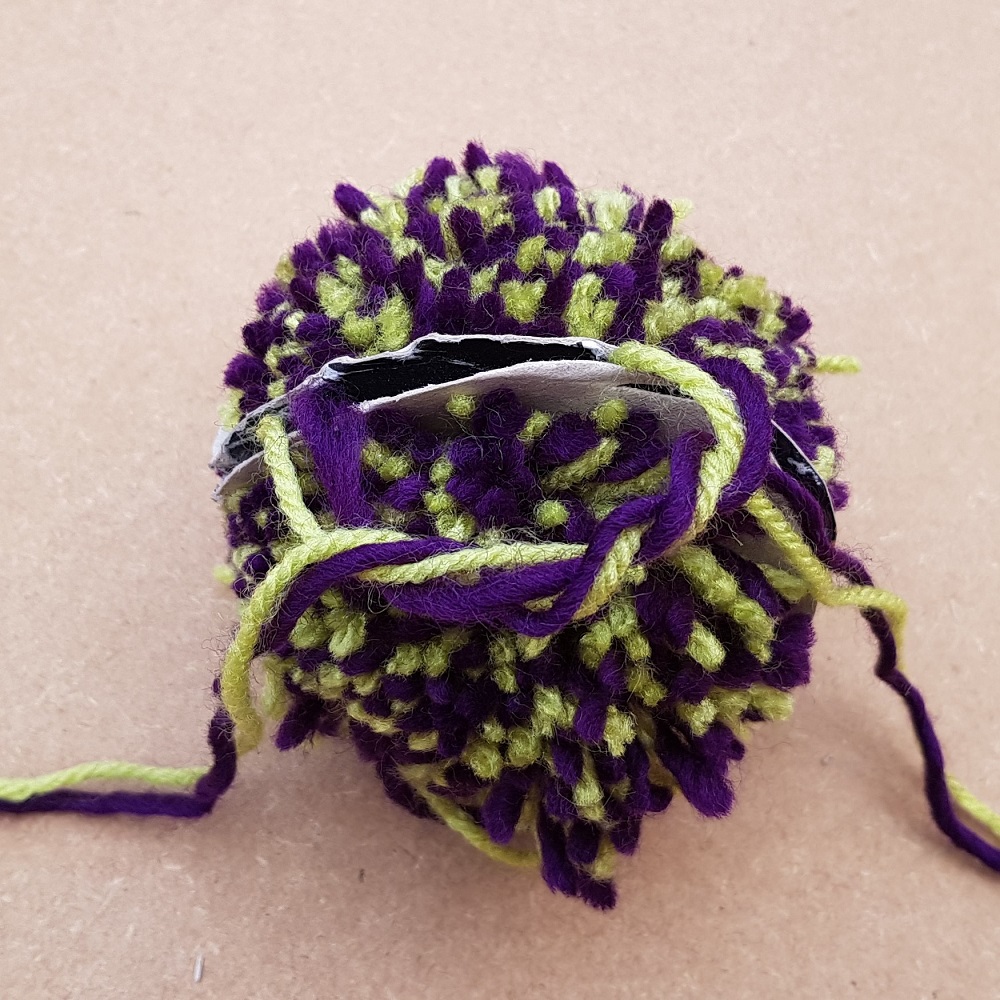
9. Cut two lengths of the yarn approximately 40cms long and pass them between the two card hoops. Cross the two working ends left over right and tuck the left end underneath the loop, as if you were starting to tie a bow. To stop the need for you to hold the yarn twist in place, pass the left working yarn under the loop again and pull tight; complete the knot.
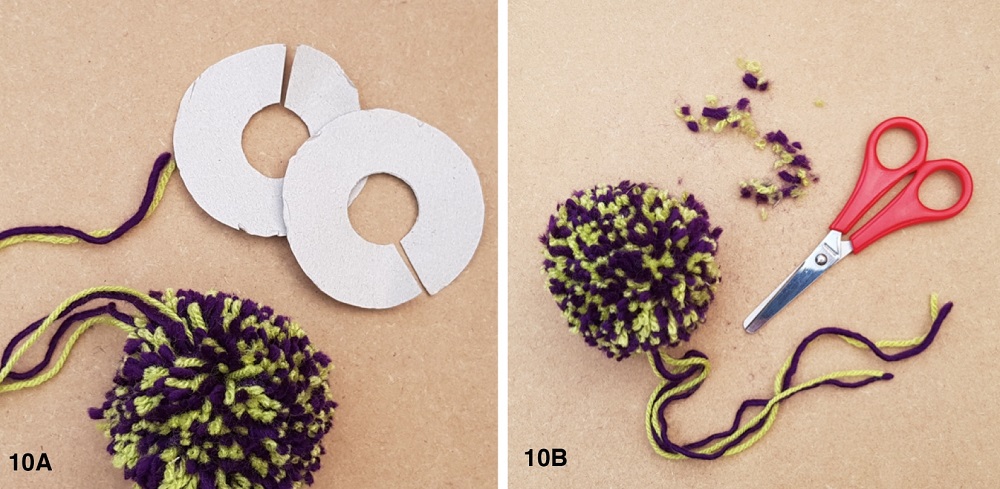
10. Carefully remove the two cardboard hoops (10a). Gently fluff up the pompom in your hands and use scissors to trim away any long ends (10b).
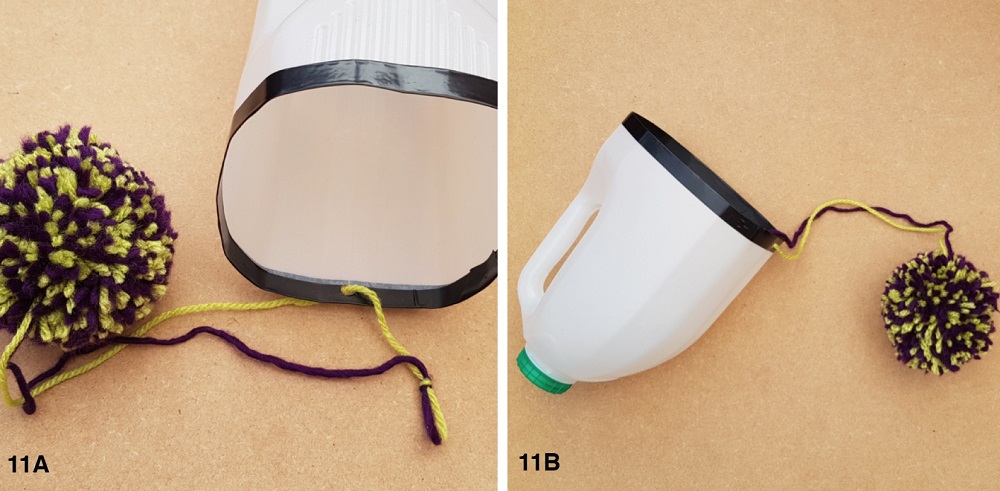
11. Separate the two ends of the long lengths of yarn still attached to the pompom and thread one end through the hole in the catch cup; knot the two ends together (11a). You are now ready to play (11b).

Flying Saucer ‘Discus’

Our version of discus throwing involves sending a flying saucer off to land on far away planets.
Skill level: Beginner
You will need:
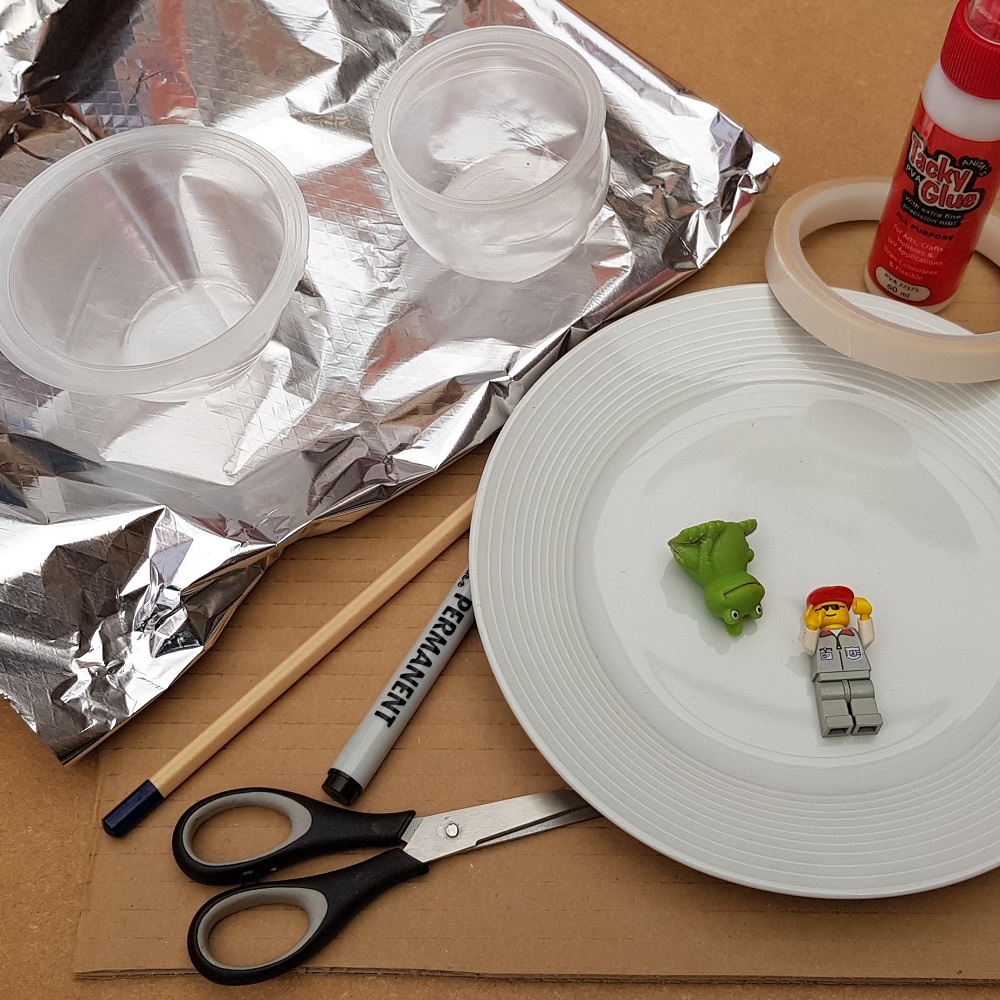
- Piece of thick card – corrugated card works best
- Small plate
- Aluminium baking foil
- Clear plastic yoghurt or jelly pot
- Scissors
- Pencil
- Permanent marker pen
- Strong glue or double-sided tape (if you have a glue gun this will build a stronger space ship)
- Plain or coloured paper
- Small figure or toy (optional)
To make the Flying saucer
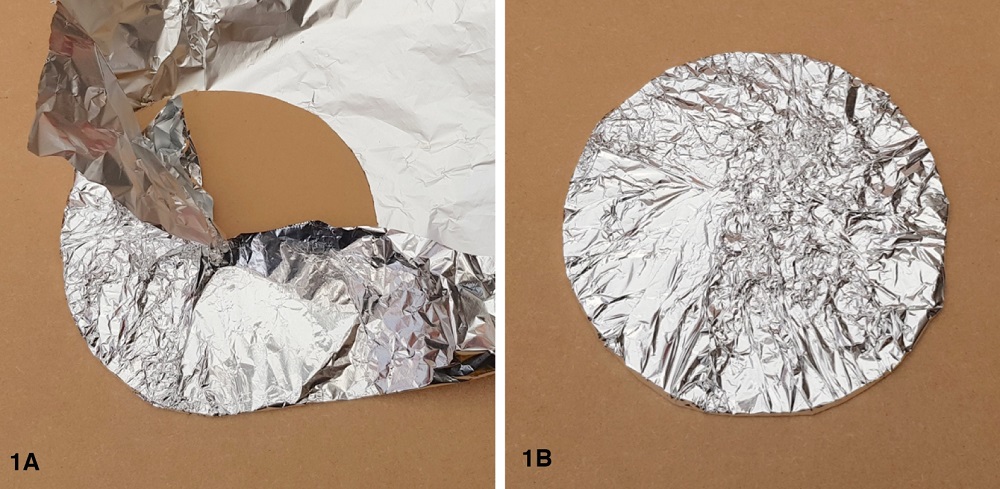
1. Draw around the small plate on to card and carefully cut out with scissors to make a circle. Cover one side of the circle with glue and place into the middle of a large piece of baking foil, big enough to completely cover both sides of the disc (1a). Fold over the foil and gently form to the disc shape with your hands. Stick the overlapping edges down with glue or tape (1b).
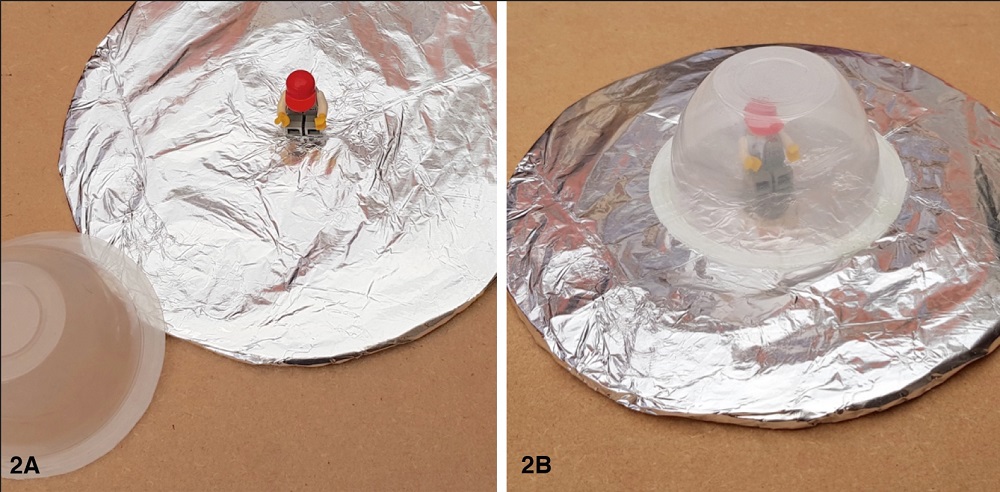
2. Turn the covered disc over so the smooth side is on the top and if desired, glue a small toy to ‘drive’ the flying saucer in the centre (2a). Allow glue to dry fully. Using strong glue or double-sided tape, fasten the clear yoghurt pot over the top of the toy in the centre of the disc (2b).
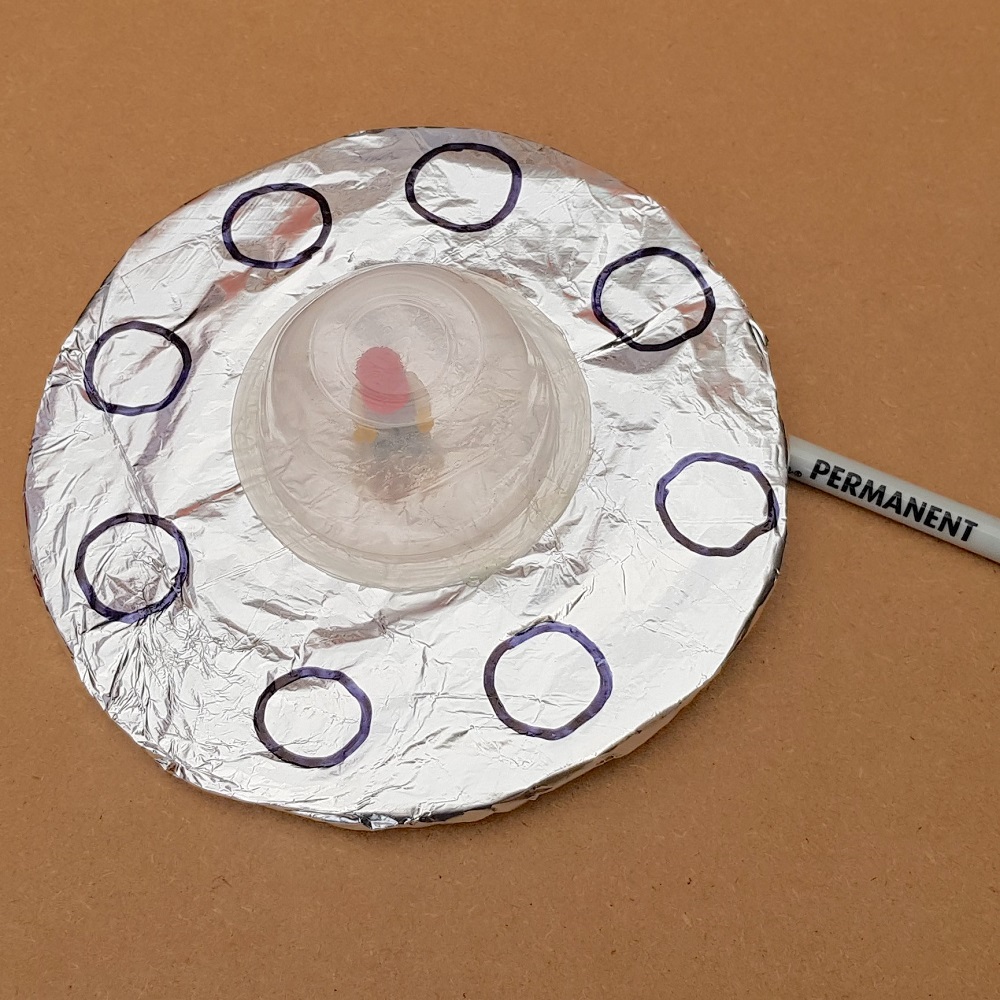
3. Draw on decorative details as desired with a permanent marker and your flying saucer is now ready to fly.
To make the planet targets
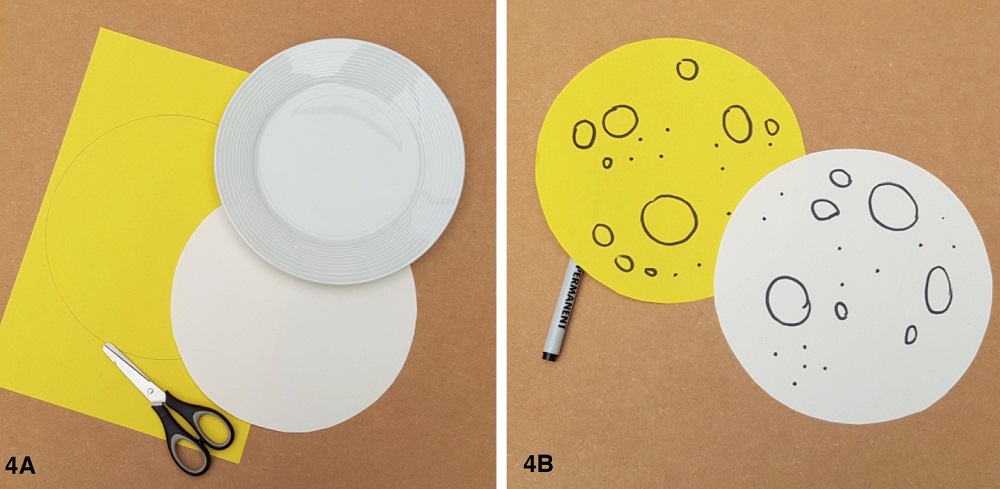
4. Using the plate, draw a circle on your chosen coloured papers – the number of planet targets is up to you. Cut out the circles and draw on moon crater details with a pen or add patterns as desired.

5 Place the targets well spaced-out at a distance and ‘fly’ the saucer to see which planet it lands on.
To ‘fly’ the flying saucer ‘discus’

6. Hold the flying saucer in hand and turn the wrist around so it is facing forward. Flick the wrist out quickly and let go of the flying saucer… this will take practice, but it’s fun!
Javelin Rockets

Children will have lots of fun with our Javelin Rockets game. Based on blow darts, it’s great fun to make and play, plus being made entirely from paper it’s a lot safer than throwing a Javelin!
You will need:

- Javelin Rocket Wings Template [download here – add link]
- A drinking straw
- Pieces of coloured paper
- Pencil
- Scissors
- Sticky tape
- Printer (optional)
To make
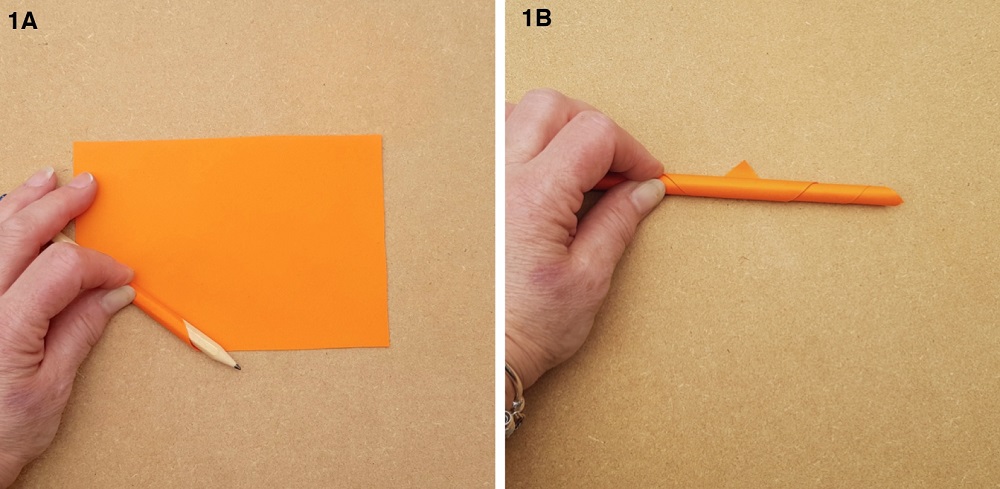
1. Cut a piece of coloured paper approximately 16cm x 11cm in for the main body of the rocket. Place a pencil at one corner of the paper, roll the edge of the paper around a pencil (1a) and then gently roll it up to form a tube (1b). Use a small piece of tape to fasten the end in place, before carefully removing the pencil.
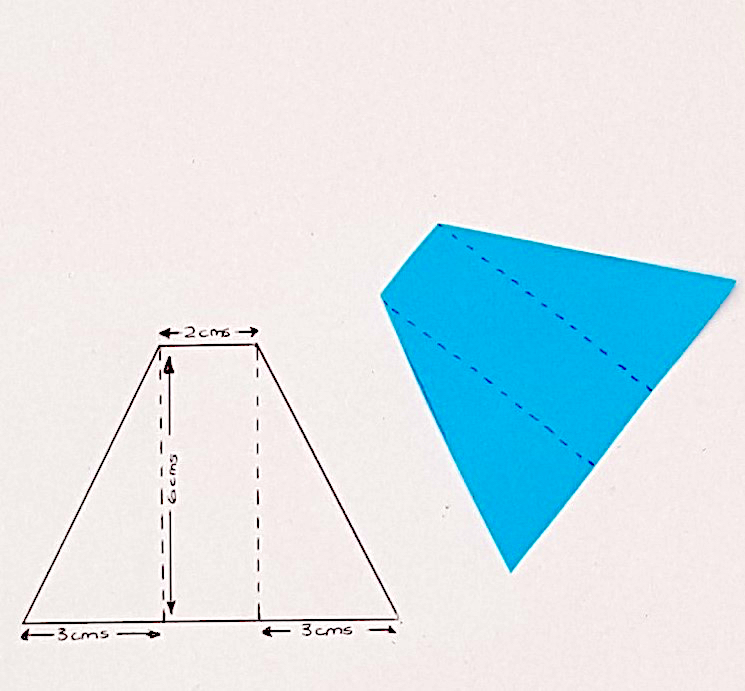
2. Download and print out the Javelin Rocket Wings template [Link to template] at 100% on to coloured paper. Cut out the shape and fold each side down along the broken lines. Open out flat again and use glue or double-sided sticky tape down the centre section between the broken lines. If you don’t have a printer, draw your own rocket wings onto a piece of coloured paper using the template as a guide.
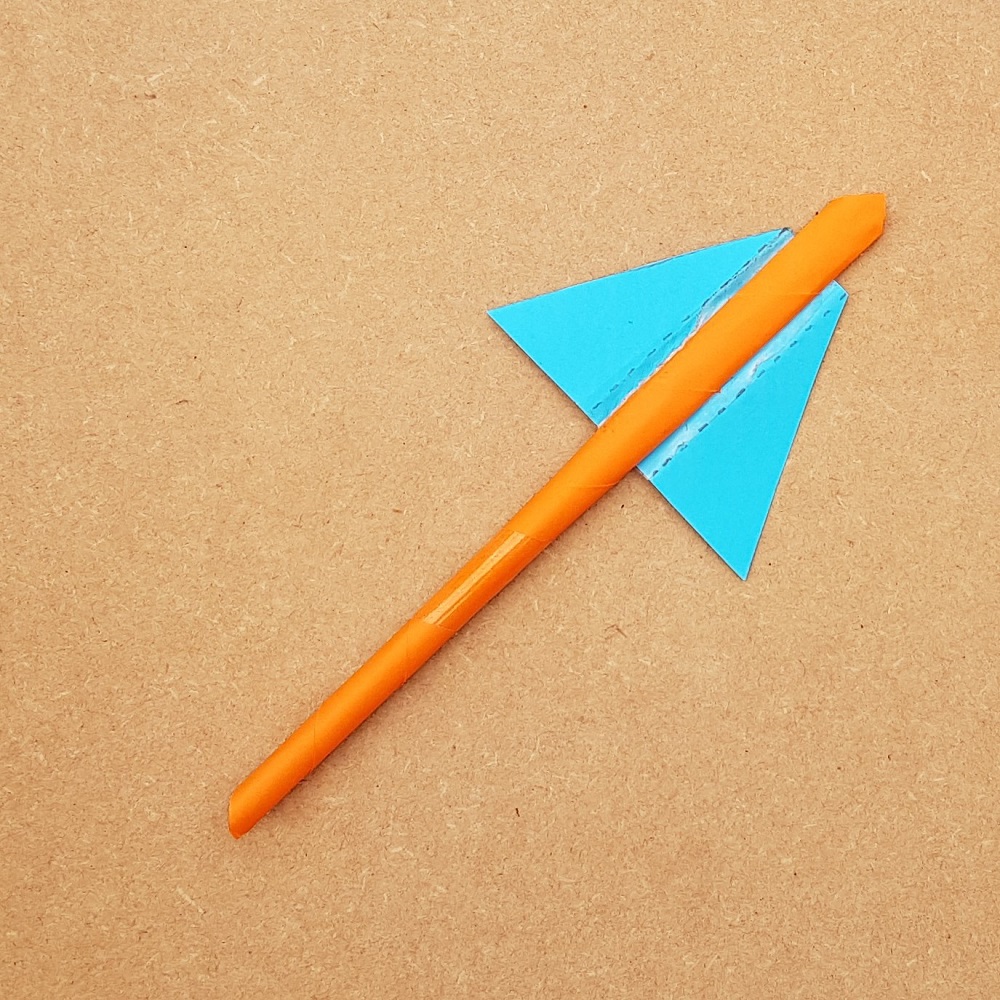
3. Gently press down to flatten the top section of the paper tube and lay it along the centre section of the glued/sticky part of the wings, leaving it protruding about 1cm at the top.
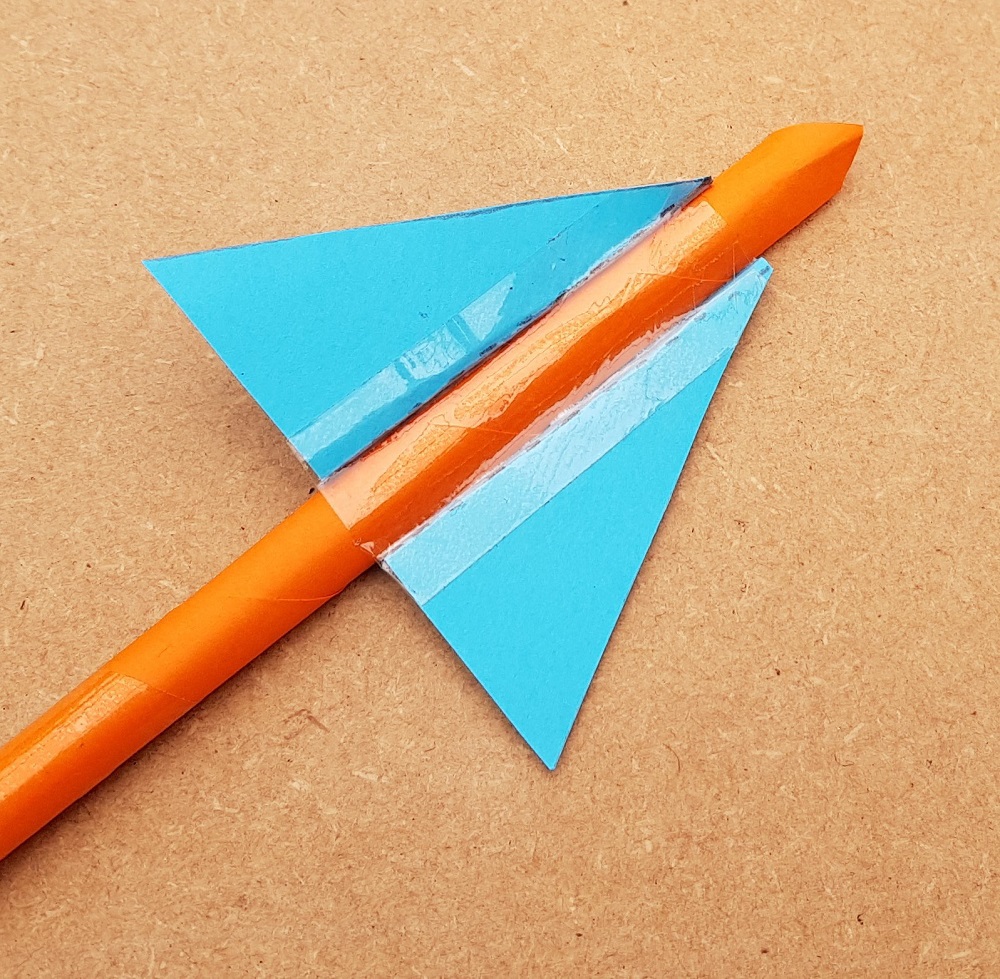
4. Reshape the tube by re-inserting the pencil and form the wings around the tube, stick a piece of sticky tape onto the top of the wings and tube where they meet. Allow glue to dry completely if using instead of tape.
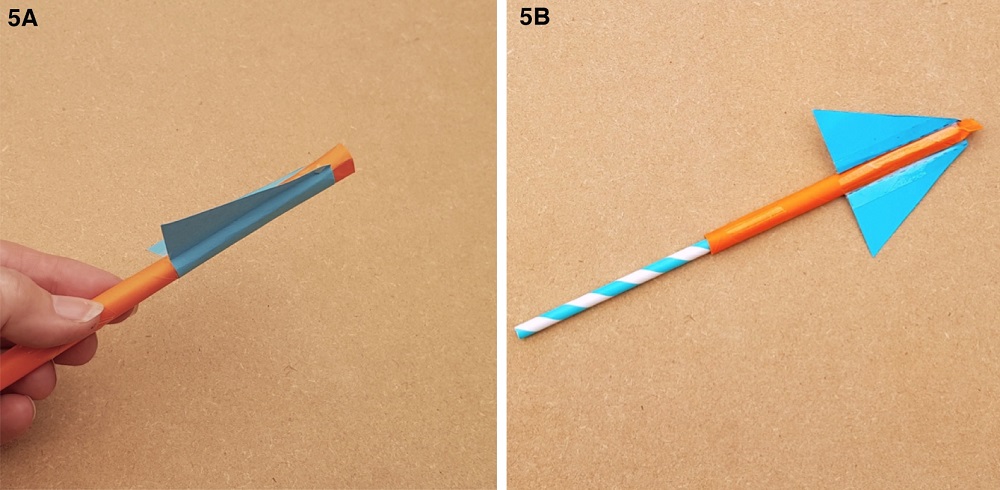
5. Before removing the pencil, cut the protruding end of the tube straight (5a) and pinch the end of the tube near the wings at a right angle to close the tube and stick the ends together with a small piece of sticky tape (5b).

6. To use your Javelin simply pop a straw into the open end of the rocket and blow.
The Winning Medals
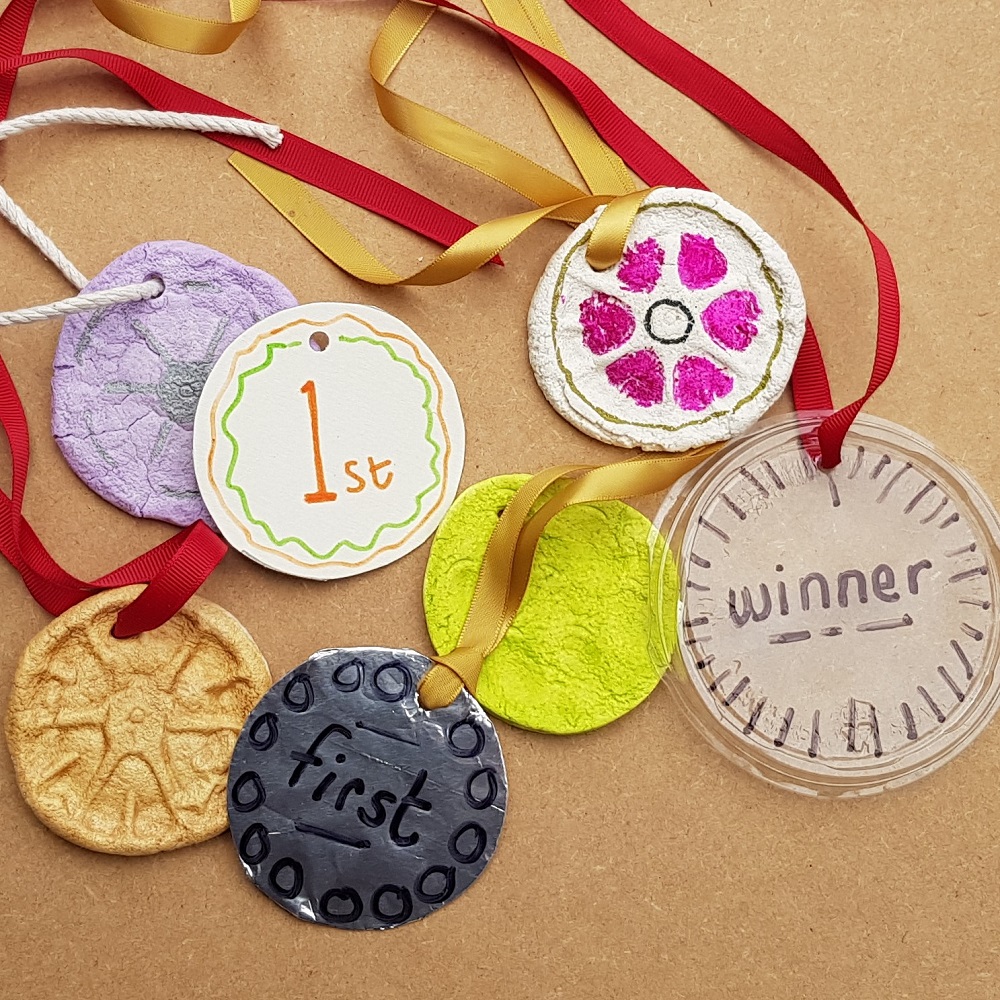
Complete your special ‘At Home’ sports day by rewarding your children’s efforts with their very own personalised medals – they’re fun and easy to do.
Medals have also historically been given as prizes in various types of competitive activities, especially athletics. At the first Olympic Games of the modern era in Athens in 1896, the winner was crowned with an olive wreath and received a silver medal. The gold, silver and bronze medals that we see today were first used at the 1904 Summer Olympic Games.
Making your own medals
Here are a few simple ideas for children to get creative and make their own medals.
Cardboard: You can simply use a piece of thick card to make a winning medal, by drawing around a glass or beaker for a circle shape and cut out. Add a pattern or picture, paint or colour in and use a hole-punch to make a hole to thread on your ribbon pass over your head.
Foil or plastic lids: Cut a card disk and cover with a piece of aluminium foil for a shiny medal or use the clear plastic lids off a large yoghurt or cream pot.
Salt dough: For a more fun way of making your medals mix up a batch of salt dough, see below for the instructions.
To make salt dough medals
You will need:
- Plain flour
- Salt
- Water
- Large mixing bowl
- Spoon
- Measuring cup
- Drinking straw
- Small water bottle for decoration (optional)
- Rolling pin/cutter (optional)
- Non-stick pastry mat (optional)
- Food colouring or paint (optional)
- Ribbon, string, yarn or cord for stringing
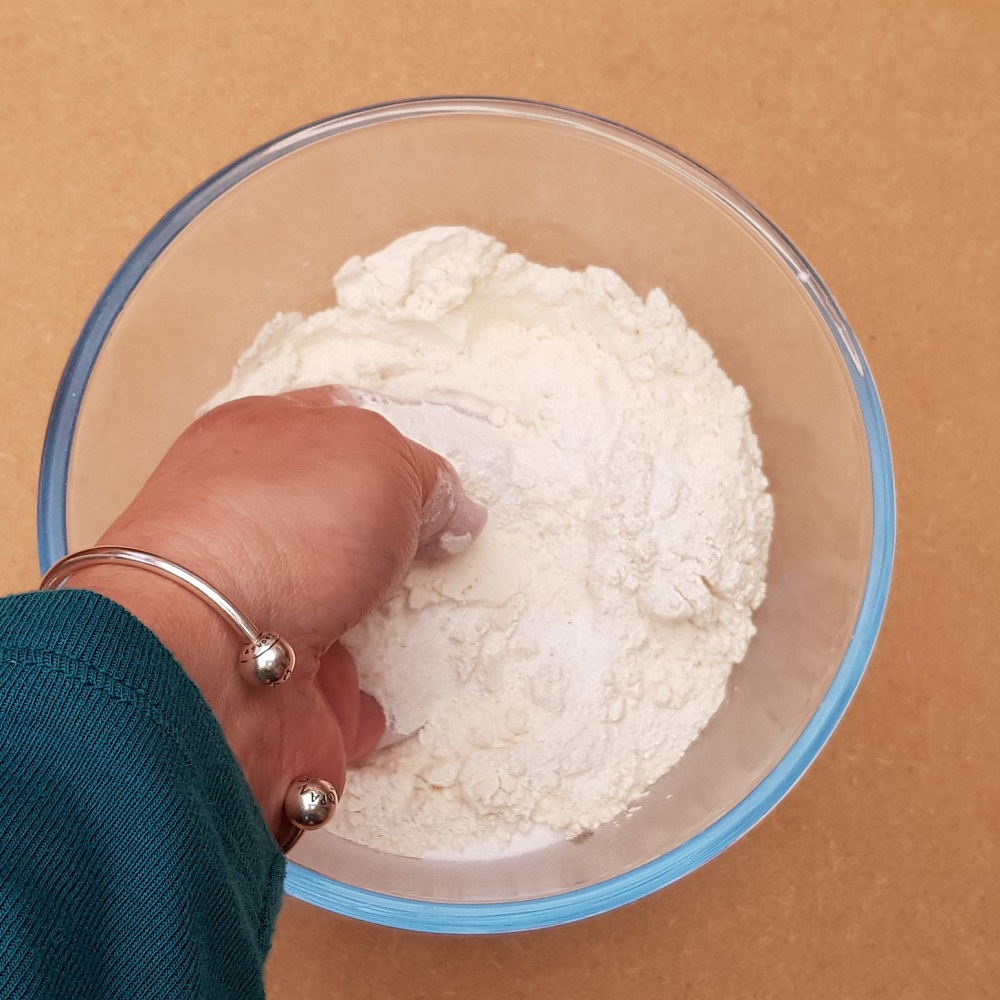
1. Measure out the flour and salt – if you do not have measuring cups use an ordinary cup or measuring jug – as long as you use the same cup/measurement for each amount.
In a basin or large bowl, measure out one cup of flour and half a cup of salt.
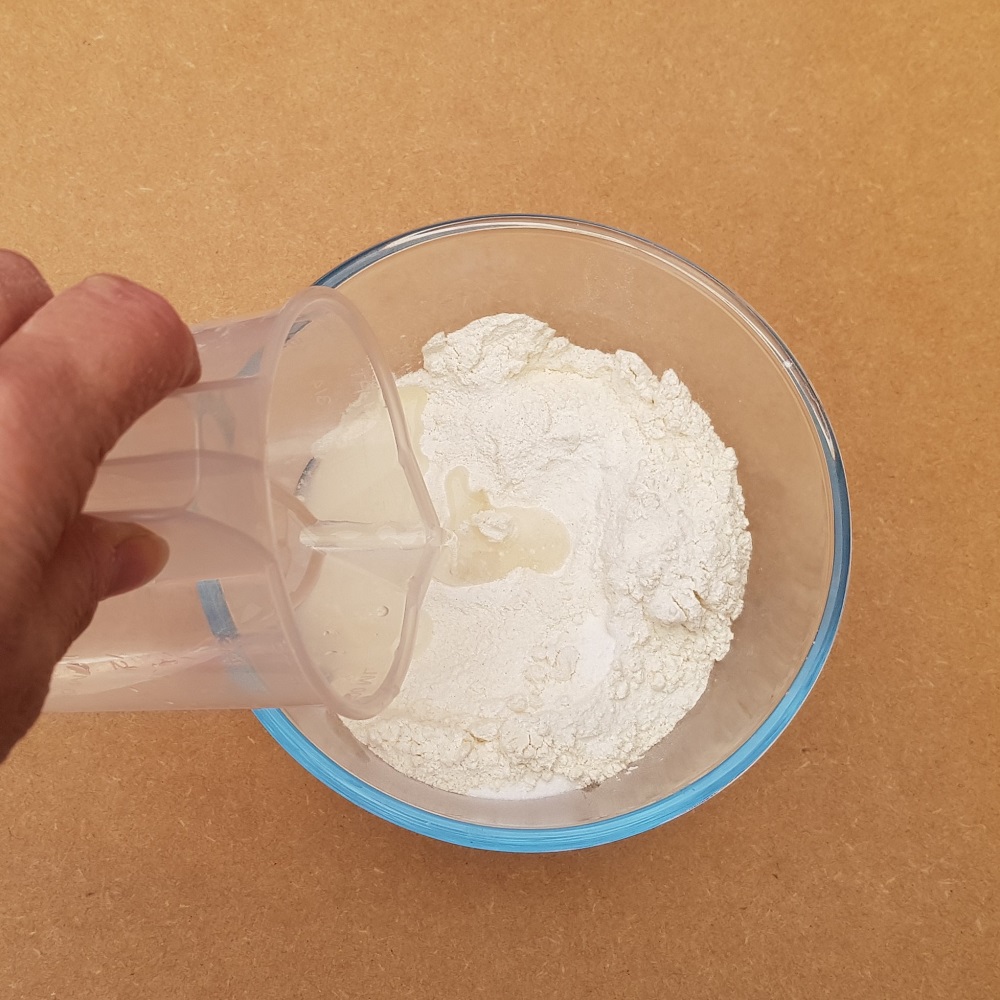
2. Mix the two ingredients together and gradually add about a quarter of a cup of cold water, stirring constantly.
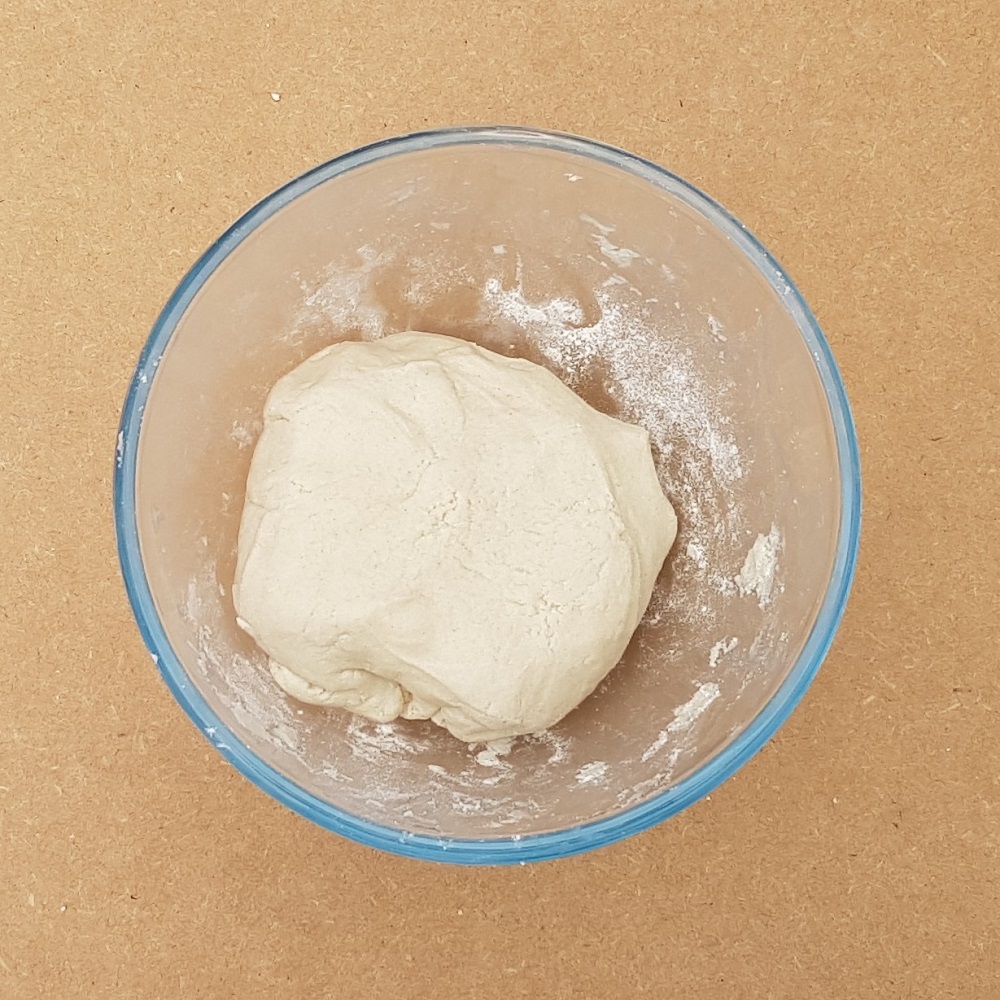
3. Knead the dough until it is smooth. The resulting dough should be workable and firm, add a little more water if it’s too dry or flour if too sticky.
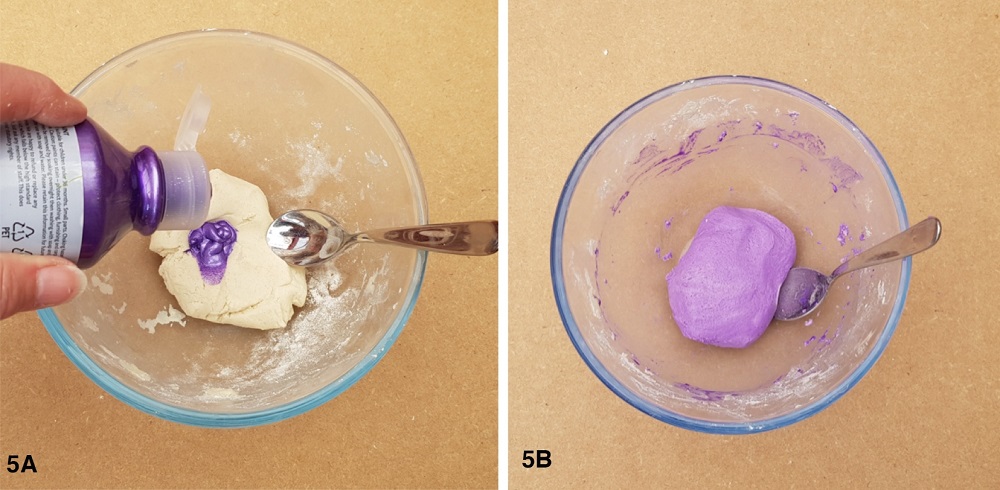
4. If desired, you can add colour to the dough before rolling it into balls, continue kneading the dough until it is uniformly coloured.
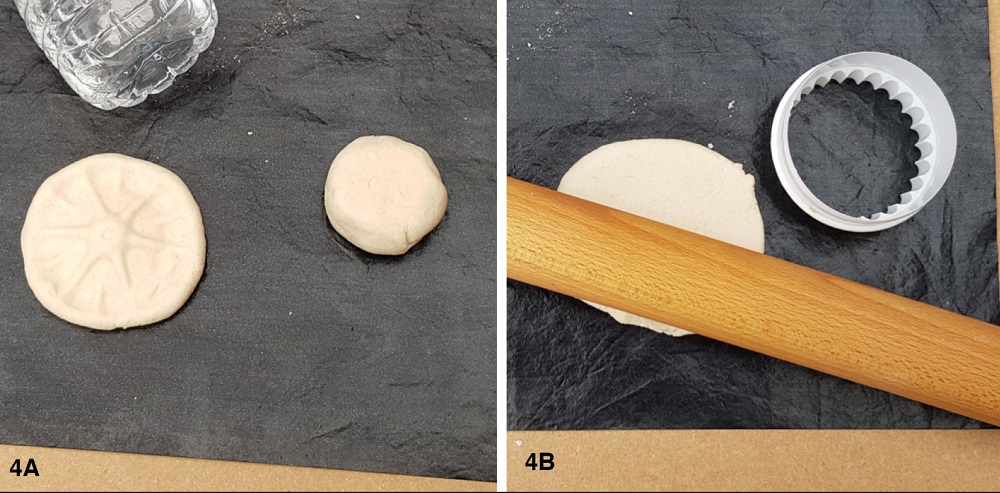
5. Using a non-stick pastry mat or a work surface, lightly dusted with flour, pinch off small amounts of dough approximately the size of a golf ball, and roll in hands until it forms a smooth ball. Using a small water bottle press the base down on top of the dough ball to flatten and create a pretty pattern (5a). Alternatively, roll the dough ball out flat and use a pastry cutter to cut out a circle (5b).
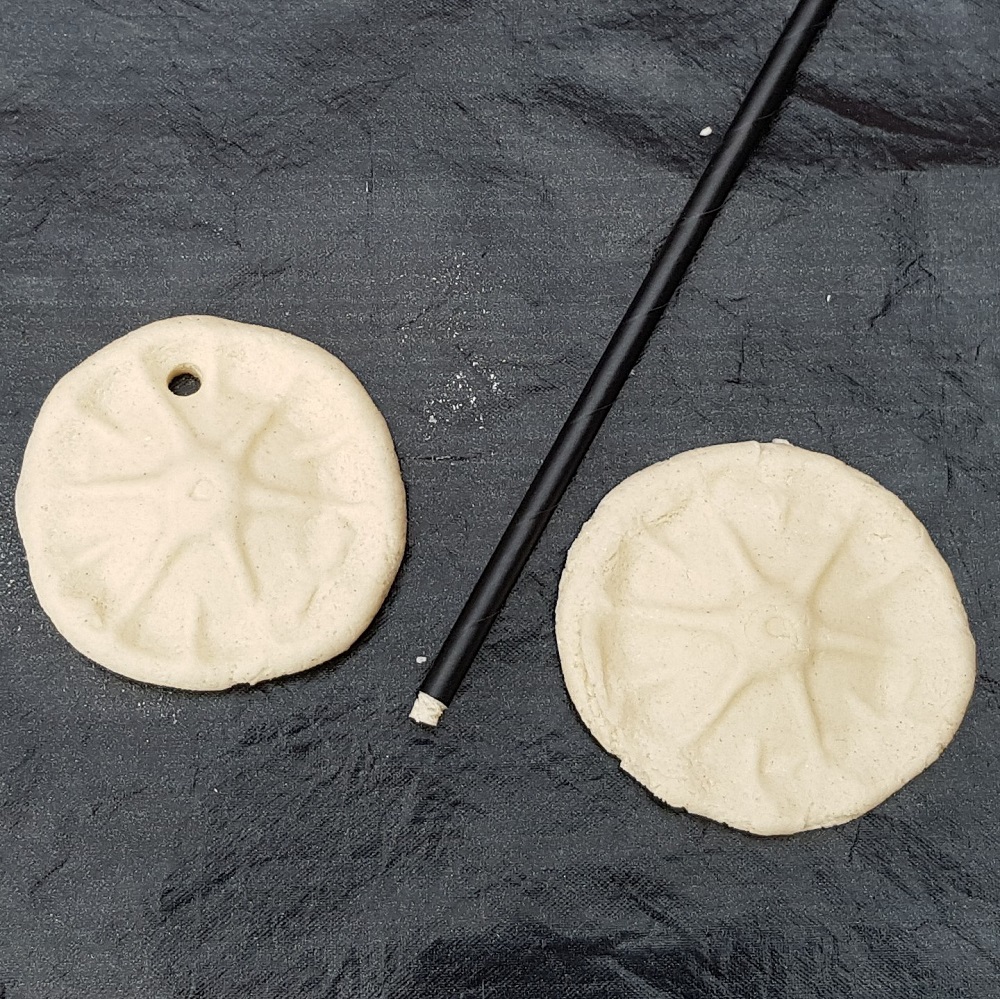
6. Use a drinking straw to push into the top of your ‘medal’ to make a hole for the ribbon. Do not make the hole too close to the edge or your finished medal could break easily when you wear it.
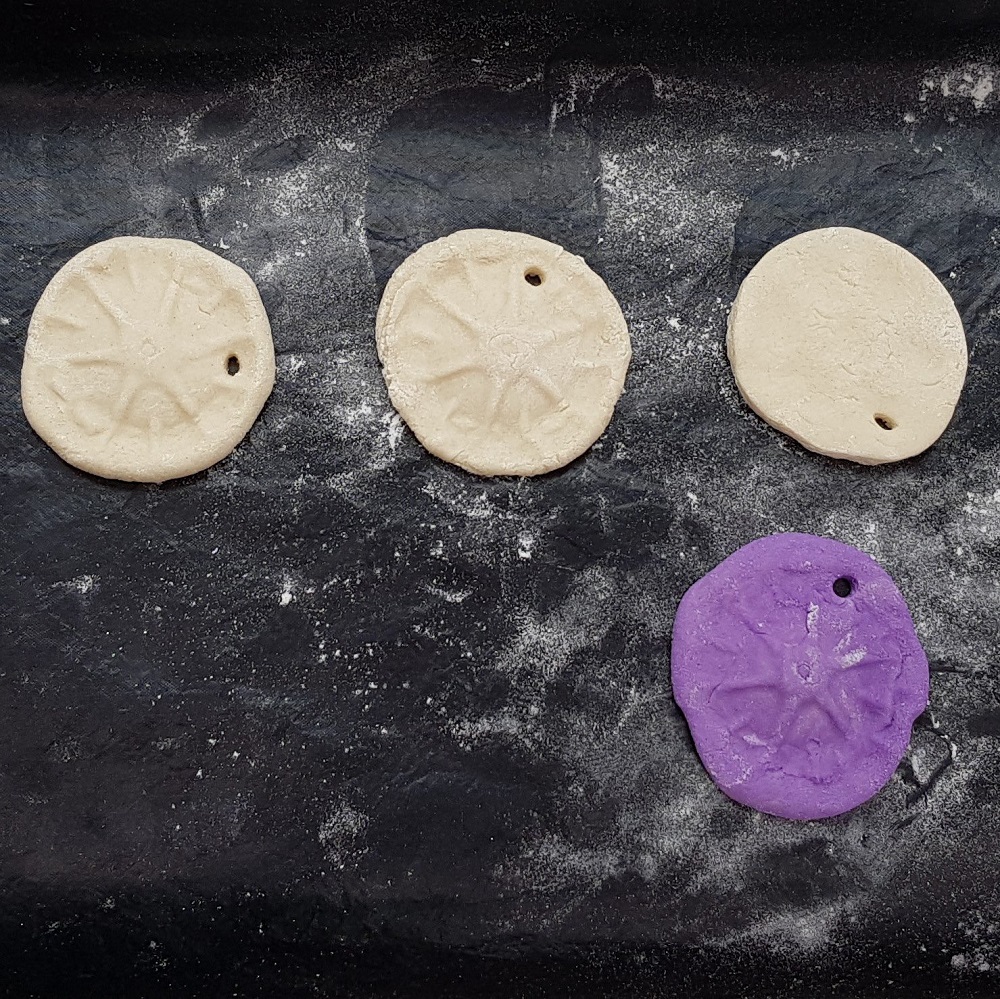
7. Leave the ‘medals’ out to dry at room temperature on a tray or plate, until completely dry, turning them frequently for faster drying. The salt dough will become lighter as it dries and may form small cracks as it hardens, but this is normal. Any un-dried areas will remain darker and soft to the touch.
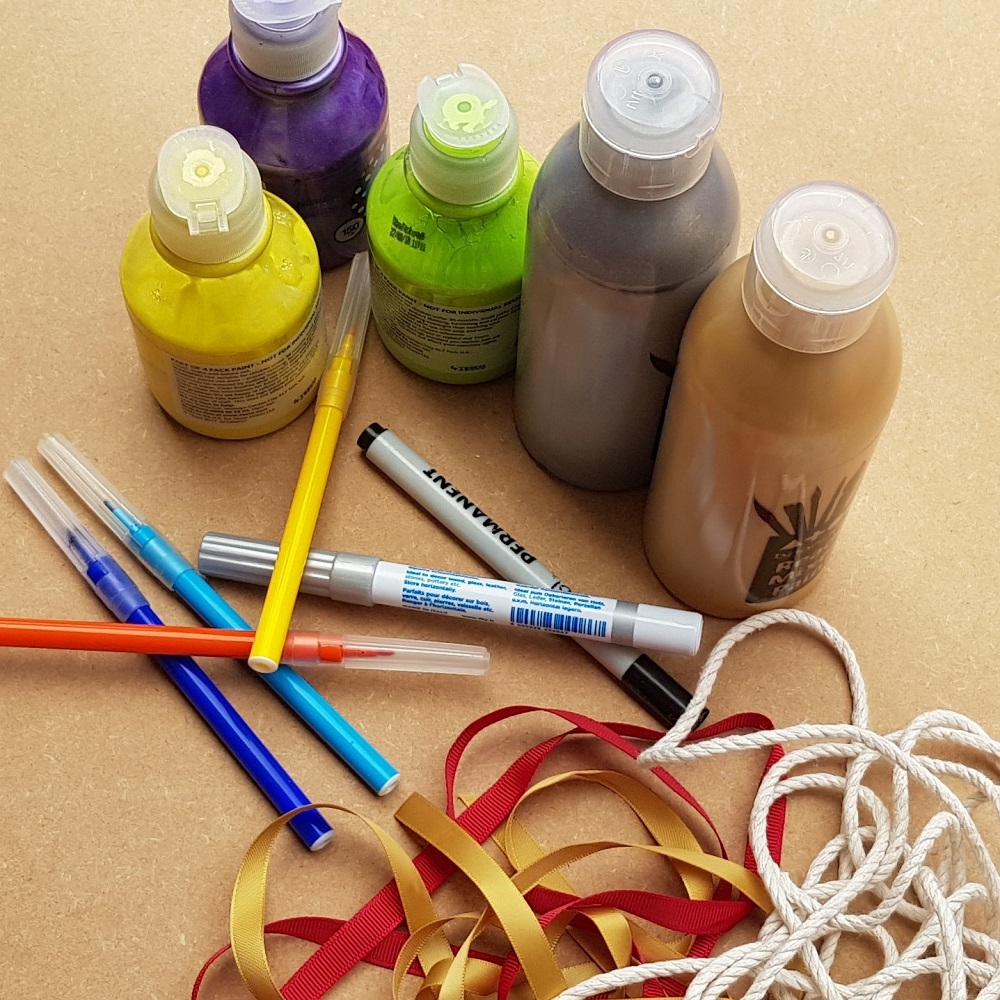
8. Finally, either paint your dried ‘medals’ or use felt pens to decorate. Then, thread a long piece of ribbon, string, yarn or cord through the hole, making sure it is plenty long enough to tie together and pass over your head when you win.
PARENTAL GUIDANCE
Any cord worn around a child’s neck must be worn with caution. If preferred, please add Lanyard Quick Release safety clasps to the ends of your ribbon lengths, instead of knotting the ends together. These are available to purchase on-line.
Design: Ruth Ryan, Director of Stanhope House Day Nursery, Leicester.

